background image

8.  The status bar (bottom part of the window) indicates the connection status of the HomePlug device. Click the 

Encryption

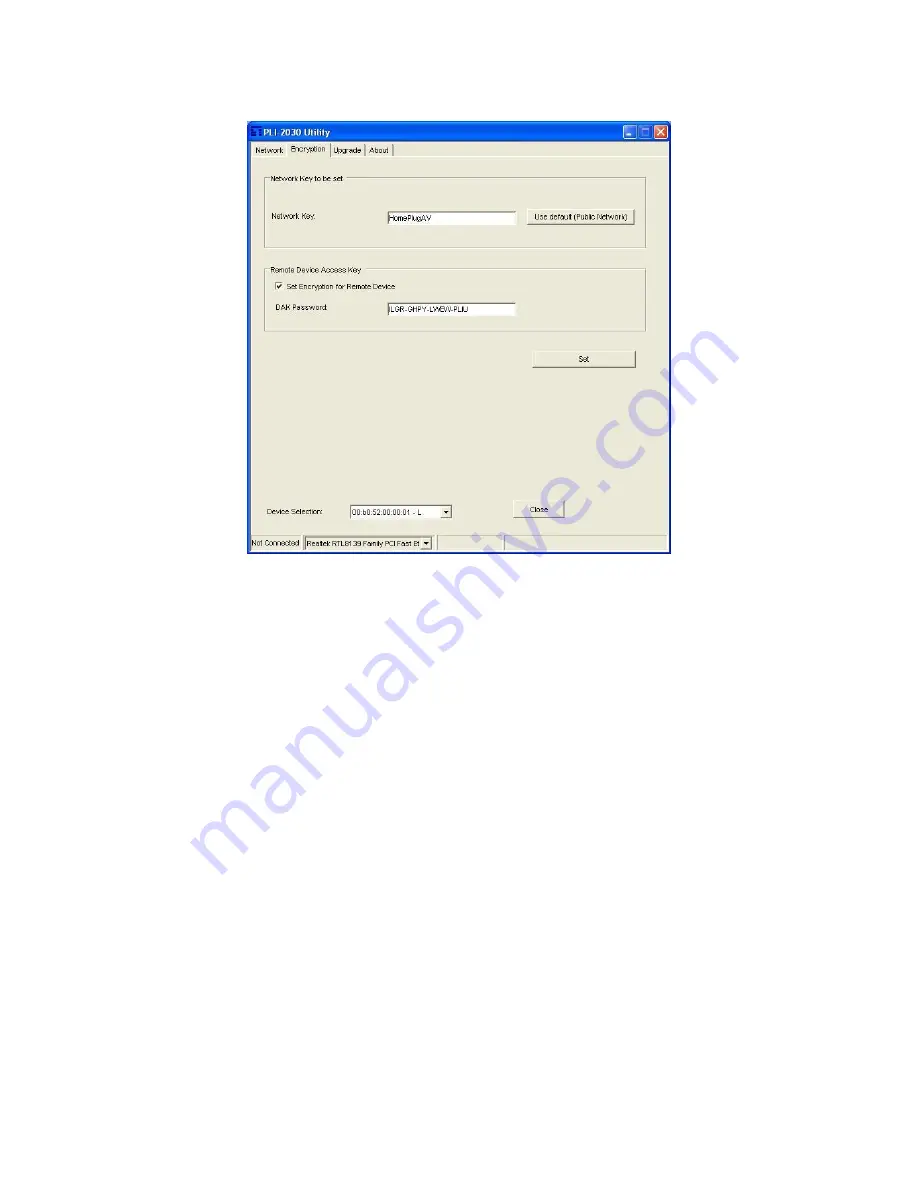
 tab. You will see a screen like the example below. 


Figure 4: PLI-2030 Utility - Encryption Tab 


9.  Enter both the Remote Device password in the 

DAK Password

 field and the desired 

Network Key

 in the field 

provided. Click 

Set

” 

to save this value to the remote HomePlug device. 

If the 

DAK Password

 is left blank, the 

Network Key

 will be saved to the local HomePlug device only.  

  All HomePlug devices must use the same 

Network Key

, or they will not be able to communicate with each 

other. 

  On this screen, you can also click 

Use default

 to use the 200Mbps HomePlug AV Ethernet Bridge's default 

Network Key

10. Click 

Close

 to exit the 

PLI-2030 

utility. 

Setup is now complete. 

If your PC is not the device you wish to use with the 200Mbps HomePlug AV Ethernet Bridge, connect the Ether-

net cable from the 200Mbps HomePlug AV Ethernet Bridge to the desired device. 

The 200Mbps HomePlug AV Ethernet Bridge Central Management is now ready for use. 


Summary of Contents for PLI-2030

Page 1: ...LevelOne User Manual Ver 2 0 0 PLI 2030 200Mbps HomePlug AV...

Page 2: ...e following two conditions 1 This device may not cause harmful interference 2 This device must accept any interference received including interference that may cause undesired operation CE This equipm...

Page 3: ...Table of Contents 1 HOMEPLUG POWERLINE 4 1 1 INTRODUCTION 4 1 2 PHYSICAL DETAILS 4 1 3 SETUP 6 2 SECURITY BUTTON 10 3 OPERATION 11 4 SPECIFICATION 12...

Page 4: ...ction 200Mbps HomePlug AV Ethernet Bridge allows you to connect any device which has an Ethernet port to a Power line network In operation the 200Mbps HomePlug AV Ethernet Bridge is completely transpa...

Page 5: ...rnet On Ethernet connection is active Off No Ethernet connection Flashing Data is being transmitted or received via the Ethernet Port Security This button is designed to generate an individual network...

Page 6: ...a few seconds for startup to be completed and then check the LEDs The Power LED should be ON The HomePlug LED will be ON The Ethernet LED should be ON Client device installation Connect a standard LAN...

Page 7: ...HomePlug AV Ethernet Bridge into a power outlet 3 Wait a few seconds for startup to be completed and then check the LEDs The Power LED should be ON The HomePlug LED will be ON The Ethernet LED should...

Page 8: ...rogram The first screen Network Tab will display in formation of the compatible devices found Choose the desired device from the Device Selection and the information of the selected device will be dis...

Page 9: ...the Network Key will be saved to the local HomePlug device only All HomePlug devices must use the same Network Key or they will not be able to communicate with each other On this screen you can also...

Page 10: ...oots 3 Press and hold the security button on the adapter a for 2 seconds then release 4 The Power LED on adapter a starts to flash 5 Press and hold the security button on the adapter b for 2 seconds t...

Page 11: ...wing Each HomePlug device must use the same Network Key You may use the Encryption tab of the PLI 2030 utility to assign a Network Key to other HomePlug devices 200Mbps HomePlug AV Ethernet Bridge wor...

Page 12: ...t Standards Ethernet specification IEEE802 3 IEEE802 3u IEEE802 3x Power 100 240VAC 50 60 Hz Power Consumption 100mA max Operating Temperature 0 C to 40 C Storage Temperature 25 C to 70 C Operating Hu...

Reviews: