-
30
-
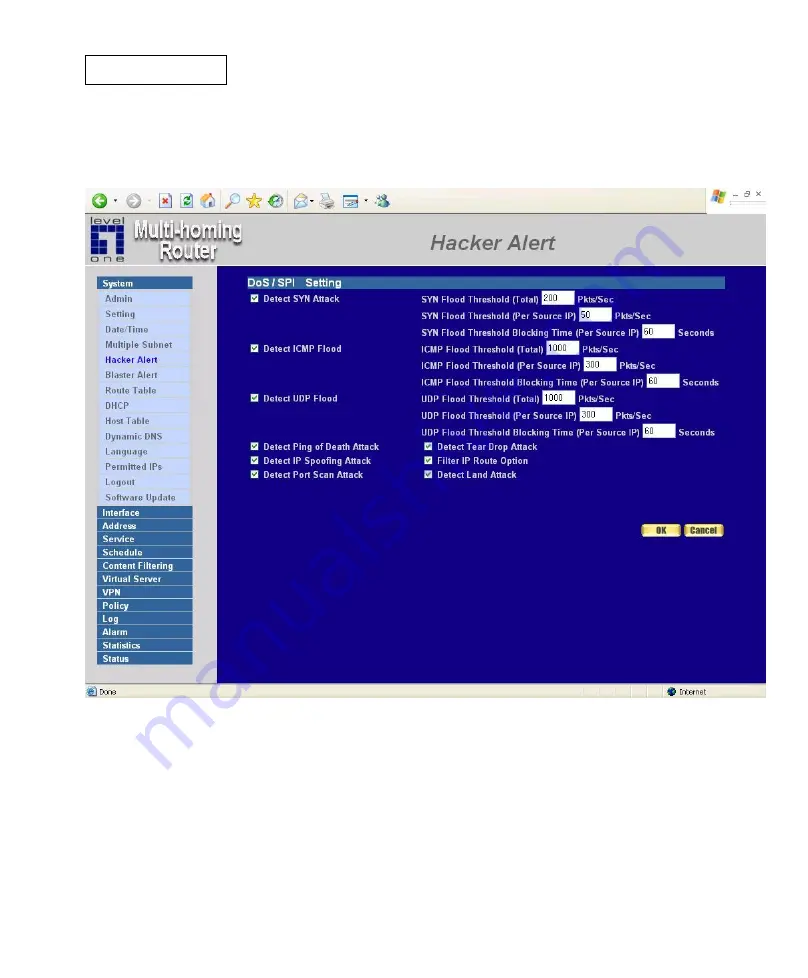
Hacker Alert
The Administrator can enable the device
‟s auto detect functions in this section. When
abnormal conditions occur, the Multi-Homing Gateway will send an e-mail alert to notify the
Administrator, and also display warning messages in the
Event
window of
Alarm.
Auto Detect functions
Detect SYN Attack:
Select this option to detect TCP SYN attacks that
hackers send to server computers continuously to block or cut down all the
connections of the servers. These attacks will prevent valid users from
connecting to the servers.
【
SYN Flood Threshold( Total) Pkts/Sec
】
: T
he System Administrator can
enter the maximum number of SYN packets per second that is allow to enter
Summary of Contents for FBR-2000
Page 1: ...LevelOne FBR 2000 2 WAN Load Balance Broadband Router User Manual V1 3...
Page 25: ...18...
Page 34: ...27 Step 4 Adding a new Incoming Policy In the incoming window click the New Entry button...
Page 48: ...41...
Page 50: ...43...
Page 68: ...61...
Page 70: ...63...
Page 72: ...65...
Page 98: ...91...
Page 133: ...126...
Page 145: ...138...
Page 147: ...140...
Page 154: ...147...
Page 158: ...151 Step 2 In the Execute window enter the command MMC in Open...
Page 161: ...154 Step 5 Choose Local Machine L for finishing the setting of Add...
Page 162: ...155 Step 6 Finish the setting of Add...
Page 164: ...157 Step 8 Click Next...
Page 165: ...158 Step 9 Enter the Name of this VPN and optionally give it a brief description...
Page 166: ...159 Step 10 Disable Activate the default response rule And click Next...
Page 167: ...160 Step 11 Completing the IP Security Policy setting and click Finish Enable Edit properties...
Page 168: ...161 Step 12 In VPN_B window click Add and please don t click Use Add Wizard...
Page 169: ...162 Step 13 In IP Filter List tab click Add...
Page 172: ...165 Step 16 Finish the setting and close IP Filter List window...
Page 173: ...166 Step 17 Click Filter Action tab and choose Require Security Click Edit...
Page 175: ...168 Step 19 Click Edit in Custom None 3DES MD5...
Page 176: ...169 Step 20 Click Custom For professional user and click Edit...
Page 178: ...171 Step 22 Click Connection Type tab and click all network connections...
Page 180: ...173 Step 24 Click Authentication Methods and click Edit...
Page 182: ...175 Step 26 Finish the setting and close the window...
Page 183: ...176 Step 27 Finish the Policy setting of VPN_B WAN TO LAN...
Page 185: ...178 Step 29 In New Rule Properties click Add...
Page 188: ...181 Step 32 Finish the setting and close IP Filter List window...
Page 189: ...182 Step 33 Click Filter Action tab and choose Require Security Click Edit...
Page 191: ...184 Step 35 Click Edit in Custom None 3DES MD5...
Page 192: ...185 Step 36 Click Custom For professional user and click Edit...
Page 194: ...187 Step 38 Click Connection Type tab and click all network connections...
Page 196: ...189 Step 40 Click Authentication Methods and click Edit...
Page 198: ...191 Step 42 Finish the setting and close the window...
Page 199: ...192 Step 43 Finish the Policy setting of VPN_B LAN TO WAN...
Page 201: ...194 Step 45 Click Master key Perfect Forward Secrecy...
Page 202: ...195 Step 46 Move IKE 3DES MD5 up to the highest order Finish all settings...
Page 203: ...196 Step 47 Finish the settings of Company B s Windows 2000 VPN...
Page 204: ...197 Step 48 Click the right button of mouse in VPN_B and enable Assign...
Page 205: ...198 Step 49 To restart IPSec by Start Settings Control Panel...
Page 206: ...199 Step 50 Enter Control Panel and click Administrative Tools...
Page 207: ...200 Step 51 After entering Administrative Tools click Services...
Page 208: ...201 Step 52 After entering Service click IPSec Services Restart the Service...
Page 209: ...202 Step 53 Finish all settings...
Page 211: ...204...
Page 218: ...211...
Page 224: ...217 Step 9 Click OK to finish the setting of Company B...
Page 228: ...221 Step 3 Click OK to save modifications or click Cancel to cancel modifications...
Page 267: ...260...
Page 288: ...281...
Page 297: ...290 Step 4 When the following screen appears the setup is completed...
Page 300: ...293 Step 8 When the following screen appears the setup is completed...
Page 302: ...295 Step 7 A new Virtual Service should appear...
Page 303: ...296 Step 8 Go to the Incoming window under the Policy menu then click on the New Entry button...
Page 304: ...297 Step 9 In the Add New Policy window set each parameter then click OK...
Page 305: ...298 Step 10 An Incoming FTP policy should now be created...
Page 307: ...300 Step 3 In the Add New IP Mapping window enter each parameter and then click OK...
Page 308: ...301 Step 4 When the following screen appears the IP Mapping setup is completed...
Page 309: ...302 Step 5 Go to the Incoming window under the Policy menu Step 6 Click the New Entry button...
Page 311: ...304 Step 9 The setup is completed...


