LevelOne 53143703, User Manual
The LevelOne 53143703 user manual is available for free download on manualshive.com. This essential manual provides detailed instructions on setting up and using your LevelOne product. Get the most out of your device with this comprehensive guide. Download now for easy access to all the information you need.
Share
Download


Reviews:
No comments
Related manuals for 53143703

DC100
Brand: Caldertech Pages: 12

FUN
Brand: MAGINON Pages: 40

FE-110/X-705
Brand: Olympus Pages: 1

PowerShot ELPH 110 HS
Brand: Canon Pages: 218

DMC-ZS30W
Brand: Panasonic Pages: 314

PowerShot ELPH 510 HS
Brand: Canon Pages: 212
FE110 - 5 Megapixel Digital Camera
Brand: Olympus Pages: 2

VR-350
Brand: Olympus Pages: 75

Topway
Brand: emmeti Pages: 7

61 03 68
Brand: Conrad Pages: 22

Finepix F750EXR
Brand: FujiFilm Pages: 67

Z1800D
Brand: Cobra Digital Pages: 1

SEC-CAM710
Brand: König Electronic Pages: 34

9622
Brand: Nikon Pages: 533

1 J2
Brand: Nikon Pages: 335

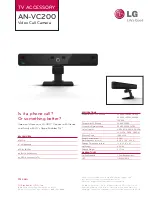
AN-VC200
Brand: LG Pages: 13
AN-VC200
Brand: LG Pages: 1

D3100
Brand: Nikon Pages: 318


