


Operation
Data input
6
54
EDBPM-H312 DE/EN/FR 2.0
6.2
Data input
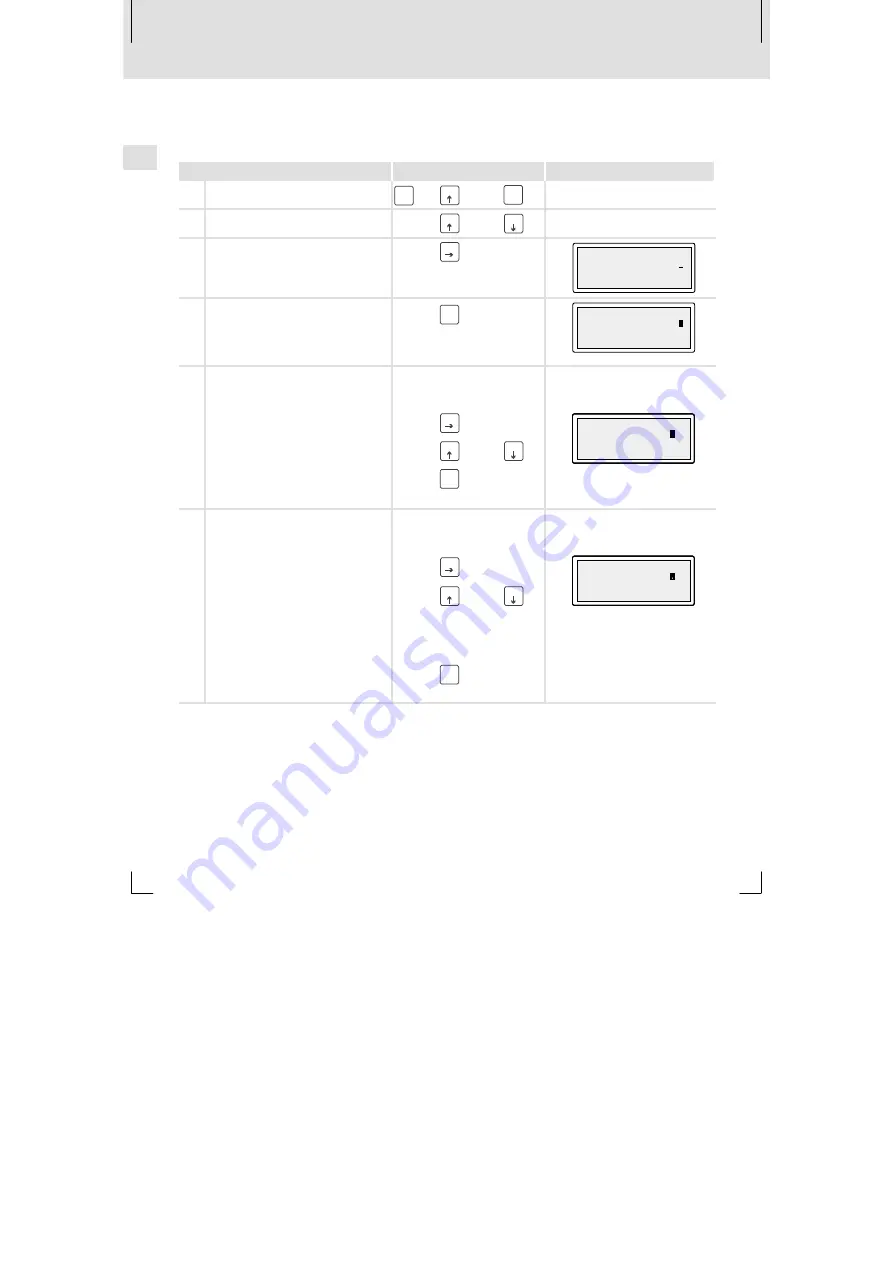
Data input and modification are described step-by-step using examples.
If you want to ...
touch the fields...
Example
A
... select a menu.
shift
+
F1
...
Enter
F4
B
... select a page
F1
or
F2
C
... place the cursor on the next field
F3
Field 1
ON
Field 2
-9876
D
... change to the next parameter level.
The cursor is placed on the right
digit.
In dynamic text fields, the cursor is
placed on the left character (see G).
Enter
F4
Field 1
ON
Field 2
-987
6
E
... change an individual numeric digit.
1. Change to the parameter level
(see D).
2. Select the desired digit.
F3
Field 1
ON
Field 2
-9 76
3
3. Change the digit.
F1
or
F2
Field 1
ON
Field 2
-9 76
3
4. Confirm the input.
– The cursor changes to the menu
level.
Enter
F4
Field 1
ON
Field 2
-9 76
3
F
... insert a point.
1. Change to the parameter level
(see D).
2. Select the position where the point
is to be inserted.
F3
Field 1
ON
Field 2
-9 76
3. Change the digit until the point
occurs.
Note:
A floating point can only be inserted if
the field is defined as “Floating Point”
(see planning tool »HMI Designer«).
F1
or
F2
Field 1
ON
Field 2
-9 76
4. Confirm the input.
– The cursor changes to the menu
level.
Enter
F4
Field 1
ON
Field 2
-9 76


