© Copyright Lenovo 2017
Chapter 4: Removing and Replacing Components
63
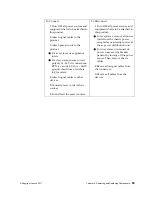
To
Connect:
1.
Turn
OFF
all
power
sources
and
equipment
that
is
to
be
attached
to
this
product.
2.
Attach
signal
cables
to
the
product.
3.
Attach
power
cords
to
the
product.
For
ac
systems,
use
appliance
inlets.
For
dc
systems,
ensure
correct
polarity
of
‐
48
V
dc
connections:
RTN
is
+
and
‐
48
V
dc
is
‐
.
Earth
ground
should
use
a
two
‐
hole
lug
for
safety.
4.
Attach
signal
cables
to
other
devices.
5.
Connect
power
cords
to
their
sources.
6.
Turn
ON
all
the
power
sources.
To
Disconnect:
1.
Turn
OFF
all
power
sources
and
equipment
that
is
to
be
attached
to
this
product.
For
ac
systems,
remove
all
power
cords
from
the
chassis
power
receptacles
or
interrupt
power
at
the
ac
power
distribution
unit.
For
dc
systems,
disconnect
dc
power
sources
at
the
breaker
panel
or
by
turning
off
the
power
source.
Then,
remove
the
dc
cables.
2.
Remove
the
signal
cables
from
the
connectors.
3.
Remove
all
cables
from
the
devices.
Summary of Contents for ThinkSystem NE1032T
Page 1: ...Lenovo ThinkSystem NE1032T RackSwitch Installation Guide For Lenovo Cloud Network OS ...
Page 6: ...6 Lenovo G8296 Installation Guide ...
Page 14: ...14 NE1032T Installation Guide ...
Page 18: ...18 NE1032T Installation Guide ...
Page 32: ...32 NE1032T Installation Guide ...
Page 78: ...78 NE1032T Installation Guide ...
Page 94: ...94 NE1032T Installation Guide ...
Page 100: ...100 NE1032T Installation Guide ...
Page 120: ...120 NE1032T Installation Guide ...

