© Copyright Lenovo 2020
ThinkSystem 440-16i SAS/SATA PCIe Gen4 12Gb Internal HBA Installation and User
Guide
4
Chapter 2: Adapter Installation Instructions
1. Unpack the adapter and inspect the adapter for damage.
Unpack the adapter in a static-free environment. Remove the adapter from the antistatic bag, and carefully inspect the
adapter for damage. If you notice any damage, contact Lenovo or your reseller support representative.
ATTENTION
To avoid the risk of data loss, back up your data before you change your system configuration.
2. Review the adapter connectors.
3. Check whether the adapter is well-fixed on the mounting bracket.
The adapter ships preinstalled on a mounting bracket. Check that the adapter is fixed in place. If any loose screws
exist, tighten the screws using a No.1 Phillips torque screwdriver. The maximum torque is 4.8 ± 0.5 inch-pounds.
ATTENTION
Exceeding this torque specification can damage the board, connectors, or screws, and can void
the warranty on the board. Damage caused to the board as a result of changing the bracket can
void the warranty on the board. Adapters returned without a bracket mounted on the board will be
returned without return merchandise authorization (RMA) processing.
4. Prepare the server.
Turn off the power to the server and disconnect all power cords.
5. Remove the top cover from the chassis.
6. Remove any components that might impede the adapter installation.
Refer to
ThinkSystem Server Documentation Center
, select your product, and review the Hardware replacement
procedures section for detailed instructions.
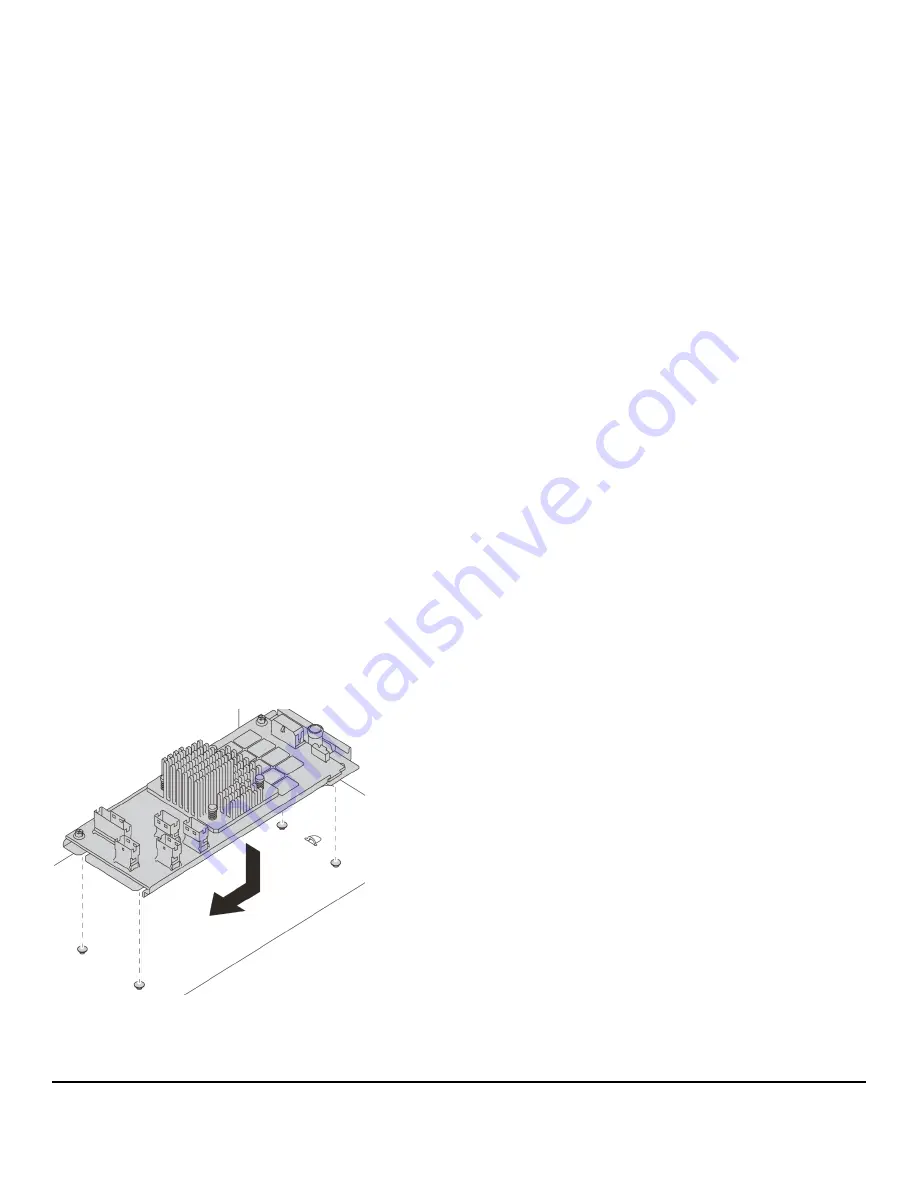
7. Install the adapter.
Align the notches on the mounting bracket with the four pins or three pins on the chassis, place down the adapter, and
slightly slide the adapter to secure it in place, as the following figure shows.
ATTENTION
The shape, size, and locations of the components on your adapter and its bracket might vary
from the following illustration.
Figure 2
Installing the Adapter


