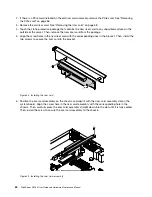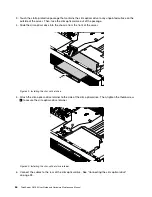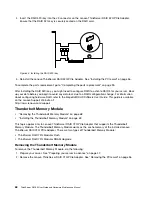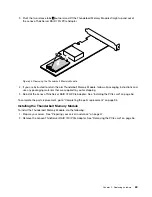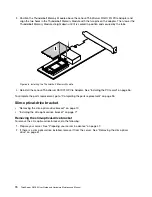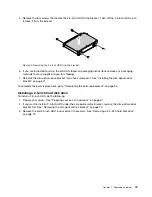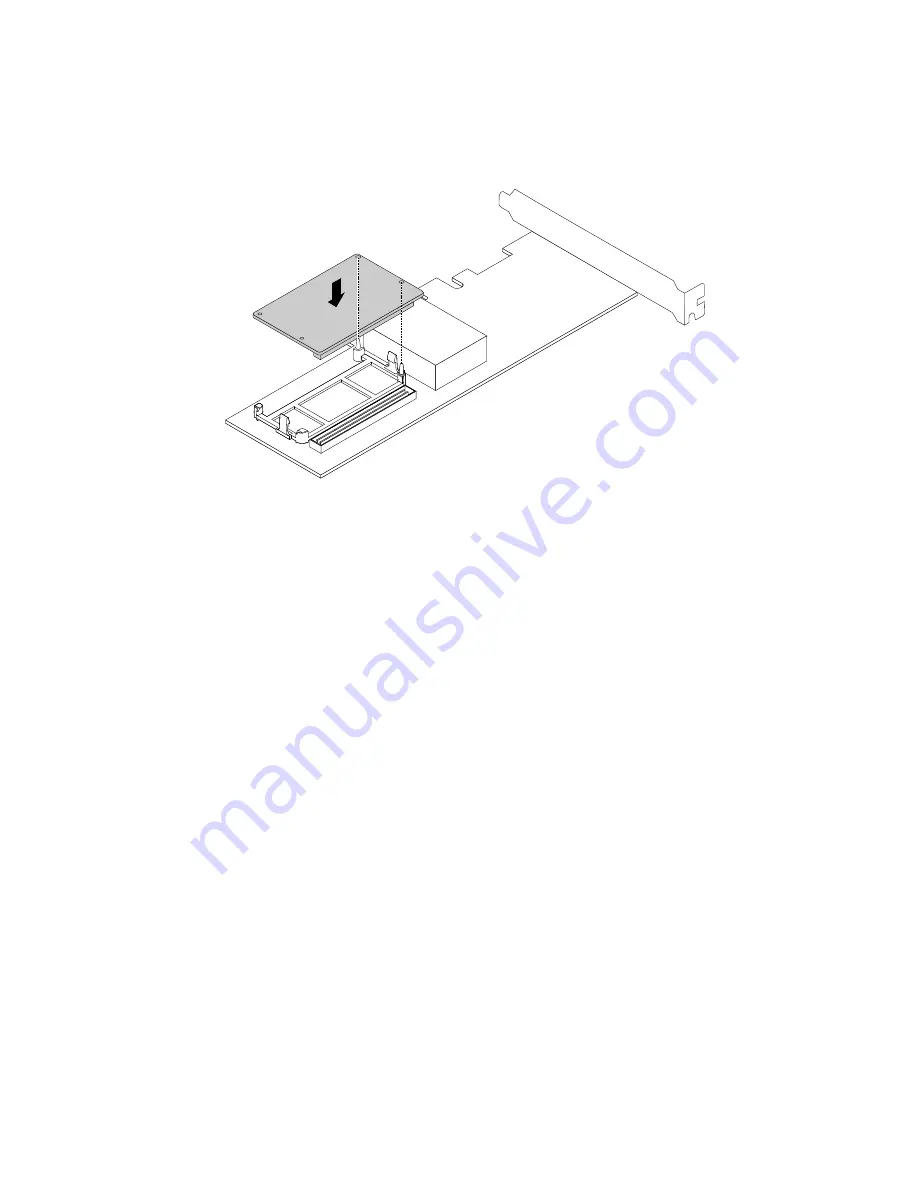
3. Position the Thunderbolt Memory Module above the Lenovo ThinkServer RAID 720i PCIe Adapter and
align the two holes in the Thunderbolt Memory Module with the two pins on the adapter. Then, lower the
Thunderbolt Memory Module straight down until it is seated in position and secured by the tabs.
Figure 46. Installing the Thunderbolt Memory Module
4. Reinstall the Lenovo ThinkServer RAID 720i PCIe Adapter. See “Installing the PCIe card” on page 56.
To complete the parts replacement, go to “Completing the parts replacement” on page 95.
Slim-optical-drive bracket
•
“Removing the slim-optical-drive bracket” on page 70
•
“Installing the slim-optical-drive bracket” on page 71
Removing the slim-optical-drive bracket
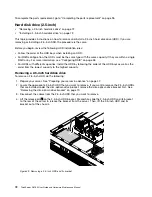
To remove the slim-optical-drive bracket, do the following:
1. Prepare your server. See “Preparing your server in advance” on page 47.
2. If there is a slim optical drive installed, remove it from the server. See “Removing the slim optical
70
ThinkServer RS160 User Guide and Hardware Maintenance Manual
Summary of Contents for ThinkServer RS160
Page 14: ...xii ThinkServer RS160 User Guide and Hardware Maintenance Manual ...
Page 18: ...4 ThinkServer RS160 User Guide and Hardware Maintenance Manual ...
Page 42: ...28 ThinkServer RS160 User Guide and Hardware Maintenance Manual ...
Page 58: ...44 ThinkServer RS160 User Guide and Hardware Maintenance Manual ...
Page 118: ...104 ThinkServer RS160 User Guide and Hardware Maintenance Manual ...
Page 130: ...116 ThinkServer RS160 User Guide and Hardware Maintenance Manual ...
Page 141: ......
Page 142: ......

