• Distortion, deformation, or discoloration of the cosmetic parts
• Plastic parts, latches, pins, or connectors that have been cracked or broken by excessive force
• Damage caused by liquid spilled into the system
• Damage caused by the improper insertion of a PC Card or the installation of an incompatible card
• Fuses blown by attachment of a nonsupported device
• Forgotten tablet password (making the tablet unusable)
• Sticky keys caused by spilling a liquid
• Damage caused due to use of an incorrect ac charger
The following symptom might indicate damage caused by nonwarranted activities:
• Missing parts might be a symptom of unauthorized service or modification.
Power system checkout
To verify a symptom, do the following:
1. Turn off the tablet.
2. Remove the internal battery.
3. Attach the tablet to a ThinkPad Tablet Dock (hereafter referred to as the dock) and then connect the
dock to an electrical outlet using the 65 W ac power adapter shipped with the dock.
4. Check whether power is supplied when you turn on the tablet.
5. Turn off the tablet.
6. Disconnect the ac power adapter and detach the dock. Then install the internal battery.
7. Check whether the internal battery supplies power when you turn on the tablet.
If you suspect a power problem, see the appropriate one of the following power supply checkouts:
•
“Checking the internal battery” on page 24
•
“Checking the internal battery condition” on page 24
•
“Checking the ThinkPad Tablet AC Charger” on page 25
•
“Checking the internal battery status” on page 25
Checking the internal battery
When you use the internal battery but the tablet fails, see the instructions in this topic to check the internal
battery.
To check the internal battery, do the following:
1. Turn off the tablet.
2. Replace the internal battery with another battery.
3. Check that power is supplied when you turn on the tablet.
If you can turn on the tablet, replace the internal battery.
Checking the internal battery condition
After you have used the tablet for a long time, check the internal battery condition and determine if the
battery shall be replaced with a new one.
To check the internal battery condition, do the following:
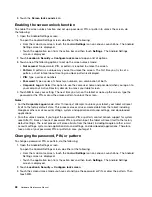
1. Open the Android Settings screen.
To open the Android Settings screen, do either of the following:
• From the main Home screen, touch the Android
Settings
icon on Lenovo Launch Zone. The Android
Settings screen is displayed.
24
Hardware Maintenance Manual
Summary of Contents for ThinkPad 1838
Page 1: ...Hardware Maintenance Manual ThinkPad Tablet ...
Page 4: ...ii Hardware Maintenance Manual ...
Page 6: ...iv Hardware Maintenance Manual ...
Page 11: ...DANGER DANGER DANGER DANGER DANGER DANGER Chapter 1 Safety information 5 ...
Page 12: ...DANGER 6 Hardware Maintenance Manual ...
Page 13: ...PERIGO PERIGO PERIGO Chapter 1 Safety information 7 ...
Page 14: ...PERIGO PERIGO PERIGO PERIGO PERIGO 8 Hardware Maintenance Manual ...
Page 15: ...DANGER DANGER DANGER DANGER DANGER Chapter 1 Safety information 9 ...
Page 16: ...DANGER DANGER DANGER VORSICHT VORSICHT 10 Hardware Maintenance Manual ...
Page 17: ...VORSICHT VORSICHT VORSICHT VORSICHT VORSICHT VORSICHT Chapter 1 Safety information 11 ...
Page 18: ...12 Hardware Maintenance Manual ...
Page 19: ...Chapter 1 Safety information 13 ...
Page 20: ...14 Hardware Maintenance Manual ...
Page 21: ...Chapter 1 Safety information 15 ...
Page 22: ...16 Hardware Maintenance Manual ...
Page 23: ...Chapter 1 Safety information 17 ...
Page 24: ...18 Hardware Maintenance Manual ...
Page 28: ...22 Hardware Maintenance Manual ...
Page 32: ...26 Hardware Maintenance Manual ...
Page 38: ...32 Hardware Maintenance Manual ...
Page 56: ...50 Hardware Maintenance Manual ...
Page 58: ...Overall 1 14 13 12 11 10 9 8 7 2 3 4 5 6 52 Hardware Maintenance Manual ...
Page 67: ......

