


2. To get access to the system board, remove the following parts if any:
b. “M.2 solid-state drive” on page 72.
c. “Computer cover and rear I/O bracket” on page 73.
d. “Coin-cell battery” on page 75.
f. “Internal speaker” on page 77.
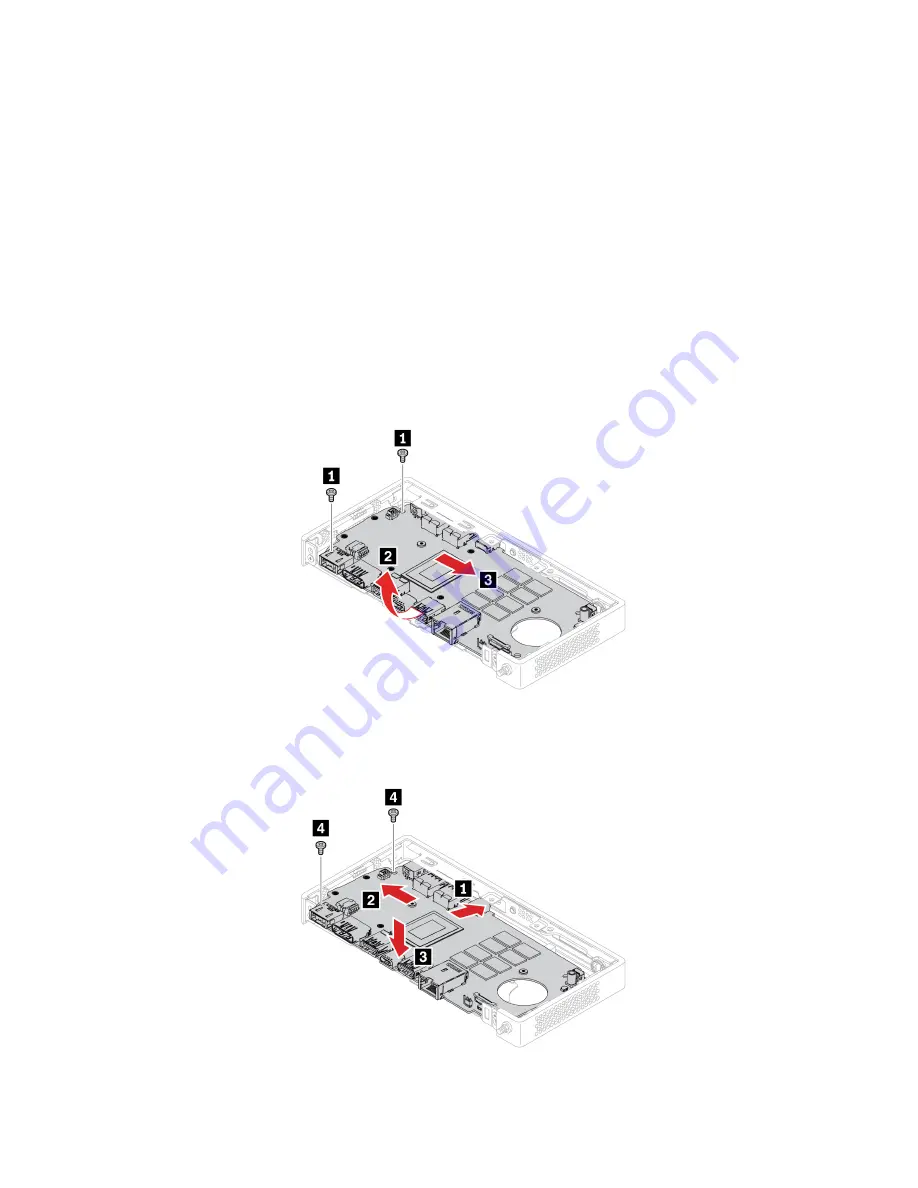
3. Record the cable routing and cable connections, and then disconnect all cables from the system board.
See “System board” on page 58.
4. Remove the two screws that secure the system board, and then carefully lift the system board out of the
chassis.
Note:
Carefully handle the system board by its edges.
5. Install the new system board into the chassis by aligning the two screw holes in the new system board
with the corresponding mounting studs on the chassis. Then, install the two screws to secure the new
system board.
80
ThinkCentre M75nHardware Maintenance Manual
Summary of Contents for ThinkCentre M75n
Page 1: ...ThinkCentre M75n Hardware Maintenance Manual ...
Page 6: ...iv ThinkCentre M75nHardware Maintenance Manual ...
Page 13: ...Chapter 1 Important safety information 7 ...
Page 14: ... 18 kg 37 lb 32 kg 70 5 lb 55 kg 121 2 lb 1 2 8 ThinkCentre M75nHardware Maintenance Manual ...
Page 17: ...Chapter 1 Important safety information 11 ...
Page 18: ...1 2 12 ThinkCentre M75nHardware Maintenance Manual ...
Page 19: ...Chapter 1 Important safety information 13 ...
Page 25: ...Chapter 1 Important safety information 19 ...
Page 29: ...Chapter 1 Important safety information 23 ...
Page 46: ...40 ThinkCentre M75nHardware Maintenance Manual ...
Page 116: ...110 ThinkCentre M75nHardware Maintenance Manual ...
Page 119: ......
Page 120: ......