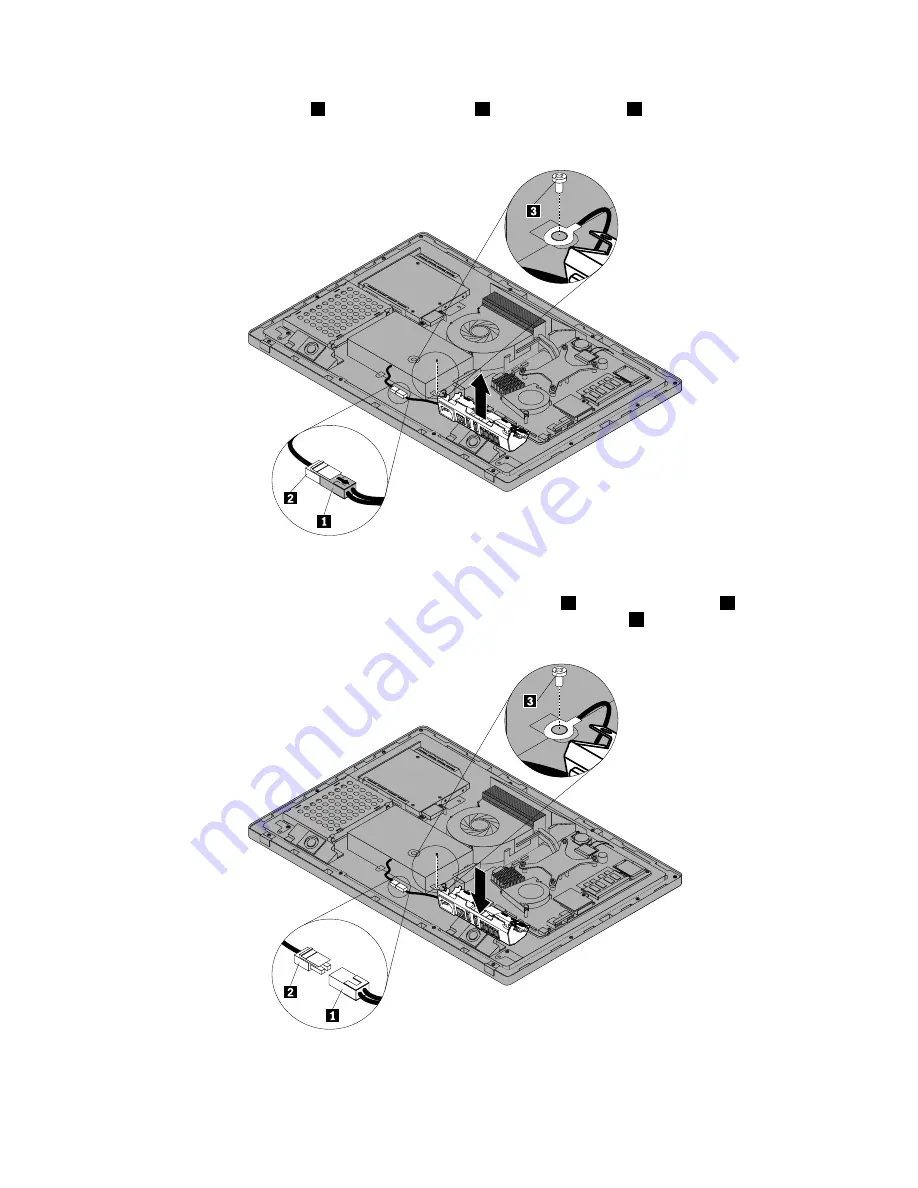
8. Disconnect the power cable
1
from the power cable
2
. Remove the screw
3
to disconnect the earth
wire from the chassis. Then remove the rear I/O assembly from the computer.
Figure 27. Removing the rear I/O assembly
9. To reinstall the new rear I/O assembly, reconnect the power cable
1
and the power cable
2
. Align the
earth wire with the corresponding hole in the chassis. Then install the screw
3
to secure the earth wire.
Figure 28. Connecting the power cord cable and securing the earth wire
92
ThinkCentre E93z Hardware Maintenance Manual
Summary of Contents for ThinkCentre E93z
Page 1: ...ThinkCentre E93z Hardware Maintenance Manual Machine Types 10B8 10B9 10BA 10BH 10BJ and 10BK ...
Page 6: ...2 ThinkCentre E93z Hardware Maintenance Manual ...
Page 13: ...Chapter 2 Safety information 9 ...
Page 17: ...Chapter 2 Safety information 13 ...
Page 18: ...1 2 14 ThinkCentre E93z Hardware Maintenance Manual ...
Page 19: ...1 2 Chapter 2 Safety information 15 ...
Page 24: ...1 2 20 ThinkCentre E93z Hardware Maintenance Manual ...
Page 25: ...1 2 Chapter 2 Safety information 21 ...
Page 28: ...24 ThinkCentre E93z Hardware Maintenance Manual ...
Page 32: ...28 ThinkCentre E93z Hardware Maintenance Manual ...
Page 64: ...60 ThinkCentre E93z Hardware Maintenance Manual ...
Page 70: ...66 ThinkCentre E93z Hardware Maintenance Manual ...
Page 78: ...74 ThinkCentre E93z Hardware Maintenance Manual ...
Page 132: ...128 ThinkCentre E93z Hardware Maintenance Manual ...
Page 141: ......
Page 142: ......


