background image

Lenovo Moto G8 
Level 2 

– Service and Repair Manual 


Lenovo Confidential Restricted: 

PAGE 31 


Do not share without consent from Lenovo 

Front-Facing Camera Removal 

NOTE 

The Front-Facing Camera can be 

recovered and reused after removal. 

1.


Use the Plastic Tweezer to remove the 
Copper Foil from the location as shown. 


2.


Use the flat end of the Black Stick to gently 
remove the Front-Facing Camera as shown.


Summary of Contents for Moto G8

Page 1: ...Moto G8 Lenovo Moto G8 Level 2 Service and Repair Manual ...

Page 2: ...Lenovo Moto G8 Level 2 Service and Repair Manual Lenovo Confidential Restricted PAGE 2 Do not share without consent from Lenovo REVISION HISTORY Revision Date Notes 1 01 16 2020 Initial Release ...

Page 3: ...ection 17 IMEI Label Removal 18 Battery Cover Removal 19 Battery Cover Adhesive Removal 21 Insulating Tape Removal 22 PCB Bracket Removal 23 Rear Facing Camera Lens Removal 24 Water Detection Label Inspection 25 Finger Print Sensor Removal 26 Rear Facing Camera Removal 27 TOF Sensor Grommet Removal 28 Main PCB Removal 29 Front Facing Camera Removal 31 Headset Jack Grommet Removal 32 Finger Print S...

Page 4: ...d for Assembly 57 Sim Pin Hole Grommet Assembly 58 Water Detection Label Assembly 59 Front Housing Insulating Tape Assembly 60 Side Key Grommet Assembly 61 Side Key FPC Assembly 62 Proximity Sensor Board Adhesive Assembly 63 Proximity Sensor Board Assembly 64 Thermal Gel Assembly 65 Main PCB Conductive Copper Foil Assembly 71 Headset Jack Grommet Assembly 72 Water Detection Label Assembly 73 Front...

Page 5: ...oil Assembly 90 TOF Grommet Assembly 91 Rear Facing Camera Grommet Assembly 92 Finger Print Sensor Assembly 93 Insulating Tape Assembly 94 PCB Bracket Assembly 95 Rear Facing Camera Lens Assembly 96 Finger Print Sensor Foam Assembly 97 Insulating Tape Assembly 98 Battery Cover Graphite Assembly 99 FPS Assembly 100 Battery Cover Assembly 101 IMEI Label Assembly 102 Sim Tray Assembly 103 ...

Page 6: ...novo Confidential Restricted PAGE 6 Do not share without consent from Lenovo LIST OF TABLES Table 1 External Views Parts List 9 Table 2 Assembly Exploded View Parts List 10 TABLE OF FIGURES Figure 1 External Views 8 9BFigure 2 Assembly Exploded View 10 ...

Page 7: ... Battery Pack is dropped to the floor it may be internally damaged and must be scrapped Ensure all surfaces fixtures and phone components contacting the Battery are smooth and clean Ensure Battery and its insulation are not damaged e g scratched dented punctured prior to and throughout assembly Prior to assembly ensure Battery edges and surfaces are not dented or deformed and that fixtures and par...

Page 8: ...Lenovo Moto G8 Level 2 Service and Repair Manual Lenovo Confidential Restricted PAGE 8 Do not share without consent from Lenovo INTRODUCTION External Views Figure 1 External Views ...

Page 9: ...consent from Lenovo Table 1 External Views Parts List Reference Description 1 SIM Door 2 Front housing 3 Main Lens 4 Front Facing Camera 5 Receiver Mesh 6 Sensor 7 Headset Jack 8 USB Port 9 Speaker Mesh 10 Power Key 11 Volume Key 12 Camera Lens 13 Camera Ring 14 Flash Lens 15 FPS Bezel 16 FPS 17 Battery Cover ...

Page 10: ...JR HSG FRNT RAV BR LDA L5 Kit BLU JR RAV Display ASSY LDA L5 KIT AR IN WHT JR RAV Display ASSY LDA L5 KIT AR IN BLU JR Yes 2 XT2045 1 Main Board 4 64G DS CS XT2045 1 Main Board 4 64G SS CS XT2045 2 Main Board 4 64G DS CS XT2045 6 Main Board 4 64G DS CS ASSY BD KIT RAV BR 4 64 MB Yes 3 HQ21405100000 Rubber_Black_Earphone_DGJR Yes 4 HQ21405107000 Rubber_Black_Rear camera8M Yes 5 HQ21405111000 Rubber...

Page 11: ...0 Battery cover white DGJR HSG BAT CVR RAV BR BAT CVR KIT BE JR HSG BAT CVR RAV BR BAT CVR KIT WH JR Yes 21 HQ23800024000 Dual SIM tray_HL HQ23800025000 Dual SIM tray_Blue_NCVM_HL HQ23800019000 Single SIM tray_T Flash_HL HQ23800026000 Single SIM tray_T FLASH_HL Yes 22 HQ22261516000 Flake graphite_ZYTS No 23 HQ21212634000 Single camera lens_BLK_ZB Yes 24 HQ21212637000 Double camera lens_BLK_ZB HQ21...

Page 12: ... HQ22110563000 screw No 39 HQ22110564000 screw No HQ60460003000 Waterproof Label No RAV Cam Deco PSA_B HQ22211819000CSS No Sofia R ThermGel_5CC 715000511131 CSS IMEI LABEL REV2 No HQ22202564000 Conductive foam_DS No RAV FPS adhesive HQ22211773000 CSS No RAV Cam adhesive_R HQ22211729000CSS No RAV Cam adhesive_L HQ22211728000CSS No RAV Batt adhesive2 HQ22211775000 CSS No RAV Batt adhesive1 HQ2221177...

Page 13: ... Level 2 Service and Repair Manual Lenovo Confidential Restricted PAGE 13 Do not share without consent from Lenovo DISASSEMBLY AND RECOVERY Disassembly and Recovery Map Shaded parts may be eligible for parts recovery ...

Page 14: ...14 Do not share without consent from Lenovo Tools Required for Disassembly The following tools are required to disassemble the Moto G8 phone Description Part Picture Drawing 3 mm Allen Wrench Hot Plate Thin Plastic Spudger 0 00 00 40826 SIM SD Tray Removal Tool Black Stick Torque Driver ...

Page 15: ...l 2 Service and Repair Manual Lenovo Confidential Restricted PAGE 15 Do not share without consent from Lenovo Description Part Picture Drawing Shim 4 00 5L 10000 Torx Bit Stick Plastic Tweezers ESD Mat Wrist Strap Gloves ...

Page 16: ...sent from Lenovo SIM Tray Removal NOTE The SIM Tray can be recovered and reused after removal 1 Power off the device before beginning with the procedure Use the SIM Tray Removal pin to push into the SIM Tray hole 2 Press the SIM Tray removal tool to make it pop out as shown 3 Use fingers to take out the SIM Tray ...

Page 17: ...enovo Water Detection Label Inspection NOTE If the Water Detection Label WDL has been activated the phone s warranty no longer applies 1 Inspect the WDL inside the SIM Tray Slot for signs of activation Use external light if needed 2 Inspect the WDL inside the Headset Jack for signs of activation Use external light if needed ...

Page 18: ...Lenovo Confidential Restricted PAGE 18 Do not share without consent from Lenovo IMEI Label Removal NOTE Remove the IMEI Label only if necessary After you remove it you cannot reuse it Use the Plastic Tweezer to remove the IMEI Label from the SIM tray ...

Page 19: ...attery Cover can be recovered and reused after removal if it is undamaged 1 Use the stick to press the edge of the Battery Cover from the Front Housing as shown CAUTION Only press the Battery Cover with the Stick and do not touch the USB Connector to avoid damaging the phone 2 Use the Stick to press the edge of the Battery Cover from the Front Housing as shown ...

Page 20: ... Housing on the points as shown CAUTION Please make sure not to slide the Stick in the gaps 4 Use the Plastic Tweezer to remove the Battery Cover Graphite as shown 5 Use the pointed end of the Black Stick to push out the Finger Print Sensor Flex from the Battery Cover as shown WARNING Use care not to disconnect the Fingerprint Sensor FPS Flex from the Battery Cover when removing the Front Housing ...

Page 21: ... Confidential Restricted PAGE 21 Do not share without consent from Lenovo Battery Cover Adhesive Removal NOTE After you remove the Battery Cover Adhesive you cannot reuse it Use the Black Stick to remove the Battery Cover Adhesive from the location as shown ...

Page 22: ...l Lenovo Confidential Restricted PAGE 22 Do not share without consent from Lenovo Insulating Tape Removal NOTE After you remove the Insulating Tape you cannot reuse it Use the Plastic Tweezer to remove the Insulating Tape from the location as shown ...

Page 23: ...acket Removal NOTE The PCB Bracket can be recovered and reused after removal 1 Use the Torque Driver with Torx Bit to remove the 10 screws as shown WARNING The screws cannot be reused after removal 2 Use the flat end of the Black Stick to lift the PCB Bracket from the location as shown NOTE Be careful with the Finger Print Sensor Flex ...

Page 24: ...ens Removal NOTE The Rear Facing Camera Lens can be recovered and reused after removal 1 Use the pointed end of the Black Stick to carefully disengage and push out the Rear Facing Camera Lens from the location as shown 2 Use the pointed end of the Black Stick to carefully disengage and push out the Rear Facing Camera Lens from the location as shown ...

Page 25: ...estricted PAGE 25 Do not share without consent from Lenovo Water Detection Label Inspection NOTE If the Water Detection Label WDL has been activated the phone s warranty no longer applies Inspect the WDL which is visible on the Main PCB Examine it for signs of activation ...

Page 26: ...ovo Finger Print Sensor Removal NOTE The Finger Print Sensor Flex can be recovered and reused after removal 1 Use the flat end of the Black Stick to disengage the Battery BtB Connector from the location as shown 2 Use the flat end of the Black Stick to disengage the Finger Print Sensor BtB Connector from the location as shown ...

Page 27: ...removal 1 Use the flat end of the Black Stick to disengage the Rear Facing Camera Flex from the location as shown 2 Use the flat end of the Black Stick to disengage the Rear Facing Camera Flex from the location as shown 3 Use the flat end of the Black Stick to disengage the Rear Facing Camera Flex from the location as shown 4 Use the Plastic Tweezer to remove the Rear Facing Camera Grommet from th...

Page 28: ...o Confidential Restricted PAGE 28 Do not share without consent from Lenovo TOF Sensor Grommet Removal NOTE The TOF Sensor Grommet can be recovered and reused after removal Use the Plastic Tweezer to remove the TOF Sensor Grommet from the location as shown ...

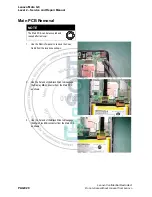
Page 29: ...NOTE The Main PCB can be recovered and reused after removal 1 Use the Plastic Tweezer to remove the Coax Cable from the location as shown 2 Use the flat end of the Black Stick to disengage the Display BtB connector from the Main PCB as shown 3 Use the flat end of the Black Stick to disengage the Main Flex BtB connector from the Main PCB as shown ...

Page 30: ...tial Restricted PAGE 30 Do not share without consent from Lenovo 4 Use the Torque Driver with Torx Bit to remove the screw as shown WARNING The screw cannot be reused after removal 5 Use the flat end of the Black Stick to lift the Main PCB from the location as shown ...

Page 31: ...hare without consent from Lenovo Front Facing Camera Removal NOTE The Front Facing Camera can be recovered and reused after removal 1 Use the Plastic Tweezer to remove the Copper Foil from the location as shown 2 Use the flat end of the Black Stick to gently remove the Front Facing Camera as shown ...

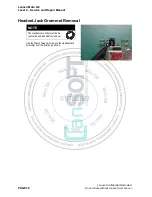
Page 32: ...onfidential Restricted PAGE 32 Do not share without consent from Lenovo Headset Jack Grommet Removal NOTE The Headset Jack Grommet can be recovered and reused after removal Use the Plastic Tweezer to remove the Headset Jack Grommet from the location as shown ...

Page 33: ...idential Restricted PAGE 33 Do not share without consent from Lenovo Finger Print Sensor Foam Removal NOTE After you remove the Finger Print Sensor Foam you cannot reuse it Use the Plastic Tweezer to remove the Finger Print Sensor Foam from the location as shown ...

Page 34: ...o Confidential Restricted PAGE 34 Do not share without consent from Lenovo Main PCB Copper Foil Removal NOTE After you remove the Main PCB Copper Foil you cannot reuse it Use the Plastic Tweezer to remove the Main PCB Copper Foil from the Main PCB as shown ...

Page 35: ... Restricted PAGE 35 Do not share without consent from Lenovo Proximity Sensor Board Removal NOTE The Proximity Sensor Board can be recovered and reused after removal Use the flat end of the Black Stick to remove the Proximity Sensor Board from the Front Housing as shown ...

Page 36: ...fidential Restricted PAGE 36 Do not share without consent from Lenovo Proximity Sensor Grommet Removal NOTE After you remove the Proximity Sensor Board you cannot reuse it Use the Plastic Tweezer to remove the Proximity Sensor Grommet from the location as shown ...

Page 37: ...enovo Confidential Restricted PAGE 37 Do not share without consent from Lenovo Receiver Removal NOTE Remove the Receiver only if necessary After you remove it you cannot reuse it Use the Plastic Tweezer to remove the Receiver from the location as shown ...

Page 38: ... without consent from Lenovo Side Key Flex Removal NOTE After you remove the Side Key Flex you cannot reuse it 1 Use the flat end of the Black Stick to disengage the Side Key Flex from the location as shown 2 Use the flat end of the Black Stick to disengage the Side Key Flex from the location as shown ...

Page 39: ...ithout consent from Lenovo Speaker Box Removal NOTE The Speaker Box can be recovered and reused after removal 1 Use the Torque Driver with Torx Bit to remove the nine screws as shown WARNING The screws cannot be reused after removal 2 Use the flat end of the Black Stick to lift the Speaker Box as shown ...

Page 40: ...estricted PAGE 40 Do not share without consent from Lenovo Water Detection Label Inspection NOTE If the Water Detection Label WDL has been activated the phone s warranty no longer applies Inspect the WDL which is visible on the Sub Board Examine it for signs of activation ...

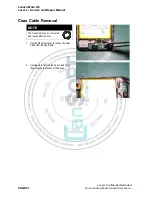
Page 41: ...PAGE 41 Do not share without consent from Lenovo Coax Cable Removal NOTE The Coax Cable can be recovered and reused after removal 1 Use the Plastic Tweezer to remove the Coax Cable from the Sub Board 2 Use fingers to remove the Coax Cable from the pocket on the recess of the phone ...

Page 42: ...vered and reused after removal 1 Use the flat end of the Black Stick to carefully disengage the Main Flex BtB Connector from the location on the Sub Board as shown 2 Use the Torque Driver with Torx Bit to remove the white screw as shown WARNING The screw cannot be reused after removal 3 Use the flat end of the Black Stick to gently lift the Sub Board from the location as shown ...

Page 43: ...nual Lenovo Confidential Restricted PAGE 43 Do not share without consent from Lenovo USB Grommet Removal NOTE The USB Grommet can be recovered and reused after removal Use the Plastic Tweezer to remove the USB Grommet from the Sub Board as shown ...

Page 44: ...ntial Restricted PAGE 44 Do not share without consent from Lenovo Vibrator Removal NOTE Remove the Vibrator only if necessary After you remove it you cannot reuse it Use the pointed end of the Black Stick to gently disengage the Vibrator from the location as shown ...

Page 45: ...y damaged and must be scrapped Ensure Battery and its insulation are not damaged e g scratched dented punctured prior to and through assembly Prior to assembly ensure Battery edges and surfaces are not dented or deformed and that fixtures and parts that will contact the Battery are free of foreign material Ensure screws and screwdrivers do not contact the Battery 1 Set the temperature of the Hot P...

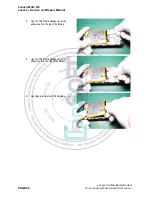
Page 46: ...al Restricted PAGE 46 Do not share without consent from Lenovo 4 Use the Thin Plastic Spudger to cut the adhesives from the top of the Battery 5 Use the Thin Plastic Spudger to cut the adhesives from the side of the Battery 6 Use fingers to carefully lift the Battery ...

Page 47: ...ice and Repair Manual Lenovo Confidential Restricted PAGE 47 Do not share without consent from Lenovo Main Flex Removal NOTE After you remove the Main Flex you cannot reuse it Use fingers to gently peel off the Main Flex as shown ...

Page 48: ... Lenovo Confidential Restricted PAGE 48 Do not share without consent from Lenovo Side Key Grommet Removal NOTE After you remove the Side Key Grommet you cannot reuse it Use the Plastic Tweezer to remove the Side Key Grommet from the location as shown ...

Page 49: ...ential Restricted PAGE 49 Do not share without consent from Lenovo Sim Tray Silica Gel Sheet Removal NOTE After you remove the Sim Tray Silica Gel Sheet you cannot reuse it Use the Plastic Tweezer to remove the Sim Tray Silica Gel Sheet from the location as shown ...

Page 50: ...hare without consent from Lenovo PARTS REFRESH Tools Required for Parts Refresh The following tools are required for parts refresh of the Moto G8 phone Description Part Image Plastic Tweezers Black Stick ESD Mat Wrist Strap Isopropyl ISP Alcohol Cotton Swabs Cleaning Pads Gloves or Finger Collets ...

Page 51: ...idential Restricted PAGE 51 Do not share without consent from Lenovo Battery Cover Cleaning Use the ISP Alcohol and Cotton Swabs to remove all the adhesives on the Battery Cover as shown CAUTION Remove the adhesive carefully to avoid damage to the Battery Cover ...

Page 52: ... 2 Service and Repair Manual Lenovo Confidential Restricted PAGE 52 Do not share without consent from Lenovo PCB Bracket Cleaning Use the Cotton Swabs with ISP Alcohol to remove all the adhesives from the location as shown ...

Page 53: ...m Lenovo Main PCB Cleaning Use Plastic Scraper to remove the most part of thermal putty from the Main PCB CAUTION Avoid damage to the Main PCB the scrape or wipe operation must be soft and light And 45 placement is to avoid the alcohol or washer solvent flows into open the devices of PCBA such as connectors cassettes etc ...

Page 54: ...Service and Repair Manual Lenovo Confidential Restricted PAGE 54 Do not share without consent from Lenovo Front Housing Thermal Gel Cleaning Use Plastic Scraper to remove the most part of thermal putty from the Front Housing ...

Page 55: ...2 Service and Repair Manual Lenovo Confidential Restricted PAGE 55 Do not share without consent from Lenovo Front Housing Cleaning Use the Cotton Swabs with ISP Alcohol to remove all the adhesives from the location as shown ...

Page 56: ...Lenovo Moto G8 Level 2 Service and Repair Manual Lenovo Confidential Restricted PAGE 56 Do not share without consent from Lenovo ASSEMBLY Assembly Map ...

Page 57: ... PAGE 57 Do not share without consent from Lenovo Tools Required for Assembly The following tools are required to assemble the Moto One Vision phone Description Part Picture Drawing Black Stick Torque Driver Torx Bit Manual Roller Plastic Tweezers Tweezers Gloves or Finger Collets ...

Page 58: ...Pin Hole Grommet Assembly Description Reference HSG FRNT RAV BR LDA L5 Kit WHT JR HSG FRNT RAV BR LDA L5 Kit BLU JR RAV Display ASSY LDA L5 KIT AR IN WHT JR RAV Display ASSY LDA L5 KIT AR IN BLU JR 1 HQ21405101000 Rubber_BLK_Sim pin hole 33 Use the Plastic Tweezer to place and secure the Sim Pin Hole Grommet on the location as shown ...

Page 59: ...Description Reference HSG FRNT RAV BR LDA L5 Kit WHT JR HSG FRNT RAV BR LDA L5 Kit BLU JR RAV Display ASSY LDA L5 KIT AR IN WHT JR RAV Display ASSY LDA L5 KIT AR IN BLU JR 1 1 Use the Plastic Tweezer to place the Water Detection Label WDL near the Sim Tray as shown 2 Use the Plastic Tweezer to place the Water Detection Label WDL near the Headset Jack as shown ...

Page 60: ...ing Insulating Tape Assembly Description Reference HSG FRNT RAV BR LDA L5 Kit WHT JR HSG FRNT RAV BR LDA L5 Kit BLU JR RAV Display ASSY LDA L5 KIT AR IN WHT JR RAV Display ASSY LDA L5 KIT AR IN BLU JR 1 HQ22231931000 Insulating tape_DS 6 Use the Plastic Tweezer to place and secure the Front Housing Insulating Tape on the location as shown ...

Page 61: ...o Side Key Grommet Assembly Description Reference HSG FRNT RAV BR LDA L5 Kit WHT JR HSG FRNT RAV BR LDA L5 Kit BLU JR RAV Display ASSY LDA L5 KIT AR IN WHT JR RAV Display ASSY LDA L5 KIT AR IN BLU JR 1 HQ21405110000 Rubber_Side key_DGJR 29 Use the Plastic Tweezer to place and secure the Side Key Grommet on the location as shown ...

Page 62: ...t WHT JR HSG FRNT RAV BR LDA L5 Kit BLU JR RAV Display ASSY LDA L5 KIT AR IN WHT JR RAV Display ASSY LDA L5 KIT AR IN BLU JR 1 HQ22002899000 Side key_FPC 27 1 Use the Plastic Tweezer to place the Side Key FPC Stiffener on the Front Housing as shown 2 Use Plastic Tweezer to pass the Side Key FPC from the Side Key Grommet as shown 3 Use fingers to place the Side Key FPC on the Front Housing as shown...

Page 63: ...oard Adhesive Assembly Description Reference HSG FRNT RAV BR LDA L5 Kit WHT JR HSG FRNT RAV BR LDA L5 Kit BLU JR RAV Display ASSY LDA L5 KIT AR IN WHT JR RAV Display ASSY LDA L5 KIT AR IN BLU JR 1 ASSY DTR BRD RAV BR PSensor PCBA 12 Use fingers to place and secure the Proximity Sensor Board adhesive on the location as shown and peel off the liner ...

Page 64: ...ximity Sensor Board Assembly Description Reference HSG FRNT RAV BR LDA L5 Kit WHT JR HSG FRNT RAV BR LDA L5 Kit BLU JR RAV Display ASSY LDA L5 KIT AR IN WHT JR RAV Display ASSY LDA L5 KIT AR IN BLU JR 1 ASSY DTR BRD RAV BR PSensor PCBA 12 Use the Plastic Tweezer to place and secure the Proximity Sensor Board on the location as shown ...

Page 65: ...re without consent from Lenovo Thermal Gel Assembly NOTE This procedure is only required when replacing the Main PCB or Front Housing Thermal Gel Syringe size package and Needle Gauges description 1 TDS SY TP350 5ml can operate without dispensing tool 2 TDS SY TP350 30ml operate with dispensing tool ...

Page 66: ...tricted PAGE 66 Do not share without consent from Lenovo 3 Henkel LF350 30ml operate with dispensing tool 4 When use SY TP350 or Henkel LF350 suggest using 16 gauge needle when use Artic and Cooler Master suggest using 18 gauge needle It can be easier operate the gel volume ...

Page 67: ...ricted PAGE 67 Do not share without consent from Lenovo Thermal Gel location method 1 Add Thermal conductive gel on the two visual blocks as shown 2 Use the diagonal of the rectangle to find out the center point and Use the pen to mark the center points on the Front Housing ...

Page 68: ...from Lenovo Thermal Gel Assembly by Area 1 Use the 18 gauge needle green color for Artic and Cooler Master Use the 16 gauge needle black color for SY TP350 Henkel LF350 2 Use the Tweezer to cut off the string of thermal gel from the needle NOTE The tip of the needle and tweezers must be cleaned after each application ...

Page 69: ...AGE 69 Do not share without consent from Lenovo 3 Heat conductive gel is extruded according to the amount of heat conductive gel Rav Row thermal gel area diameter mm A 5 B 3 NOTE Needle must be replaced daily NOTE Care not to exceed the mark line area while applying the Thermal gel ...

Page 70: ...om catalog coolers thermal grease mastergel pro MGZ NDSG N15M R1 https www coolermaster com catalog coolers thermal grease mastergel maker RG ICE1 TG15 R1 https www coolermaster com catalog coolers thermal grease ic essential e1 RG ICE2 TA15 R1 https www coolermaster com catalog coolers thermal grease ic essential e2 RG EFX1 TG15 R1 https www coolermaster com catalog coolers thermal grease extreme...

Page 71: ...ve Copper Foil Assembly Description Reference XT2045 1 Main Board 4 64G DS CS XT2045 1 Main Board 4 64G SS CS XT2045 2 Main Board 4 64G DS CS XT2045 6 Main Board 4 64G DS CS ASSY BD KIT RAV BR 4 64 MB 2 HQ21910063000 Conductive copper foil 37 Use the Plastic Tweezer to place and secure the Main PCB Conductive Copper Foil on the Main PCB as shown ...

Page 72: ...adset Jack Grommet Assembly Description Reference XT2045 1 Main Board 4 64G DS CS XT2045 1 Main Board 4 64G SS CS XT2045 2 Main Board 4 64G DS CS XT2045 6 Main Board 4 64G DS CS ASSY BD KIT RAV BR 4 64 MB 2 HQ21405100000 Rubber_Black_Earphone_DGJR 3 Use the Plastic Tweezer to place the Headset Jack Grommet on the location as shown ...

Page 73: ...sent from Lenovo Water Detection Label Assembly Description Reference XT2045 1 Main Board 4 64G DS CS XT2045 1 Main Board 4 64G SS CS XT2045 2 Main Board 4 64G DS CS XT2045 6 Main Board 4 64G DS CS ASSY BD KIT RAV BR 4 64 MB 2 Use the Plastic Tweezer to place the Water Detection Label WDL on the Main PCB as shown ...

Page 74: ...novo Front Facing Camera Assembly Description Reference XT2045 1 Main Board 4 64G DS CS XT2045 1 Main Board 4 64G SS CS XT2045 2 Main Board 4 64G DS CS XT2045 6 Main Board 4 64G DS CS ASSY BD KIT RAV BR 4 64 MB 2 MDL CAMR 8M sofia front8M F4H7YCJ Q Tech 15 Use fingers to place the Front Facing Camera on the Main PCB as shown ...

Page 75: ...ive Copper Foil Assembly Description Reference XT2045 1 Main Board 4 64G DS CS XT2045 1 Main Board 4 64G SS CS XT2045 2 Main Board 4 64G DS CS XT2045 6 Main Board 4 64G DS CS ASSY BD KIT RAV BR 4 64 MB 2 HQ21910058000 conductive copper foil_DS 9 Use the Plastic Tweezer to place the Front Facing Camera Conductive Copper Foil on the Main PCB as shown ...

Page 76: ...e HSG FRNT RAV BR LDA L5 Kit WHT JR HSG FRNT RAV BR LDA L5 Kit BLU JR RAV Display ASSY LDA L5 KIT AR IN WHT JR RAV Display ASSY LDA L5 KIT AR IN BLU JR 1 XT2045 1 Main Board 4 64G DS CS XT2045 1 Main Board 4 64G SS CS XT2045 2 Main Board 4 64G DS CS XT2045 6 Main Board 4 64G DS CS ASSY BD KIT RAV BR 4 64 MB 2 Use fingers to place the Main PCB on the location as shown ...

Page 77: ...LDA L5 KIT AR IN WHT JR RAV Display ASSY LDA L5 KIT AR IN BLU JR 1 XT2045 1 Main Board 4 64G DS CS XT2045 1 Main Board 4 64G SS CS XT2045 2 Main Board 4 64G DS CS XT2045 6 Main Board 4 64G DS CS ASSY BD KIT RAV BR 4 64 MB 2 HQ20321112000 Receiver plate spring 14 HQ22110564000 screw 39 1 Use the Plastic Tweezer to place the Receiver on the location aligning with the pins as shown 2 Use the Torque D...

Page 78: ...m Lenovo Vibrator Assembly Description Reference HSG FRNT RAV BR LDA L5 Kit WHT JR HSG FRNT RAV BR LDA L5 Kit BLU JR RAV Display ASSY LDA L5 KIT AR IN WHT JR RAV Display ASSY LDA L5 KIT AR IN BLU JR 1 HQ20401162000 Motor_12 3x4 6x3 7_AH 28 Use the Plastic Tweezer to place and secure the Vibrator on the location as shown ...

Page 79: ...icted PAGE 79 Do not share without consent from Lenovo USB Grommet Assembly Description Reference XT2045 1 Sub Board CS ASSY DTR BRD RAV BR KB PCBA 36 HQ21405106000 Rubber_Black_USB_DGJR 34 Use the Plastic Tweezer to place and secure the USB Grommet on the Sub Board as shown ...

Page 80: ...dential Restricted PAGE 80 Do not share without consent from Lenovo Water Detection Label Assembly Description Reference XT2045 1 Sub Board CS ASSY DTR BRD RAV BR KB PCBA 36 Use the Plastic Tweezer to place the Water Detection Label WDL on the Sub Board as shown ...

Page 81: ...RAV BR LDA L5 Kit WHT JR HSG FRNT RAV BR LDA L5 Kit BLU JR RAV Display ASSY LDA L5 KIT AR IN WHT JR RAV Display ASSY LDA L5 KIT AR IN BLU JR 1 XT2045 1 Sub Board CS ASSY DTR BRD RAV BR KB PCBA 36 HQ22110563000 screw 38 1 Remove the adhesive liner Use fingers to place the Sub Board on the location as shown 2 Use the Torque Driver with Torx Bit to tighten the white screw as shown ...

Page 82: ...LDA L5 KIT AR IN WHT JR RAV Display ASSY LDA L5 KIT AR IN BLU JR 1 XT2045 1 Main Board 4 64G DS CS XT2045 1 Main Board 4 64G SS CS XT2045 2 Main Board 4 64G DS CS XT2045 6 Main Board 4 64G DS CS ASSY BD KIT RAV BR 4 64 MB 2 XT2045 1 Sub Board CS ASSY DTR BRD RAV BR KB PCBA 36 HQ21300324000 Coaxial cable 30 1 Use the Plastic Tweezer to place the Coax Cable on the Main PCB as shown 2 Use the Plastic...

Page 83: ...oto G8 Level 2 Service and Repair Manual Lenovo Confidential Restricted PAGE 83 Do not share without consent from Lenovo 3 Use fingers to place and secure the Coax Cable in the pocket on the recess of the phone ...

Page 84: ...ard 4 64G SS CS XT2045 2 Main Board 4 64G DS CS XT2045 6 Main Board 4 64G DS CS ASSY BD KIT RAV BR 4 64 MB 2 HQ22002898000 ZQL1883ALTA_FPC 35 1 Use fingers to carefully place the Main Flex on the phone as shown sticky side down Use fingers to press and secure the Link Flex on the Main PCB and Sub Board as shown NOTE Be sure the lines on the Main Flex is oriented in relation to the Front Housing as...

Page 85: ... 10 WARNING Failure to adhere to Safety Critical Note s may increase risk of rupture burning or failure to function safely when used by the customer Refer to the Battery Safety Guidelines CAUTION Handle the Battery Pack with care If dropped to the floor it may be internally damaged and must be scrapped Ensure Battery and its insulation are not damaged e g scratched dented punctured prior to and th...

Page 86: ...o place the Battery on the Front Housing as shown 3 Use fingers to press and secure the Battery BtB Connector as shown 4 Use the Manual Roller to roll over the Battery for 10 cycles to secure the Battery as shown NOTE For each cycle roll the Manual Roller from top to bottom of the Battery and vice versa NOTE Each cycle should last for 3 seconds ...

Page 87: ...tion Reference HSG FRNT RAV BR LDA L5 Kit WHT JR HSG FRNT RAV BR LDA L5 Kit BLU JR RAV Display ASSY LDA L5 KIT AR IN WHT JR RAV Display ASSY LDA L5 KIT AR IN BLU JR 1 HQ20330637000 Speaker Box1712_DS 26 HQ22110563000 screw 38 1 Use fingers to place the Speaker Box on the location as shown 2 Use Torque Driver with Torx Bit to tighten the nine screws as shown ...

Page 88: ... WHT JR RAV Display ASSY LDA L5 KIT AR IN BLU JR 1 XT2045 1 Main Board 4 64G DS CS XT2045 1 Main Board 4 64G SS CS XT2045 2 Main Board 4 64G DS CS XT2045 6 Main Board 4 64G DS CS ASSY BD KIT RAV BR 4 64 MB 2 MDL CAMR 2M sofia after2M L02AA30 Ofilm 16 MDL CAMR 16M sofia after16M F16E10AF Q T 17 MDL CAMR 8M F4H7YCC 18 1 Use fingers to place and secure the Rear Facing Camera on the Main PCB as shown ...

Page 89: ...vo Moto G8 Level 2 Service and Repair Manual Lenovo Confidential Restricted PAGE 89 Do not share without consent from Lenovo 3 Use fingers to place and secure the Rear Facing Camera on the Main PCB as shown ...

Page 90: ... FRNT RAV BR LDA L5 Kit BLU JR RAV Display ASSY LDA L5 KIT AR IN WHT JR RAV Display ASSY LDA L5 KIT AR IN BLU JR 1 XT2045 1 Main Board 4 64G DS CS XT2045 1 Main Board 4 64G SS CS XT2045 2 Main Board 4 64G DS CS XT2045 6 Main Board 4 64G DS CS ASSY BD KIT RAV BR 4 64 MB 2 HQ21910057000 conductive copper foil_DS 11 Use the Plastic Tweezer to place the Front Facing Camera Copper Foil on the Main PCB ...

Page 91: ...Display ASSY LDA L5 KIT AR IN WHT JR RAV Display ASSY LDA L5 KIT AR IN BLU JR 1 XT2045 1 Main Board 4 64G DS CS XT2045 1 Main Board 4 64G SS CS XT2045 2 Main Board 4 64G DS CS XT2045 6 Main Board 4 64G DS CS ASSY BD KIT RAV BR 4 64 MB 2 HQ21405102000 Rubber_Black_TOF_DGJR 31 Make sure the wide side of the Grommet is faced upwards while inserting the TOF Grommet as shown Use the Plastic Tweezer to ...

Page 92: ... WHT JR HSG FRNT RAV BR LDA L5 Kit BLU JR RAV Display ASSY LDA L5 KIT AR IN WHT JR RAV Display ASSY LDA L5 KIT AR IN BLU JR 1 XT2045 1 Main Board 4 64G DS CS XT2045 1 Main Board 4 64G SS CS XT2045 2 Main Board 4 64G DS CS XT2045 6 Main Board 4 64G DS CS ASSY BD KIT RAV BR 4 64 MB 2 HQ21405107000 Rubber_Black_Rear camera8M 4 Use the Plastic Tweezer to place the Rear Facing Camera Grommet on the Mai...

Page 93: ...RNT RAV BR LDA L5 Kit BLU JR RAV Display ASSY LDA L5 KIT AR IN WHT JR RAV Display ASSY LDA L5 KIT AR IN BLU JR 1 XT2045 1 Main Board 4 64G DS CS XT2045 1 Main Board 4 64G SS CS XT2045 2 Main Board 4 64G DS CS XT2045 6 Main Board 4 64G DS CS ASSY BD KIT RAV BR 4 64 MB 2 FINGERPRT SCANNER RAV R Neue Blue FPC152 FINGERPRT SCANNER RAV R white FPC1520 O 25 Use fingers to place the Finger Print Flex on ...

Page 94: ...94 Do not share without consent from Lenovo Insulating Tape Assembly Description Reference HQ21810404000 PCB bracket DGJR HQ21810402000 PCB bracket_Camera deco 13 HQ22231933000 Insulating tape_DS 32 Use the Plastic Tweezer to place and secure the Insulating Tape on the location as shown ...

Page 95: ...t Assembly Description Reference HSG FRNT RAV BR LDA L5 Kit WHT JR HSG FRNT RAV BR LDA L5 Kit BLU JR RAV Display ASSY LDA L5 KIT AR IN WHT JR RAV Display ASSY LDA L5 KIT AR IN BLU JR 1 HQ21810404000 PCB bracket DGJR HQ21810402000 PCB bracket_Camera deco 13 HQ22110563000 screw 38 Use fingers to place the PCB Bracket on the location as shown ...

Page 96: ... WHT JR RAV Display ASSY LDA L5 KIT AR IN BLU JR 1 HQ21810404000 PCB bracket DGJR HQ21810402000 PCB bracket_Camera deco 13 HQ21212634000 Single camera lens_BLK_ZB 23 HQ21212637000 Double camera lens_BLK_ZB HQ21212676000 Double_camera_lens_ZB 24 1 Use the Plastic Tweezer to place the Rear Facing Camera Lens adhesive as shown and peel off the liner 2 Use the Plastic Tweezer to place the Rear Facing ...

Page 97: ...Description Reference HSG FRNT RAV BR LDA L5 Kit WHT JR HSG FRNT RAV BR LDA L5 Kit BLU JR RAV Display ASSY LDA L5 KIT AR IN WHT JR RAV Display ASSY LDA L5 KIT AR IN BLU JR 1 HQ21810404000 PCB bracket DGJR HQ21810402000 PCB bracket_Camera deco 13 HQ22202564000 Conductive foam_DS Use the Plastic Tweezer to place the Finger Print Sensor Foam on the Main PCB as shown ...

Page 98: ...rom Lenovo Insulating Tape Assembly Description Reference HSG FRNT RAV BR LDA L5 Kit WHT JR HSG FRNT RAV BR LDA L5 Kit BLU JR RAV Display ASSY LDA L5 KIT AR IN WHT JR RAV Display ASSY LDA L5 KIT AR IN BLU JR 1 HQ22231978000 Insulating tape 7 Use the Plastic Tweezer to place the Insulating Tape on the location as shown ...

Page 99: ... DGJR HSG BAT CVR RAV BR BAT CVR KIT BE JR HSG BAT CVR RAV BR BAT CVR KIT WH JR 20 HQ22261518000 Battery cover graphit_ZYTS 19 1 Use the Plastic Tweezer to place the Battery Cover adhesive on the location as shown and peel off the liner 2 Use the Plastic Tweezer to place the Battery Cover Graphite on the location as shown and peel off the liner 3 Use the Plastic Tweezer to place the Battery Cover ...

Page 100: ...10404000 PCB bracket DGJR HQ21810402000 PCB bracket_Camera deco 13 HQ20330637000 Speaker Box1712_DS 26 HQ20746477000 Battery cover blue DGJR HQ20746474000 Battery cover white DGJR HSG BAT CVR RAV BR BAT CVR KIT BE JR HSG BAT CVR RAV BR BAT CVR KIT WH JR 20 FINGERPRT SCANNER RAV R Neue Blue FPC152 FINGERPRT SCANNER RAV R white FPC1520 O 25 1 Use the Plastic Tweezer to place the FPS adhesive on the ...

Page 101: ...L5 Kit WHT JR HSG FRNT RAV BR LDA L5 Kit BLU JR RAV Display ASSY LDA L5 KIT AR IN WHT JR RAV Display ASSY LDA L5 KIT AR IN BLU JR 12 HQ20746477000 Battery cover blue DGJR HQ20746474000 Battery cover white DGJR HSG BAT CVR RAV BR BAT CVR KIT BE JR HSG BAT CVR RAV BR BAT CVR KIT WH JR 20 Use fingers to place Battery Cover on the Front Housing of the phone press it gently on all side to secure it ...

Page 102: ...t consent from Lenovo IMEI Label Assembly Description Reference HQ23800024000 Dual SIM tray_HL HQ23800025000 Dual SIM tray_Blue_NCVM_HL HQ23800019000 Single SIM tray_T Flash_HL HQ23800026000 Single SIM tray_T FLASH_HL 21 IMEI LABEL REV2 Use the Plastic Tweezer to place the IMEI Label on the SIM tray as shown ...

Page 103: ... JR RAV Display ASSY LDA L5 KIT AR IN BLU JR 1 HQ20746477000 Battery cover blue DGJR HQ20746474000 Battery cover white DGJR HSG BAT CVR RAV BR BAT CVR KIT BE JR HSG BAT CVR RAV BR BAT CVR KIT WH JR 20 HQ23800024000 Dual SIM tray_HL HQ23800025000 Dual SIM tray_Blue_NCVM_HL HQ23800019000 Single SIM tray_T Flash_HL HQ23800026000 Single SIM tray_T FLASH_HL 1 Insert the SIM Tray in the transceiver as s...

Reviews: