


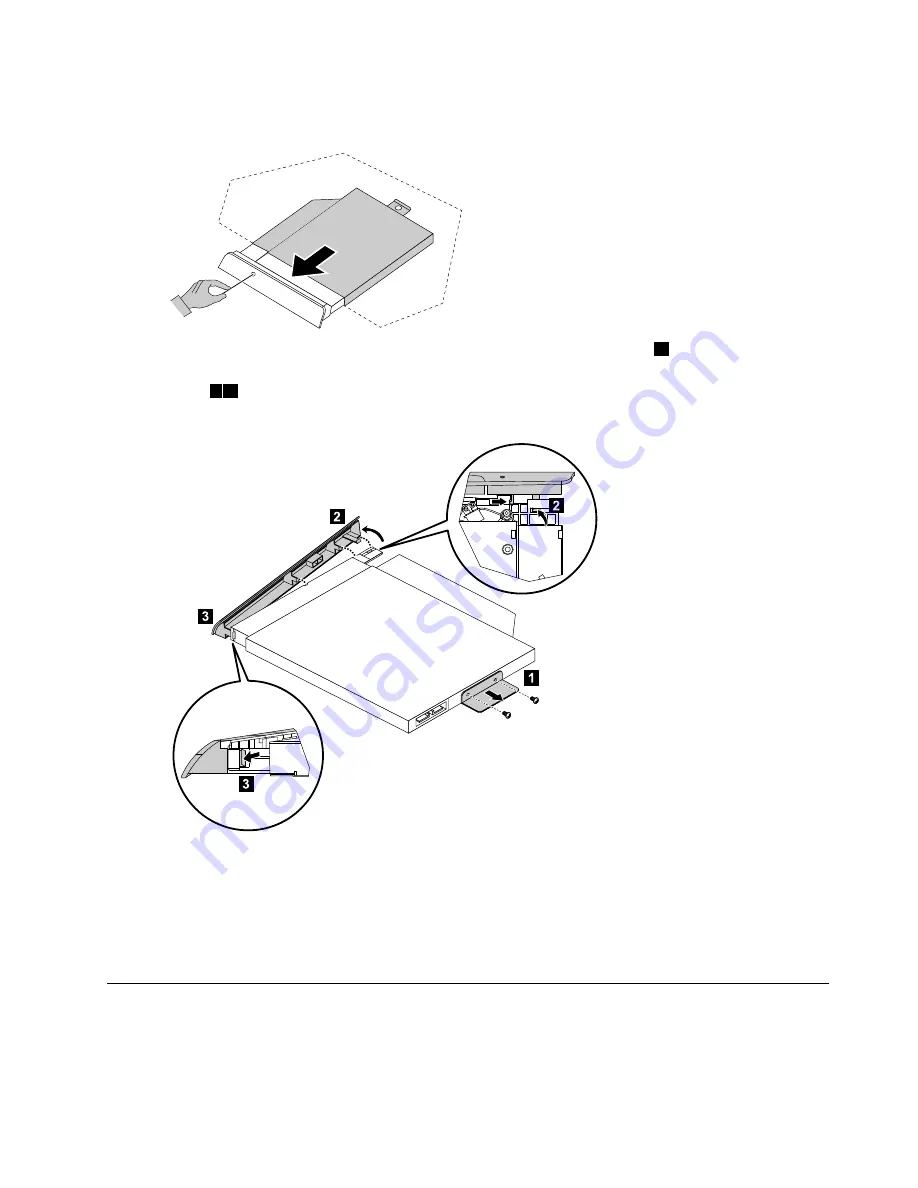
Step 8.
Push a small iron stick (paper clip) into the small hole on the optical drive cover so that the disk
springs out as shown.
Step 9.
Remove the 2 screws that secure the optical drive to the metal bracket.
1
Step 10. Use a small flat head screwdriver to press and push out the pins that secure the cover to the
disk.
2 3
Step 11. Separate the cover from the defective optical drive.
Step 12. To install the new optical drive:
a.
Align the new optical drive with the cover, and then push the cover back into position.
b.
Attach the bracket to the optical disk drive.
c.
Slide the new optical drive into the drive bay.
Step 13. Reattach the foot cover and stand base.
Removing the stand holder
Note:
Turn off the computer and wait 3 to 5 minutes to let it cool down before removing the cover.
Chapter 7
.
Replacing hardware
29
Summary of Contents for ideaCentre C470
Page 2: ......
Page 3: ...Lenovo C470 All In One Computer Hardware Maintenance Manual Machine Types 10170 F0AR C470 ...
Page 6: ...iv Lenovo C470 All In One ComputerHardware Maintenance Manual ...
Page 8: ...2 Lenovo C470 All In One ComputerHardware Maintenance Manual ...
Page 16: ...10 Lenovo C470 All In One ComputerHardware Maintenance Manual ...
Page 18: ...12 Lenovo C470 All In One ComputerHardware Maintenance Manual ...
Page 24: ...18 Lenovo C470 All In One ComputerHardware Maintenance Manual ...
Page 49: ...Step 11 Push the middle case feet outward as shown Chapter 7 Replacing hardware 43 ...
Page 58: ...52 Lenovo C470 All In One ComputerHardware Maintenance Manual ...