background image

B613


•8• 

二  Recording 

Reference:  short-  press  means  press  the  button  ,then 

loose  it;long-press  means  press  the  button  for  2-3 

seconds and then loose it. 


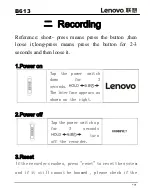
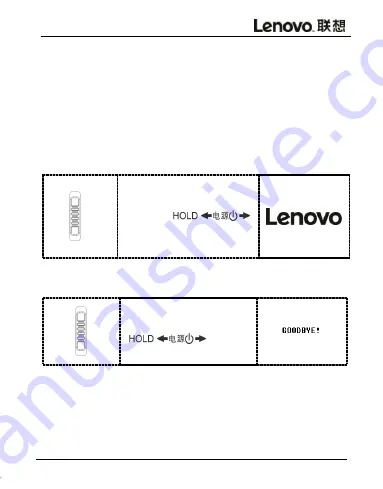
1.Power on


Tap  the  power  switch 
down 

for 

seconds.
The interface appears as 
shown on the right. 


2.Power off


Tap the power switch up 
for 

seconds 

turn 

off the recorder. 


3.Reset


If the recorder crashes, press "reset" to reset the system 

and if it still cannot be boomed , please check if the 

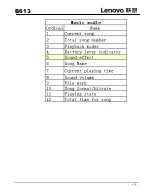
音乐模式 


号 

名称 

当前播放曲目显示 

总曲目数 

播放模式显示 

电池电量显示 

音效显示 

歌曲名显示 

当前播放时间显示 

音量显示 

书签段落 

10  歌曲格式及比特率显示 
11  播放状态显示 
12  歌曲总时间显示 

Summary of Contents for B613

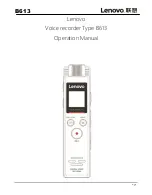
Page 1: ...B613 1 Lenovo Voice recorder Type B613 Operation Manual ...

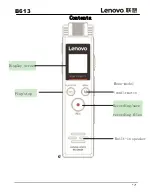
Page 2: ...B613 2 Contents e Display screen Built in speaker Play stop Menu model confirmatio n Recording save recording files ...

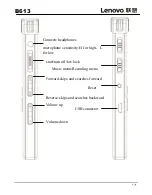
Page 3: ...n off key lock Reset Connects headphones microphone sensitivity H for high L for low USB connector Music menu Recording menu Volume up Volume down Reverse skips and searches backward Forward skips and searches forward ...

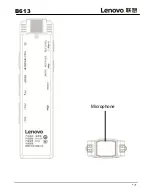
Page 4: ...B613 4 Microphone ...

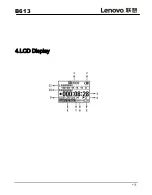
Page 5: ...B613 5 4 LCD Display ...

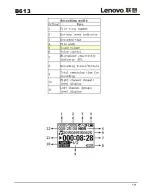
Page 6: ...B613 6 ...

Page 7: ...B613 7 ...

Page 8: ...r 2 3 seconds and then loose it 1 Power on Tap the power switch down for 3 seconds The interface appears as shown on the right 2 Power off Tap the power switch up for 3 seconds turn off the recorder 3 Reset If the recorder crashes press reset to reset the system and if it still cannot be boomed please check if the ...

Page 9: ... during recording Recording dynamic level moves with sound volume 1 One switch Power on recording In the power off state long press the recording button for 3 seconds makes the machine automatically turn on directly into recording state 2 Recording file of B613 is named after year month date hour minute and second 20150518141520 WAV 5 Pause Stop Recording 1 Pause ...

Page 10: ...ing state short press the Play Stop button to sop current recording and save recording files 6 Microphone sensitivity In recording state tap the microphone sensitivity switch RECLEVEL to the position of H for microphone high sensitivity mode Tap microphone sensitivity switch RECLEVEL to the position of L for microphone low sensitivity mode H for high sensitivity L for low sensitivity ...

Page 11: ...AY STOP button to play 三 File management and File play 1 Erasing files Locate the file you want to erase in the state of PAUSE or STOP long press MENU button to select the Delete File menu and then press MENU button to enter Delete File Model There will be the option of Delete a single file and Delete all files on the display screen Press REW or FF to switch At this time press MENU button to delet...

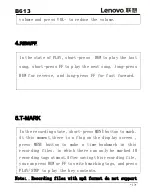
Page 12: ...he longer the time required 2 Play Pause Short press PLAY STOP to start playing recording files or music files Press PLAY STOP to pause playing files Note When headphone is plugged in sound output from the speaker will be muted when unplugged the speaker makes sounds 3 Volume Control In the state of PLAY or STOP press VOL to increase the ...

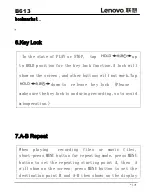
Page 13: ...5 T MARK In the recording state short press MENU button to mark At this moment there is a flag on the display screen press MENU button to make a time bookmark in this recording files in which there can only be marked 10 recording tags at most After saving this recording file you can press REW or FF to switch marking tags and press PLAY STOP to play the key contents Note Recording files with mp3 fo...

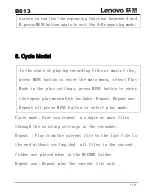
Page 14: ...p down to release key lock Please make sure the key lock is on during recording so to avoid misoperation 7 A B Repeat When playing recording files or music files short press MENU button for repeating mode press MENU button to set the repeating starting point A then A will show on the screen press MENU button to set the destination point B and A B then shows on the display ...

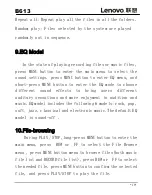
Page 15: ...de in the play settings press MENU button to enter the repeat play menu which includes Repeat Repeat one Repeat all press MENU button to select play mode Cycle mode User can repeat a single or more files through the existing settings in the recorder Repeat Play from the current file to the last file to the end without cycling And all files in the current folder are played when in the RECORD folder...

Page 16: ...e different sound effects to bring users different auditory sensations and more enjoyment in audition and music EQ model includes the following 6 models rock pop soft jazz classical and electronic music The default EQ model is sound off 10 File browsing During PLAY STOP long press MENU button to enter the main menu press REW or FF to select the File Browse menu press MENU button menu to browse fil...

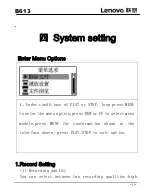
Page 17: ...PLAY or STOP long press MENU to enter the menu option press REW or FF to select menu module press MENU for conformation shown in the interface above press PLAY STOP to exit option 1 Record Setting 1 Recording quality You can select between two recording qualities high ...

Page 18: ...long time recording Note In order to ensure a better recording effect WAV format is strongly suggested 2 Segmental Recording The segmented recording can be set OFF or ON which includes 30 minutes 60 minutes and 120minutes If the segmented recording is on the recording file can be saved according to the time setting selected 3 Sound Control Model 1 Long press MENU button to enter the menu option un...

Page 19: ...turned on the voice control sensitivity mode will work and the VOX will appear on the display screen There are five lever to select The higher the level is the higher the sensitivity is The higher the ambient noise is the lower the setting sensitivity should be The sensibility needs to be set according to different environment If the sensitivity is not the desired value the sound control sensitivi...

Page 20: ...r menu option under operation condition short press REW or FF button to select recording settings and press MENU to enter menu option then select recording timing and then press MENU to confirm short press REW or FF button to select Timing on off Timing cycle Start time End time Recording Timing Cycle press MENU to select and press PLAY STOP to cancel 2 System setting 1 Shutdown Timing ...

Page 21: ...matic power saving function If the unit stays under stop or the pause condition for 2minutes without any operation the key system will shut down automatically excl the recording pause condition 2 Backlight timer This unit has the screen backlight timing function with selections of 10 seconds 20 seconds 30 seconds from with you can turn off the backlight and the constant backlight function To save ...

Page 22: ...tings and need to be adjusted manually When entering the time setting mode press REW or FF to switch values press VOL or VOL to adjust hours and minutes press MENU to enter date setting mode press REW or FF to switch values press VOL or VOL to switch year month day press the MENU button for confirmation 4 Language selection There are simplified Chinese traditional Chinese English and other languag...

Page 23: ...matting menu pressing MENU button and then the screen shows Formatting or not and then press REW or FF button to switch Yes or No Press YES to format the recorder press MENU button to confirm formatting press PLAY STOP to cancel Note Once the recorder is formatted all the memory will be emptied and can not be recovered please backup file 7 Factory Setting Select this menu press MENU button then th...

Page 24: ...NU to restore to factory settings press PLAY STOP to exit Specification table 8GB MP3 128Kbps 64Kbps Time 8730minutes 17460minutes WAV 1536Kbps Time 720 minutes Specification table 16GB MP3 128Kbps 64Kbps Time 17460minutes 34920minutes ...

Page 25: ...B613 25 WAV 1536Kbps Time 1440minutes Note Above recording time is the maximum recording time of B 613 storage capacity not the continuous recording time of battery 五 Connect computer 1 Connect computer ...

Page 26: ...nload and upload files from the computer please connect the USB Jack in PC and B613 with equipped USB cable which will automatically boot after the connection During the first connection there will be Create a driver repository Find new hardware etc showing on the computer B613 can be automatically detected The display screen is shown on the right indicating that the connection is successful ...

Page 27: ... connecting cable as follows Users under WINDOW 2000 and above WINDOW 2000 follow the following steps Click the green arrow in the lower right corner of the computer Click STOP USB Disk Driver When the dialog box of safely remove hardware appears click OK and then pull out the USB cable ...

Page 28: ...icator will blink and the battery is full the full charge icon will appear It will take about 4 hours to full fill the built in lithium battery Note If the adapter is used please select a charger with the maximum output of 5 V 1 A 5Fault diagnosis Why won t the recorder activate after pressing on power button Reason and solution Lithium battery is out of power please charge it in time If the recor...

Page 29: ...Why sometimes inserting and plugging voice recorder will cause exception on the computer side Reason and solution Mainly caused by plugging USB during file transfer please do not disconnect from computer during file transfer to avoid exceptions on the computer side Why the total memory does not appear in accordance with the actual memory Reason and solution Mainly because that there needs memory t...

Page 30: ...r work normally When compressing files Please select the coding mode of MPEG I Layer 3 6 Trouble shooting Why the files can t be erased through management software Or when erasing a file Delete failed or Delete error appears on the screen Check My Computer to check if the file is marked read only If do modify t read only to be archived and then the file can be erased As a removable storage device ...

Page 31: ... Resolution ratio 96 64 LCD Battery Built in lithium battery 3 7V 320mAh Microphone Built in microphone Condenser Microphone Noise signal ratio NSR 80dB Compression speed Maximum 24BIT 48KHz for WAV maximum16BIT 48KHz for APE FLAC Recording quaulity 1536Kbps 128Kbps 64Kbps Recording format WAV MP3 Recording sampling rate 8KHz 48KHz File system FAT32 Working temperature 5 40 Connecting USB ...

Page 32: ...recording time at room temperature About 15hours Backlight setting 30seconds WAV 1536Kbps System languages Simple Chinese default English Traditional Chinese Net Weight 60 g Battery included Note If there is any change in the content of this manual the changed content shall prevail without prior notice ...

Reviews: