8200 Series Converged Network Adapter and 3200 Series Intelligent Ethernet Adapter
Page
56
3. Select the
NIC Partitioning
tab, and then click the
Management
sub-tab. The NIC Partitioning
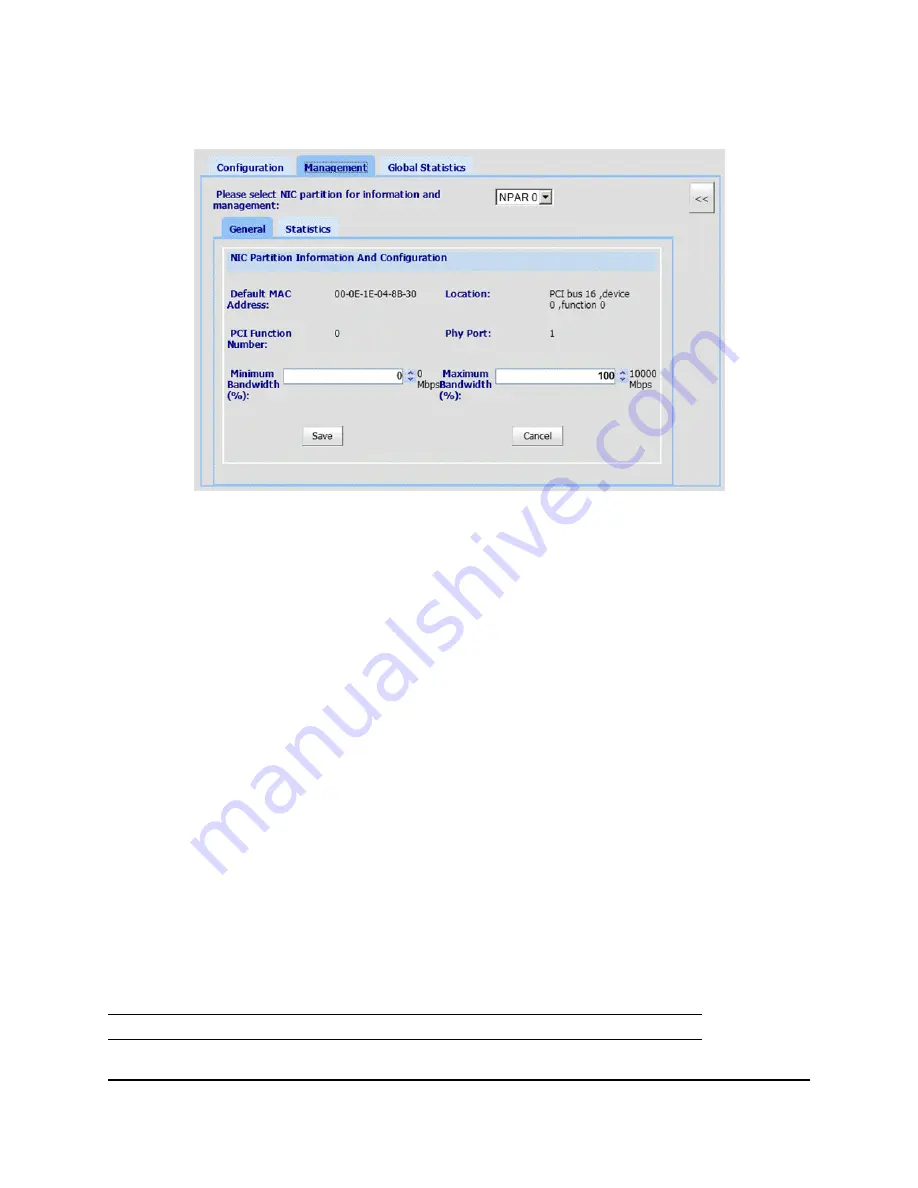
Management General page displays configuration details that apply to the selected NPAR (Figure 33).
Figure 33: NIC Partitioning—General Management Page
4. Click the down arrow and select the NIC partition (
NPAR0
,
NPAR1
,
NPAR2
, or
NPAR3
) from the
drop-down list.
Information and configuration fields related to the selected NIC partition include:
—
Default MAC Address.
The MAC address set at the manufacturer.
—
Location.
The logical location in the system: PCI bus number, device number, and function
number.
—
NPAR PCI Function Number.
The function number (
0
,
1
,
2
,
3
,
4
,
5
,
6
, or
7
) of the eight PCIe
function numbers claimed by the adapter.
—
NPAR Function Type.
This field correlates to the personality of the selected NPAR (PCIe) function:
NIC
,
iSCSI
, or
FCoE
.
—
Minimum Bandwidth (%
).
Use the UP ARROW and DOWN ARROW keys to scroll between
0
%
to
100
% to set the bandwidth you want to guarantee for data sent over the selected partition. Each
additional percent increments the bandwidth by 100Mbps. For example, setting the minimum
bandwidth to 5 percent guarantees sending and receiving data over the selected port at 500Mbps.
—
Maximum Bandwidth (%).
The maximum allowed bandwidth is specified as a percentage of the
link speed. Use UP ARROW and DOWN ARROW keys to scroll between
0
% to
100
% to set the
maximum bandwidth for data sent over the selected partition. Each additional percent increments
the bandwidth by 100Mbps. For example, setting the maximum bandwidth to 100 percent allows for
sending and receiving data over the selected partition at up to 10,000Mbps.
5. Repeat the previous step to configure the minimum and maximum bandwidth on the other partitions.
6. When you are finished making changes, click
Save
to save any changes to the advanced parameters
of the adapter. The Security Check dialog box may appear. In the
Enter Password
box, type the
password, and then click
OK
.
Note:
The settings are persistent across reboots.
Summary of Contents for 3200 Series
Page 8: ...8200 Series Converged Network Adapter and 3200 Series Intelligent Ethernet Adapter Page viii ...
Page 14: ...8200 Series Converged Network Adapter and 3200 Series Intelligent Ethernet Adapter Adapter ...
Page 18: ...8200 Series Converged Network Adapter and 3200 Series Intelligent Ethernet Adapter Page xviii ...
Page 34: ...8200 Series Converged Network Adapter and 3200 Series Intelligent Ethernet Adapter Page 16 ...
Page 110: ...8200 Series Converged Network Adapter and 3200 Series Intelligent Ethernet Adapter Page 92 ...
Page 116: ...8200 Series Converged Network Adapter and 3200 Series Intelligent Ethernet Adapter Page 98 ...
Page 130: ...8200 Series Converged Network Adapter and 3200 Series Intelligent Ethernet Adapter Page 112 ...
Page 131: ......
Page 132: ... ...


