3.
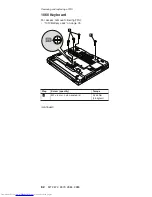
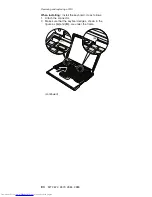
Press
the
keys
indicated
by
arrows
to
latch
the
keyboard
firmly
in
place.
4.
To
make
sure
that
the
front
side
of
the
keyboard
is
housed
firmly,
gently
press
the
keys
with
your
thumbs
and
try
to
slide
the
keyboard
toward
you.
5.
Secure
the
keyboard
by
tightening
the
screws
from
the
bottom
side
of
the
computer.
Removing
and
replacing
a
FRU
ThinkPad
X30,
X31,
X32
85
Summary of Contents for 2672PXU - THINKPAD X31 PM-1.6G 40GB
Page 6: ...2 MT 2672 2673 2884 2885 ...
Page 130: ...3 4 6 5 continued Removing and replacing a FRU 126 MT 2672 2673 2884 2885 ...
Page 133: ...3 4 6 9 8 7 continued Removing and replacing a FRU ThinkPad X30 X31 X32 129 ...
Page 174: ...LCD FRUs 12 1 in XGA TFT 1 3 6 2 4 5 7 Parts list 170 MT 2672 2673 2884 2885 ...


