background image

- 20 - 


MENU SETUP     

2).Subwoofer 

this option is effective only in  case of 5.1CH output. Select ON and the unit  will automatically 

detect whether there is bass input or not. The bass output will result if there is sound input. In 

OFF status, there will be no bass output even though there is bass input. 

3). Bass Mode 

this  function  is  effective  only  in  case  of  5.1  CH  output  to  control  the  subwoofer,  includes  two 

options, ON and OFF. 

4). Centre Delay & Rear Delay 

this two are effective only in case of 5.1 CH output to set centre delay and rear delay.  

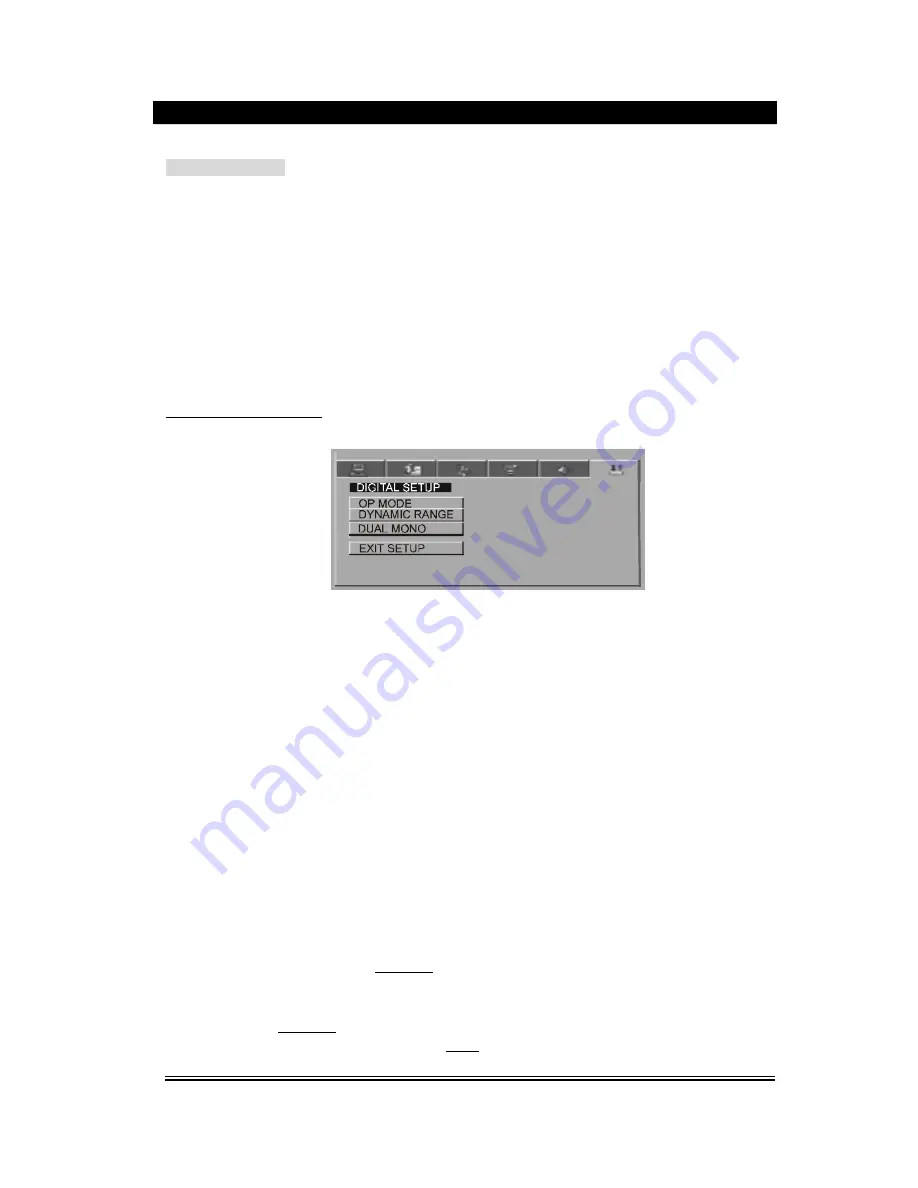
DIGITAL SETUP PAGE


1)  Op Mode 

(1)  Line  Output:  to  compress  the  input  signal  linearly,  lower  in  volume  and 

applicable to night. 

(2)  R F Remod: no compression for the input signal, higher volume and applicable 

to day. 

2). Dynamic Range  

When the output mode is Line Output, this unit will automatically adjust the linear 

compression  ratio  to  acquire  different  compression  effect  of  signals.  When  the 

option FULL is chosen, the peak-peak value of audio signal will be the minimum; 

when OFF is chosen, it will be the maximum. 

3). Dual Mono 

to  set  the  output  mode  for  left  and  right  audio  signal,  when  the  downmix  is  set,  the 

played  disc  must  be  5.1  CH  format.  Available  options:  Stereo,  Downmix,  left 

soundtrack and right soundtrack. It is mainly aimed at the mode selection of Karaoke 

of AC-3.  

The pictures above will appear on the TV screen in case of menu setup. Every time a picture is chosen, 

you can use the direction buttons or Play/Enter


button to switch over to a certain picture you are to set, 

then use the direction buttons to move the cursor onto a specific directory, press the left direction button 

to enter the subdirectory and press the up / down direction button to change various status of a specific 

item. At last, press Play/Enter


button to make the setup effective. And press the left direction button to 

return back to the upper level directory. Press the Setup button to exit the menu setup page.  

Summary of Contents for MDV-3

Page 1: ... 1 MDV 3 Home Cinema Set ...

Page 2: ... accessories in the same place Do not place objects filled with liquids such as vases on this unit Do not place naked flame sources such as lighted candles on this unit Do not interfere with the normal ventilation to this unit If your unit is damaged or cannot be operated please immediately notify your local dealers We recommend that you keep the original cartons and packing materials intact for f...

Page 3: ... 1 CONTENT 2 ACCESSORIES 2 WARNING 3 PANEL 4 REMOTE CONTROLLER 5 CONNTECTION WITH TV 6 CONNECTION WITH AMPLIFIER 7 SYSTEM CONNECTION 8 BASIC OPERATION 9 14 MENU SETUP 15 20 SPECIFICATION 21 TROUBLESHOOTING 22 ACCESSORIES ...

Page 4: ...otect power cable Avoid high Unplug the set from the wall outlet Pressure and do not step on it when you do not use it for a long Do not pull it or bend it excessively time An exclamation mark within an equilateral triangle is intended to alert the user to the presence of important operating instructions within the literature accompanying the appliance A lightning flash with arrowhead symbol withi...

Page 5: ... VOLUME 11 CENTRAL SUBWOOFER OUTPUT 12 L R SURROUDING AUDIO OUTPUT 13 L R FRONT AUDIO OUTPUT 14 S VIDEO OUTPUT 15 VIDEO OUTPUT 16 Pb Cb Y Pr Cr CHROMATISM OUTPUT 17 OPTICAL OUTPUT 18 COAXIAL OUTPUT 19 SCART INTERFACE 20 SUBWOOFER OUTPUT 21 POWER SUPPLY INPUT 22 TAPE AUDIO INPUT 23 PC AUDIO INPUT 24 AM ANTENNA 25 FM ANTENNA 26 LEFT SPEAKER OUTPUT 27 RIGHT SPEAKER OUTPUT ...

Page 6: ...th foreign matters it may result in the malfunction in signal reception or not at all 4 The remote control function may be affected under the strong interference signals such as power supply and other strong high frequency signals T F BAS BAS TRE TRE DISPLAY INPUT INT P SCAN MUTE FM AM SEARCH FF TUNE FR TUNE NUMBER TITLE MENU OSD AUDIO PAUSE DIRECTION SETTUP BASS SUBWOOFER ON OFF DISPLAY BASS PAL ...

Page 7: ...t which can directly be connected with computer or TV with such interface Note 1 It is a must to turn off the switch of both player and TV before they are connected and unplug the power line from the socket 2 You may adjust the corresponding system according to your TV system while watching various discs 3 If there are multiple connections between video player and TV please select one and unplug o...

Page 8: ...e by pressing the direction buttons then move the cursor to Audio Out select SPDIF RAW or SPDIF PCM press Play Enter button to finish Press setup button again to exit this setup Setup of 5 1 CH Analogue Audio Output Connect the FL FR SL SR CEN SW jack to the amplifier In the status of play or stop press setup button on the remote controller to open the system setup page switch to loudspeaker setup...

Page 9: ... 9 SYSTEM CONNECTION Please refer to the following figure to connect your acoustic equipment To keep all the connection correctly and firmly Power supply will be connected finally ...

Page 10: ...T button to select the multiple output modes such as left soundtrack right soundtrack stereo etc Press the button once to switch one soundtrack Note In playing DVD SVCD press this button and it will no action FAST FORWARD FAST BACKWARD In play status press Tune button or Tune there will be quadplex speeds of fast forward and fast backword shown as follows FORWARD X 2 FORWARD X 4 FORWARDX 8 FORWARD...

Page 11: ...hapter Repeat Title 2 As for CD VCD CD R etc successively press this button the screen will separately display Repeat OFF Repeat One Repeat All 3 As for Mp3 JPEG etc there are options Rep One Rep Menu Rep All A B REPEAT In play status press Rep A B button to realize the specific section repeat that is press this button once at the beginning of the section i e A and press it again at the end of the...

Page 12: ...CTION In play status successively press Angle button you can enjoy the same action shot in different angles The function depends on the discs VOLUME ADJUSTMENT You can press the VOL button to turn up or down the volume of this unit DIRECTION BUTTONS Press the direction buttons to move the cursor to select pictures or menu NUMBER BUTTONS 1 In playing songs press number buttons to directly select th...

Page 13: ... keys to move the cursor to a certain directory and press Play Enter button to enter the directory Press the direction buttons to enter the subdirectory or the file area select a song with the cursor press Play Enter button to play the song During playing press or button to select other songs under the current directory During playing press the left direction button the icon will skip to the direc...

Page 14: ... TITLE while more section will be given under each TITLE which are called Chapters There are some songs in one chapter During playing DVD discs press the Menu button the TITLE button will appear on the TV screen Available for the DVD discs that contain more than one title menu You can use the direction buttons to move the cursor to the desired title menu press Play Enter button to play it If the t...

Page 15: ...wn 4 Automatically search bands press the Search button this unit will start to search bands from the lowest part to highest part automatically Meanwhile the searched bands will be saved orderly Press the button again to stop searching 3 Save Bands Press the Save button will appear on the VFD that means that saving the current frequency of band For example If you want to save 99 3 MHz in 28th plea...

Page 16: ...can be chosen if Y Cb Cr are connected with TV 2 P SCAN this option can be chosen when Y Pb Pr are connected with TV and the TV is set in P SCAN mode NOTE only when the TV has progressive scan function you can use P SCAN 4 TV Type please select the right screen type according to your TV including 3 options 4 3 LB mailbox format the picture data will panoramic and scanning format will be played in ...

Page 17: ...t the language for menu and other screen displays includes English Chinese German Spanish French Portuguese Italian Dutch 2 Audio Language When play DVD disc the player will automatically play the pre selected language includes Chinese English Japanese French Spanish Portuguese Latin and German If there is no such option in the disc the default language of the disc will be played 3 Subtitle Langua...

Page 18: ...amplifier must have the decoding function for Dolby DTS and MPEG SPDIF PCM this option can be chosen when the payer is connected with the digital stereo amplifier with 2 channel When play the Dolby MPEG discs the coaxial or optical output port will output 2 channel signal which is modulated by PCM 2 Prologic It will not take effect unless you set the Downmix of loudspeaker setup page to be 5 1 CH ...

Page 19: ...turation of the screen press the up down direction button to adjust the saturation press left direction button to exit LOUDSPEAKER SETUP PAGE 1 Downmix 1 LT RT when your played disc has the prologic dolby stereo sound effect select this option then the disc signal will be decoded by the decoding system inside the player to present the real to life effect like a theatre 2 Stereo when use 5 1 CH out...

Page 20: ... to acquire different compression effect of signals When the option FULL is chosen the peak peak value of audio signal will be the minimum when OFF is chosen it will be the maximum 3 Dual Mono to set the output mode for left and right audio signal when the downmix is set the played disc must be 5 1 CH format Available options Stereo Downmix left soundtrack and right soundtrack It is mainly aimed a...

Page 21: ...the screen Press the direction button to switch over to the interface for System Setup as shown in the following figure 2 Press the direction button to move the cursor to the Password option press the direction button or Play Enter button to enter the subdirectory then use the number button to enter the password the password upon delivery is 0000 Press the Play Enter button for confirmation 3 Afte...

Page 22: ...mat MPEG 1 MPEG 2 PCM STEREO Signal Output Video system NTSC PAL PAL60 AUTO Video output 1 0 V p p Audio 2V RMS for 5 1 CH and Stereo Input Joint TAPE PC Power Supply AC220V 50Hz Max Power 100W Frequency Response 3 dB 20 Hz 20 KHz Audio S N 90 dB weight A Operating Condition Temperature 5 35ºC Operating status Level Note The specification is for reference only subject to change without prior notic...

Page 23: ...nu is displayed Check if there is menu recorded in this disc Play mode is different from what has been chosen in the SETUP MENU If the disc has no corresponding function codes some function selected in the SETUP MENU may not work properly Picture distortion or no colour displayer The TV system or video output of this player is not the same sd the TV set please reset the TV system No picture is pro...

Page 24: ... 24 ...

Reviews: