background image

OSD Manual

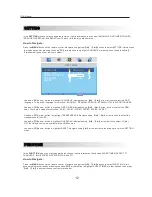
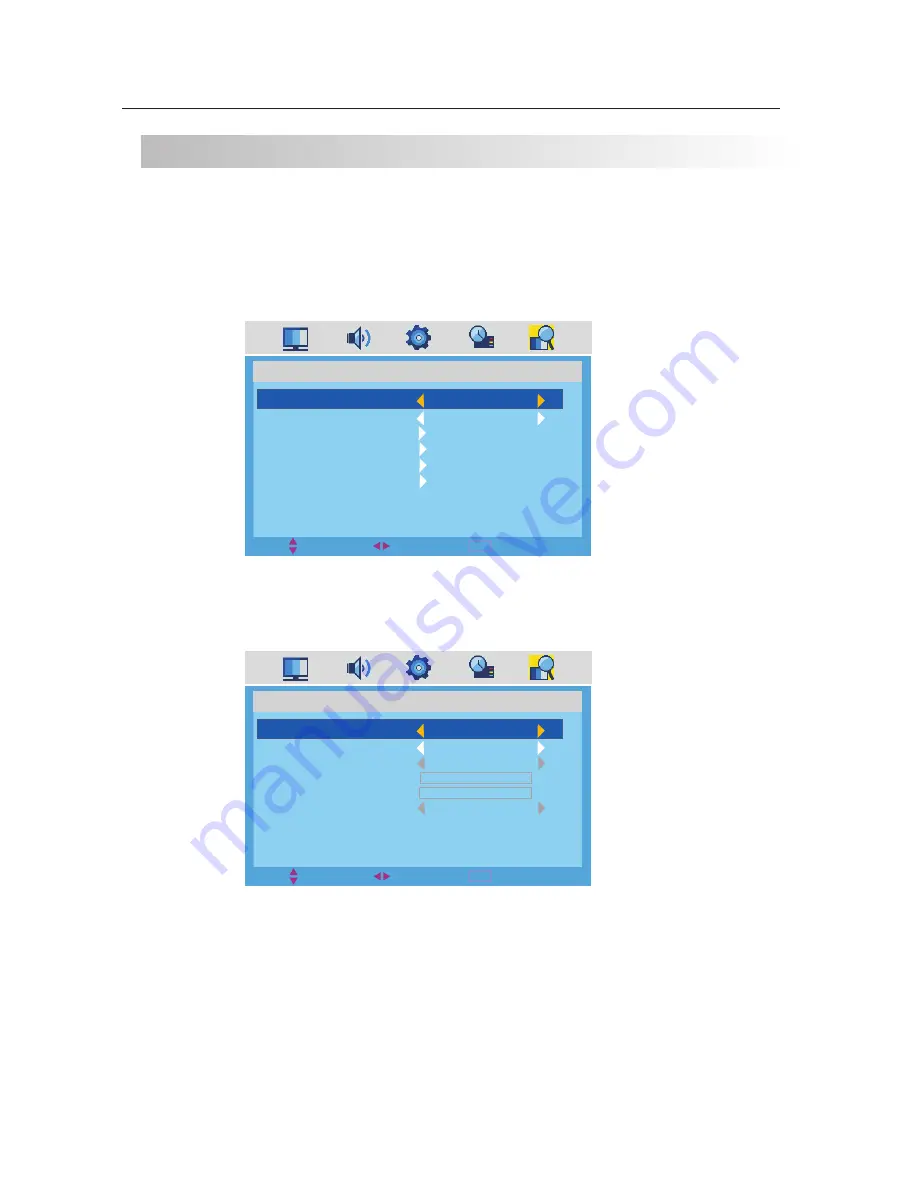
CHANNEL

In the 

CHANNEL

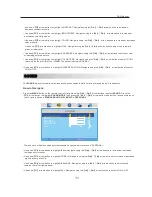
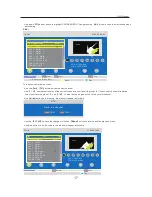
 menu you may change the channel set up of preferences in DTV that include COUNTRY, AUTO SCAN, 

MANUAL, PROGRAM, PROGRAM EDIT, PARENTAL and CI MENU. 

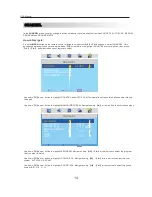
How to Navigate: 

Press the 

MENU

 button on the remote control. Navigate using arrow

buttons to select CHANNEL. Gain 

access to display options by pressing the down

arrow button to highlight COUNTRY or other options, then press

arrow buttons on your remote to select. 

◄ 

 /

 ►

◄ 

 /

 ►

】 

MENU

MOVE

EXIT

SELECT

CHANNEL

COUNTRY

AUTO SCAN

LCN

MANUAL PROGRAM
PROGRAM EDIT
CI MENU

          UK


          ON


 ·

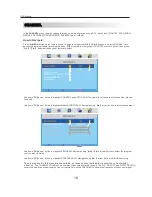
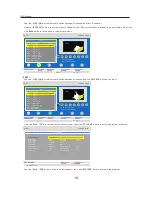
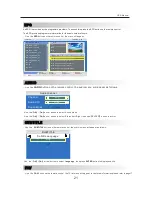
Use down

arrow  button to highlight MANUAL PROGRAM. Navigate using 

 ► 

arrow  button to enter the submenu.

 ·

Use down

arrow  button to highlight COUNTRY and AUTO SCAN. The operation of these two optins can be referred

   to page 9.

MENU

MOVE

EXIT

SELECT

CHANNEL

PROGRAM

START SEARCH

CHANNEL FOUND
SIG. QUALITY
SIG. STRENGTH
FREQUENCY

            22
        

BEGIN


AUTO        

                           0
                           0
        474.00                 
                           

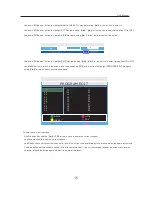
 ·

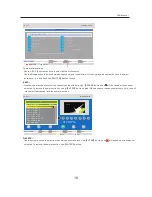
Use down

arrow  button to highlight PROGRAM. Navigate using 

 /

 ► 

arrow  button to select the program 

   that you want to watch.

 ·

Use down

arrow  button to highlight START SEARCH. Navigate using

 ► 

arrow  button to BEGIN searching.

 ·The other options in this menu are unavailable, as these options just display to show the current signal 
   situation

.  The CHANNEL FOUND shows how many channels are found recently. The SIG. QUALITY and SIG. STRENGTH

   shows the quality and the strength of the current signal. And the FREQUENCY shows the frequency of the current signal.

16

Summary of Contents for LED-2412

Page 1: ...USER MANUAL LED TV 24 MODEL NO LED 2412 For information and support www lenco eu ...

Page 2: ...ound Menu Options 6 7 1 4 5 9 10 12 12 13 Channel Menu Options 10 11 16 20 Channel List Options 21 21 Input Source Basic Operation 8 Picture Menu Options 23 PC Setup Menu Options HELP 33 23 24 25 31 32 21 Subtitle Manual 21 22 Fav List Manual EPG Manual AUDIO Manual Important Safety Precautions Front Back panel diagram MULTIMEDIA Menu Options SPECIFICATIONS ...

Page 3: ...18 Important Safety Precautions 1 ...

Page 4: ...Important Safety Precautions 2 ...

Page 5: ...Important Safety Precautions 3 ...

Page 6: ...Important Safety Precautions 4 ...

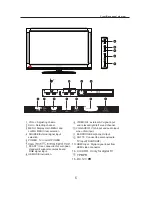
Page 7: ...when VGA input ANT 75 Connect the antenna cadle TV input 75 VHF UHF POWER Turn on off POWER MENU Display main MENU and confirm MENU item selection CH Selecting channel VOL Adjusting Volume SOURCE External signal input selection HDMI Input Digital signal input from HDMI video connector 13 14 CI CARD It only for digital TV EARPHONE Earphone Output Front Back panel diagram YPBPR 16 DC 12V VGA VOL VOL...

Page 8: ...Remote control 6 ...

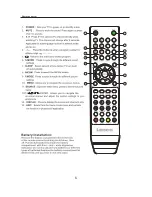
Page 9: ...Remote control RED GREEN YELLOW CYAN change the teletext on the Analoge part Choose the item on DTV menu and MEDIA menu 21 22 23 24 7 16 17 16 17 ...

Page 10: ... the MAIN OSD MENU Use button to select the MENU you want Use button to enter the sub menu You can use MENU or EXIT button to save and return back to the previous menu Use button to select the option and then press to adjust the value in the sub menu OSD Manual INPUT SOURCE BASIC OPERATION MENU MOVE EXIT SELECT PICTURE PICTURE MODE CONTRAST BRIGHTNESS COLOR TINT SHARPNESS COLOR TEMP NOISE REDUCTIO...

Page 11: ...There are 6 country for selection UK ITALY SPAN FRANCE GERMANY OTHER Use down arrow button to highlight LANGUAGE Navigate using arrow button to select the OSD language There are 6 language for selection ENGLISH GERMAN FRENCH SPANISH ITALIAN PORTUGUESE After setting these items you can press MENU to give up your installation and exit Or press button to highlight START SEARCH and then press button t...

Page 12: ... and refine the picture displayed on your TV based on ambient room light and personal prefer ences Adjustment options include BRIGHTNESS COLOR TINT SHARPNESS COLOR TEMP and NOISE REDUCTION How to Navigate Press the MENU button on the remote control Navigate using arrow buttons to select PICTURE Press the down arrow button to highlight PICTURE MODE then press the arrow button to select your viewing...

Page 13: ...ow buttons to select it ON or OFF MENU MOVE EXIT SELECT SOUND SOUND MODE BASS TREBLE BALANCE AVL STANDARD 50 50 50 ON The SOUND menu offers options to make sound enhancements while listening through the built in speakers SOUND How to Navigate Press the MENU button on the remote control Navigate using arrow buttons to select Press the arrow button to highlight SOUND MODE then press the arrow button...

Page 14: ...ow button to highlight TRANSPARENCE Navigate using arrow button to select the transparence of the OSD Use down arrow button to highlight OSD TIMER Navigate using arrow button to select the OSD timer There are 6 modes for selection 5 SEC 10 SEC 15SEC 20SEC 25 SEC 30 SEC Use down arrow button to highlight OVERSCAN Navigate using arrow button to select it ON or OFF But this option is only available i...

Page 15: ...SELECT FUNCTION SYSTEM LOCK CHILD LOCK KEY LOCK PARENTAL CHANGE CODE ON ON ON ON Use down arrow button to highlight SYSTEM LOCK Navigate using arrow button to select this option ON or OFF When set the system lock OFF the locks below will be unavailable Use down arrow button to highlight CHILD LOCK Navigate using arrow button to select this option ON or OFF When set the child lock ON the program lo...

Page 16: ...AM EDIT OTHER Use down arrow button to highlight MANUAL PROGRAM Navigate using arrow button to enter the submenu Use down arrow button to highlight COUNTRY and AUTO SCAN The operation of these two optins can be referred to page 9 MENU MOVE EXIT SELECT CHANNEL PROGRAM COLOR SYS SOUND SYS MANUAL SEARCH AFT FINE SKIP 1 AUTO AUTO ON OFF Use down arrow button to highlight PROGRAM Navigate using arrow b...

Page 17: ...rrow button to highlight PROGRAM EDIT Navigate using arrow button to enter the submenu PROGRAM EDIT MENU EXIT MOVE 01 02 03 04 05 06 07 08 09 10 11 12 13 14 15 16 17 18 19 20 21 22 23 24 25 26 27 28 29 30 NAME LOCK INSERT FAV This option has four functions Use Green button and the arrow button to name the current channel Use Yellow button to insert the current channel Use Red button to set the cur...

Page 18: ...ton to enter the submenu Use down arrow button to highlight COUNTRY and AUTO SCAN The operation of these two optins can be referred to page 9 MENU MOVE EXIT SELECT CHANNEL PROGRAM START SEARCH CHANNEL FOUND SIG QUALITY SIG STRENGTH FREQUENCY 22 BEGIN AUTO 0 0 474 00 Use down arrow button to highlight PROGRAM Navigate using arrow button to select the program that you want to watch Use down arrow bu...

Page 19: ...e menu will appear as follows Use the ENTER to save the change or Use the Menu button to return back the previous menu TV List 07 05 09 00 45 No Program Name Status 001 7 Digital 002 7 Digital 1 003 7 Digital 2 004 7 Digital 3 005 7 HD Digital 006 LUXE TV SD 007 LUXE TV UK HD 008 LUXE TV HD 009 BBC ONE Exit Fav CH Tool MENU 1 8 Favorite Group Edit Save Ch5 177500 Khz PID V 1025 A 1026 Lock Fav ALL...

Page 20: ...026 Lock Fav ALL Select ENTER TV List 07 05 09 00 45 No Program Name Status 001 7 Digital 002 7 Digital 1 003 7 Digital 2 004 7 Digital 3 005 7 HD Digital 006 LUXE TV SD 007 LUXE TV UK HD 008 LUXE TV HD 009 BBC ONE Ch5 177500 Khz PID V 1025 A 1026 Lock ALL Exit Edit CH Tool MENU Fav Select ENTER TV List 07 05 09 00 45 Exit Edit MENU Save Exit Edit ENTER Program Info Use the arrow button to select ...

Page 21: ...ns to select the channel you want to Skip Use ENTER button and will be shown at the channel selected To remove the skip function by using ENTER button again When a channel has been selected to Skip you still may select that channel with the numeric buttons TV List 07 05 09 00 45 No Program Name Status 001 7 Digital 002 7 Digital 1 003 7 Digital 2 004 7 Digital 3 005 7 HD Digital 006 LUXE TV SD 007...

Page 22: ...U Backspace Save ENTER Search Switch 1 2 3 4 5 6 7 8 9 0 1 a b c 2 d e f 3 g h i 4 j k l 5 m n o 6 p q r s 7 t u v 8 w x y z 9 0 0 9 key in characters Press 0 9 to toggle Move Use the number buttons to select the corresponding characters Notes 1 PICTURE menu and description are the same as that for TV mode 2 SOUND menu and description are the sameas that for TV mode 3 SETTING 4 menu and descriptio...

Page 23: ... button on the remote control The EPG provides programme information for the next number of hours 2009 05 16 Exit EPG Date MENU Detail ENTER EPG Use the SUBTITLE button on the remote control the subtitle menu will appear as follows Use the arrow button to select language then press ENTER button to display subtitle SUBTITLE OFF Subtitle Language eng Use the FAV button on the remote control the TV l...

Page 24: ... for TV mode 2 SOUND menu and description are the same as that for TV mode 3 SETTING menu and description are the same as that for TV mode 4 FUNCTION menu and description are the same as that for TV mode 5 CHANNEL menu and description are invalid in these modes 22 ...

Page 25: ...RD 50 50 50 To make more critical adjustments based on your own preferences in PERSONAL Use down arrow button to highlight CONTRAST Navigate using the arrow buttons to increase or decrease contrast intensity Use down arrow button to highlight BRIGHTNESS Navigate using the arrow buttons to increase or decrease overall brightness Use down arrow button to highlight COLOR TEMP Navigate using the arrow...

Page 26: ...Navigate using arrow button to select the H POSITION Use down arrow button to highlight CLOCK Navigate using arrow button to select the CLOCK Use down arrow button to highlight AUTO ADJUST Using arrow button to auto adjust the options above V POSITION Notes 1 2 SETTING menu and description are the same as that for TV mode 3 FUNCTION menuand description are the same as that for TV mode SOUND menu a...

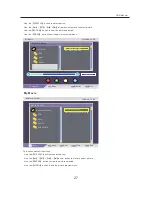
Page 27: ...e button to highlight call out the MULTIMEDIA menu Navigate using the arrow buttons to select the options including My Album My Music My Movie and My Recorder and then use ENTER to enter the submenus MEDIA ...

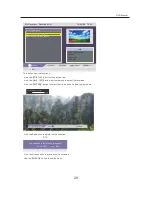
Page 28: ...g songs Use the Yellow button to select the play mode roundly No Repeat Repeat All and Repeat Once Use the Blue button to fast play the song My Album Folder 16 05 09 14 28 View MENU ENTER Move i Device 001 IMG_0331 JPG 002 IMG_0332 JPG 003 IMG_0333 JPG 004 IMG_0334 JPG 005 IMG_0335 JPG 006 IMG_0336 JPG 007 DSC046042 JPG 008 DSC046043 JPG Photo 8 photos 2048 1536 2009 05 16 Root USB PVR Music PHOTO...

Page 29: ...e arrow button to move to select picture Use the ENTER button to view the picture selected Use the MENU button to exit the picture preview menu My Movie My Music 16 05 09 14 28 Select MENU Exit ENTER Move 001 Music_001 mp3 002 Music_002 mp3 MUSIC 2 Songs Root USB PVR Music PHOTO Repeat All 30 01 25 04 15 My Movie Folder 16 05 09 14 28 View MENU ENTER Move i Device 001 Movie_001 AVI 002 When You Ar...

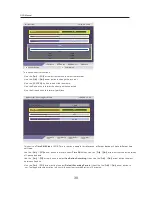
Page 30: ...orward speed to see the movie Use YELLOW button on the remote control to set the fast backward speed Use BLUE button on the remote controlto to set the fast forward speed View MENU Exit ENTER My Recorder 16 05 09 14 28 Recorder List Recording Device Recording Preference Select MENU Exit ENTER Move Navigate using the arrow buttons to select the options including Recorded List Recording Device Recor...

Page 31: ...ions Use the DISPLAY button to select device Use the arrow button to move to select file recorded Use the ENTER button to select the file and use it again to play the file MENU Exit 00 00 05 00 00 49 Sky Spts News_090608 10 Use the Red button to delete the file selected DTV Are you sure to delete this program ENTER MENU Exit YES Use the Green button to preview the file selected Use the MENU button...

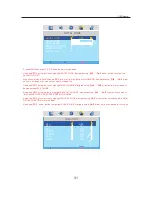
Page 32: ...16 05 09 14 28 Select MENU Exit ENTER Move Time Shift Size 1 2GB Time Shift One Button Recording OFF Switch Default Recording Period 02 00 OFF Use the arrow button to select One Button Recording tthen Use the arrow button to select between off and on Use the arrow button to select Default Recording Period tthen Use the arrow button to set The longest record duration is 8 hours the shortest record ...

Page 33: ...s ON Use down arrow button to highlight VOLUME ON Navigate using arrow button to increase or decrease the volume of power on Use down arrow button to highlight MAX VOLUME Navigate using arrow button to increase or decrease the MAX VOLUME Use down arrow button to highlight DEFAULF SOURCE Navigate using arrow button to select this option ATV DTV AV SCART YPBPR VGA HDMI Use down arrow button to highl...

Page 34: ...HELP 32 ...
Page 35: ... EARPHONE Ω Screen Size TV system Video system Input Output Power requirement Power consumption Preset Channels Audio output power Accessories User s manual Remote controller Power cord 2 x AAA Batteries DC 12V 4A 3W X 2 PAL SECAM PAL NTSC 99 24 AC 100 240V 50 60Hz 33 ...

Reviews: