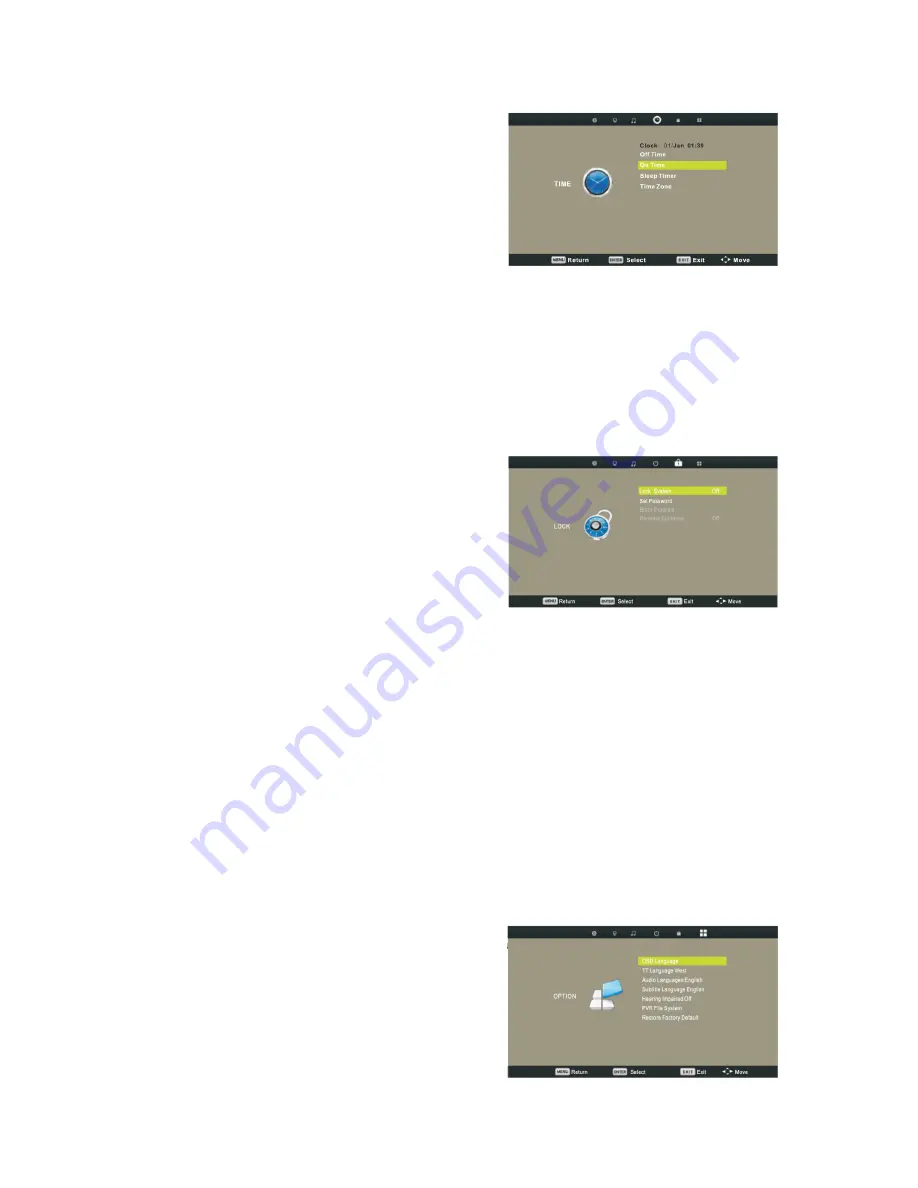
background image

13 


Time menu 

Press [MENU] to display the main menu. 
Press [

/

] to select "TIME" in the main 

menu, then press [

] and [OK] to enter. 

 
Clock (For DTV only): Display the current 
system time. It’s not available. Time Zone (For 
DTV only): Press [

] or [OK] to enter "Time 

Zone" submenu. Press [

/

/

/

] to set the proper time zone according to your 

region. 
Sleep Timer: Press [

] or [OK] to enter "Sleep Timer"submenu. Press [

/

] to 

change the sleep timer as Off, 10 Min, 20 Min, 30 Min, 60 Min, 90 Min, 120 Min, 180 
Min, 240 Min. You can press [SLEEP] repeatedly on the remote control to change the 
sleep timer directly. 

Lock menu 

Press [MENU] to display the main menu. 
Press [

/

] to select "LOCK" in the main 

menu, then press [

] and [OK] to enter. 

 
Password: Enter the default password "0000" 
to go to the LOCK function menu if you have 
set "Lock System" to "On". 
Lock System: Press [

] or [OK] toSet the lock system to "On" or "Off" which enables 

or disables below lock functions. 
Set Password: Press [

] or [OK] to enter submenu to set new password. 

You can change the password by entering the old and a new password and then re-
entering it to confirm the new one. 
Block Program: Press [

] or [OK] to enter "Block Program"submenu. 

1. You can add or release a lock to some special program.When watch a locked 
program, a dialogue box appears. You should enter the correct password. The initial 
password is “0000”. If you forget your password, input “2588”. 
2. Press rename button to lock the desired channel, press it again to unlock it. 
Parental Guidance (For DTV only): Press [

] or [OK] to enter "Parental Guidance" 

submenu. Press [

/

] to set the parental guidance level. 

Option menu 

Press [MENU] to display the main menu. 
Press [

/

] to select “OPTION” in the main 

menu then press [

] and [OK] to enter. 

 
OSD Language: Press [

/

/

/

] to set the 

on-screen display menu language. 
TT Language: Press [

/

] to set the teletext 

Summary of Contents for DVL-2455

Page 1: ...DVL 2455 61 CM 24 FULL HD LED TV WITH INTEGRATED DVD PLAYER DVB T AND CI User Manual For information and support www lenco eu UM_DVL 2455_GB V1 0...

Page 2: ...iew of the TV 7 To turn the TV power ON 7 To turn the TV power OFF 7 Rear view of the TV 8 Remote control unit 9 TV Mode 11 CHANNEL menu 11 Picture menu 12 Sound menu 12 Time menu 13 Lock menu 13 Opti...

Page 3: ...In such instances the instruction manual may not entirely match all the functions of the actual product Therefore the actual product and packaging as well as the name and illustration may differ from...

Page 4: ...around the whole unit Install in accordance with the supplied user manual Protect the power cord from being walked on or pinched particularly at plugs and the point where it exits the unit Do not pla...

Page 5: ...tic splinters to avoid injury Avoid placing the unit on any surfaces that may be subject to vibrations or shocks To protect the unit during a thunderstorm unplug the AC power cable and disconnect the...

Page 6: ...porary or permanent hearing impairment Declaration of Conformity Products with the CE marking comply with the EMC Directive 2004 108 EC and the Low Voltage Directive 2006 95 EC issued by the Commissio...

Page 7: ...at Standby mode At Standby Mode if Standby Button is pressed the power indicator will change to blue It takes a few seconds before the picture appears To turn the TV power OFF Press the Standby Button...

Page 8: ...rnal equipment with this TV set please read the instruction manual of the external equipment Switch off all power supplies to the equipment and TV set before connection Always ensure that the input an...

Page 9: ...main menu to the screen EXIT Press EXIT to exit menu or sub menu SOURCE Press to select the input source PMODE Press repeatedly to cycle through the available video picture modes SMODE Press to cycle...

Page 10: ...ot work on some DVDs ANGLE If the disc contains scenes recorded at different camera angles you can change to a different camera angle during playback Note The angle indicator will blink on the TV scre...

Page 11: ...ect the second option Press button to select audio system Press button to select search then press button to start tuning Press RED button to save the current channel Programme Edit Press and OK to en...

Page 12: ...ter Noise Reduction submenu Press o p to change the noise reduction in sequence Off Low Middle High Sound menu Press MENU to display the main menu Press to select SOUND in the main menu then press and...

Page 13: ...ock System Press or OK toSet the lock system to On or Off which enables or disables below lock functions Set Password Press or OK to enter submenu to set new password You can change the password by en...

Page 14: ...ou want to watch then press OK button to enter Press button to select the file you want then press OK to select and press button to play on the remote controller Press EXIT button to return to the pre...

Page 15: ...ontrol unit at the remote control sensor and operate Remove the obstacles between the remote control and the remote control sensor Operate the remote control unit at a distance of not more than 8 mete...

Page 16: ...h during and after the warranty period you should contact your local dealer Please note it is not possible to send repairs to Lenco directly Important note If the unit is opened by a non official serv...

Page 17: ..._________________________ _____________________________________________ _____________________________________________ _____________________________________________ ____________________________________...

Page 18: ...ordance to any applicable local laws of requirement for disposal of electrical equipment or batteries In doing so you will help to conserve natural resources and improve standards of environmental pro...

Reviews: