background image

10 


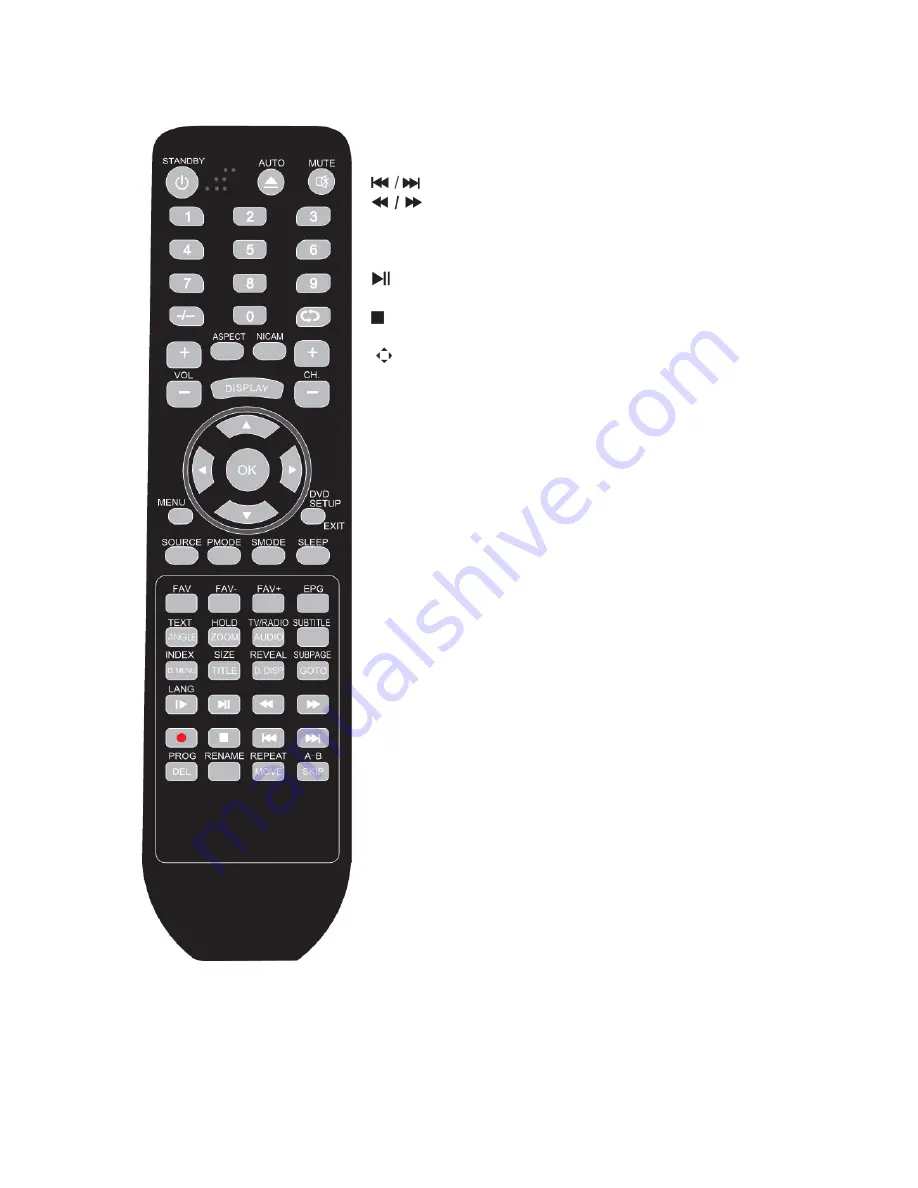
DEL/ RENAME/ MOVE/ SKIP: Navigation buttons in TV mode. 
OPEN/CLOSE Button: Press OPEN/CLOSE button to load disc 
on disc tray.  

Button: 

Press these button to go to the previous/next chapter(DVD).


Button: These buttons allow skipping ahead/back at 5-

level speed. Press “PLAY”button to return to normal playback.


REPEAT Button: To press this button you can repeatedly play a 
title(DVD) or all tracks(CD) . 

 Button : Press this button to start playback. Press this button 

again to pause playback. 

 Button : Press this button to stop DVD player. 

TITLE button: DVD disc: Press TITLE button, then you can use     

"

" and OK button to select programs. 

VCD disc: Press TITLE button, you can switch PBC on/off. 
ZOOM  : Press ZOOM during playback or still playback to  
activate the Zoom function.  
Note: Zoom may not work on some DVDs. 
ANGLE  : If the disc contains scenes recorded at different camera 
angles, you can change to a different camera angle during 
playback. Note: The angle indicator will blink on the TV screen 
during scenes recorded at different angles as an indication that 
angle  
SLOW Button: Press this button during playback to activate the 
slow function. 
D  MENU Button: If play some DVD discs, press this button back  
to root menu screen.  
PROG Button: Place a track on the program list. 
SUBTITLE Button: To press this button, you can change the 
subtitle language from one selected to the initial settings to a  
different language, if available. 
AUDIO Button: To press this button, you can change the audio  
language from the one selected at settings to a different 
language, if available. 
DVD SETUP Button : Accesses or removes setup menu. 
D DISP Button: To display player OSD. 
GOTO Button: Press this button to go to desired position.  
A-B Button: Press this button to repeat sequence. 


Summary of Contents for DVL-2455

Page 1: ...DVL 2455 61 CM 24 FULL HD LED TV WITH INTEGRATED DVD PLAYER DVB T AND CI User Manual For information and support www lenco eu UM_DVL 2455_GB V1 0...

Page 2: ...iew of the TV 7 To turn the TV power ON 7 To turn the TV power OFF 7 Rear view of the TV 8 Remote control unit 9 TV Mode 11 CHANNEL menu 11 Picture menu 12 Sound menu 12 Time menu 13 Lock menu 13 Opti...

Page 3: ...In such instances the instruction manual may not entirely match all the functions of the actual product Therefore the actual product and packaging as well as the name and illustration may differ from...

Page 4: ...around the whole unit Install in accordance with the supplied user manual Protect the power cord from being walked on or pinched particularly at plugs and the point where it exits the unit Do not pla...

Page 5: ...tic splinters to avoid injury Avoid placing the unit on any surfaces that may be subject to vibrations or shocks To protect the unit during a thunderstorm unplug the AC power cable and disconnect the...

Page 6: ...porary or permanent hearing impairment Declaration of Conformity Products with the CE marking comply with the EMC Directive 2004 108 EC and the Low Voltage Directive 2006 95 EC issued by the Commissio...

Page 7: ...at Standby mode At Standby Mode if Standby Button is pressed the power indicator will change to blue It takes a few seconds before the picture appears To turn the TV power OFF Press the Standby Button...

Page 8: ...rnal equipment with this TV set please read the instruction manual of the external equipment Switch off all power supplies to the equipment and TV set before connection Always ensure that the input an...

Page 9: ...main menu to the screen EXIT Press EXIT to exit menu or sub menu SOURCE Press to select the input source PMODE Press repeatedly to cycle through the available video picture modes SMODE Press to cycle...

Page 10: ...ot work on some DVDs ANGLE If the disc contains scenes recorded at different camera angles you can change to a different camera angle during playback Note The angle indicator will blink on the TV scre...

Page 11: ...ect the second option Press button to select audio system Press button to select search then press button to start tuning Press RED button to save the current channel Programme Edit Press and OK to en...

Page 12: ...ter Noise Reduction submenu Press o p to change the noise reduction in sequence Off Low Middle High Sound menu Press MENU to display the main menu Press to select SOUND in the main menu then press and...

Page 13: ...ock System Press or OK toSet the lock system to On or Off which enables or disables below lock functions Set Password Press or OK to enter submenu to set new password You can change the password by en...

Page 14: ...ou want to watch then press OK button to enter Press button to select the file you want then press OK to select and press button to play on the remote controller Press EXIT button to return to the pre...

Page 15: ...ontrol unit at the remote control sensor and operate Remove the obstacles between the remote control and the remote control sensor Operate the remote control unit at a distance of not more than 8 mete...

Page 16: ...h during and after the warranty period you should contact your local dealer Please note it is not possible to send repairs to Lenco directly Important note If the unit is opened by a non official serv...

Page 17: ..._________________________ _____________________________________________ _____________________________________________ _____________________________________________ ____________________________________...

Page 18: ...ordance to any applicable local laws of requirement for disposal of electrical equipment or batteries In doing so you will help to conserve natural resources and improve standards of environmental pro...

Reviews: