background image

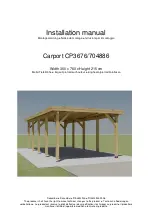
Installation manual 


 Painting and maintenance 

Wood is a natural material, growing and adapting depending on weather conditions. Large and small 
cracks, colour tone differences and changes, as well as a changing structure of wood are not errors, 
but a result of wood growing and a peculiarity of wood as a natural material.  
 
Unprocessed wood (except for foundation joists) becomes greyish after having been left untouched for 
a while, and can be turn blue and become mouldy. To protect the wooden details of your carport, you 
must immediately process them with a wood preservative.  
 
We recommend that you cover your carport in advance with a colourless wood impregnation agent. 
Only this will prevent moisture penetration. 


After  the  carport  assembly  is  completed,  we  recommend  for  the  conclusive  finishing  a  weather 
protection paint that will protect wood from moisture and UV radiation.  

When  painting,  use  high  quality  tools  and  paints,  follow  the  paint  application  manual  and 
manufacturer’s  safety  and  usage  instructions.  Never  paint  a  surface  in  strong  sunlight  or  rainy 
weather. Consult a specialist regarding paints suitable for unprocessed softwood and follow the paint 
manufacturer’s instructions.  

Having  been  properly  painted,  your  carport’s  lifetime  will  increase  substantially.  We  recommend  that 
you inspect the carport thoroughly once every six months.  


2  Preparation for assembly 


Tools and preparation of components 

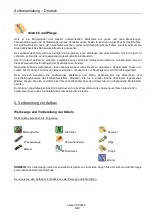
To assemble the carport, you will need the following tools: 

 assembly aid 

 water-level 


knife 


ladder 

 screwdriver 

 measuring tape 


 hammer  


saw 

 pliers 

 drill


ADVICE:

 To avoid splinters, we recommend that you wear the corresponding protective gloves during 

the assembly process. 

Carport CP3676 

           5/20

Summary of Contents for 704886

Page 1: ...uments qu un traitement rapide et sans probl me de votre r clamation sera possible Italiano La casetta che avete acquistato stata prodotta secondo la norma di alta qualit Il kit stato controllato ed i...

Page 2: ......

Page 3: ...ur profondeur hauteur lunghezza profondita altezza December Dezember D cembre Dicembre 2008 The producer shall have the right to make technical changes to the product Technische nderungen vorbehalten...

Page 4: ...of the carport We can only review complaints if you submit the control number of the house to the seller The warranty does not cover Peculiarities of wood as a natural material Wooden details already...

Page 5: ...ted we recommend for the conclusive finishing a weather protection paint that will protect wood from moisture and UV radiation When painting use high quality tools and paints follow the paint applicat...

Page 6: ...bolts in the beam support brackets Position the beams Pos 2 Check the overhang in front and at the back according to Fig 1 or according to Fig 1a in case of laminated wood arch Drill the beams throug...

Page 7: ...es Carports Es ist m glich die Reklamation nur dann als Garantiefall zu behandeln wenn Sie die Kontrollnummer Ihrem Fachh ndler weitergeben Abweichungen die keinen Reklamationsgrund darstellen Holz is...

Page 8: ...diese trocken ist sollten Sie Ihr Carport mit einer Holzlasur streichen die das Holz vor Feuchtigkeit und UV Strahlung sch tzt Beim Anstrich benutzen Sie hochwertiges Werkzeug und Farbe beachten Sie d...

Page 9: ...nd Unterlegscheiben Pos 17 19 mit den Pfosten Danach werden Dachsparren verlegt Legen Sie die Sparren Pos 3 in gleichen Abst nden s Abbildung Fig 3 auf die Sattelbalken Die Befestigung erfolgt mit den...

Page 10: ...Vous trouverez sur le bon de contr le le num ro de contr le du carport La r clamation ne peut tre trait e dans le cadre de la garantie que si vous communiquez le num ro de contr le votre revendeur sp...

Page 11: ...ctu nous vous conseillons de rev tir l ext rieur sans le toit d un appr t D s que cet appr t sera sec vous devrez rev tir votre carport d un glacis pour bois qui prot gera le bois contre l humidit et...

Page 12: ...rri re en se r f rant la figure 1 ou si c est le cas de l arc de bois lamin la figure 1a Faites passer les poutres travers le trou qui se trouve dans l extr mit sup rieure du poteau Veillez ce que les...

Page 13: ...attura d acquisto IMPORTANTE E assolutamente necessario conservare la documentazione Sul certificato di controllo riportato il numero di controllo della carport Reclami possono essere evasi in garanzi...

Page 14: ...care uno strato di fondo sulla pelle esterna senza tetto non appena il medesimo si sar asciugato verniciare la carport con una velatura per legno per proteggere il legno dall umidit e dalle radiazioni...

Page 15: ...izionare le travi Pos 2 Controllare davanti e dietro secondo la Fig 1 o secondo la Fig 1a in caso di arco laminato Trapanare le travi nelle aperture all estremit della trave Controllare che i componen...

Page 16: ...CP3676...

Page 17: ...Schermo frontone 140 19 3600 2 14 Roof board Dachbrett Planche du toit Tavola tetto 19 89 4220 40 15 Roof board Dachbrett Planche du toit Tavola tetto 19 89 3410 40 16 Roof slat Dacheckleiste Latte S...

Page 18: ...Carport CP3676 18 20...

Page 19: ...Carport CP3676 19 20...

Page 20: ...Carport CP3676 20 20...

Reviews: