14
Acquiring Images at different stage positions (Mark and Find)
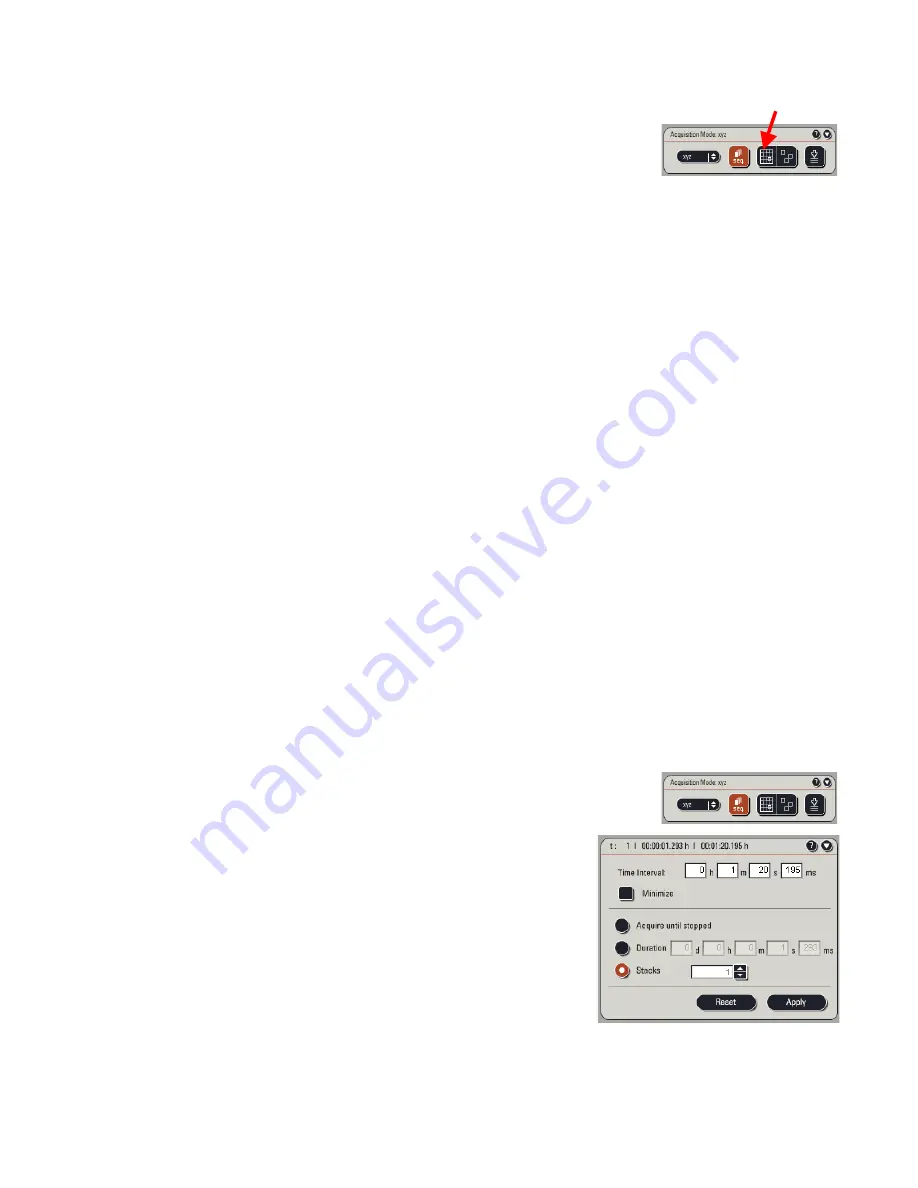
1. Enable the Mark and Find option in the Acquisition Mode
window. The mark and find window will appear.
2. Here you can see an image of the stages travel range. The cross hairs point to a
small square box which represents your current XY position. Click on the +
magnifying glass to zoom in on the box.
3. Clicking the mouse anywhere within the scaled region will cause the stage to
move to that position, USE WITH CAUTION. Only click small distances from the
current position (indicated by cross hair).
4. To mark a field of view to be captured click the Mark Position button.
5. Continue to add further positions to be scanned by using the joystick to move
around. The positions are added to a dropdown list, selecting a position from the
list will move the stage to that position.
6. The Show All Positions button will highlight within the stage area the fields of
view you have marked for scanning.
7. You can delete a single position using the Clear Position button or delete all
using the rubbish bin button.
8. If acquiring a Z stack at each position you can either use the same stack
dimensions as defined for one position at all positions or define individual Z
stacks per position. This is set using the Same Stack For All tick box.
Acquiring a Time-‐Lapse
1. Select a beam path setting and configure each wavelength channel as required.
Follow the sections above to add a tile scan, mark and find etc.
2. In the Acquisition Mode window choose the relevant time
experiment from the dropdown list xt, xyt, xyzt etc.
3. This will open the Time window. Define the total
duration of the time lapse and the frequency of
captures in the Interval box.
4. The minimise tick box will set the shortest possible
delay based on your scan speed etc.
5.
The Stacks option allows you to choose how many time
points you collect instead of having to input a du
interval.
Summary of Contents for SP5 confocal
Page 7: ...7...
Page 16: ...16 FRAP...
Page 17: ...17...
Page 18: ...18...
Page 19: ...19...
Page 20: ...20...
Page 21: ...21...
Page 22: ...22...
Page 23: ...23...
Page 24: ...24...
Page 25: ...25 FRET Acceptor Photobleaching...
Page 26: ...26...
Page 27: ...27...
Page 28: ...28...
Page 29: ...29...
Page 30: ...30...
Page 31: ...31...
Page 32: ...32 FRET Sensitised Emission...
Page 33: ...33...
Page 34: ...34...
Page 35: ...35...
Page 36: ...36...
Page 37: ...37...
Page 38: ...38...
Page 39: ...39...
Page 40: ...40...
Page 41: ...41...
Page 42: ...42 Spectral Imaging...
Page 43: ...43...
Page 44: ...44...
Page 45: ...45...
Page 46: ...46...
Page 47: ...47...
Page 48: ...48...
Page 49: ...49...
Page 50: ...50...
Page 51: ...51...
Page 52: ...52...
Page 53: ...53...
Page 54: ...54...
Page 55: ...55...
Page 56: ...56...
Page 57: ...57...
Page 58: ...58...
Page 59: ...59...
Page 60: ...60...
Page 61: ...61...
Page 62: ...62...
Page 63: ...63...
Page 64: ...64...
Page 65: ...65...


