

PXC_PXO Quick Setup Guide
6
PXC_PXO_QSG_0B_3.5.10_E
255-80-0059-00 RoHS
Wi-Fi LAN adapters
Supported 802.11
protocols
Edimax EW-7722UnD
A/B/G/N
TP-Link TL-WDN3200 v1
A/B/G/N
Raritan USB WIFI
A/B/G/N
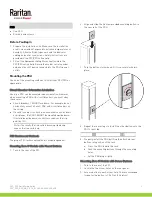
Connecting the Wireless LAN Adapter
You can connect the wireless LAN adapter either to PXC/PXO
or to a USB hub attached to PXC/PXO.
To make a wireless connection:
Do one of the following:
Plug a supported USB wireless LAN adapter into the
USB-A port on your PXC/PXO.
Connect a USB hub to the USB-A port on the PXC/PXO.
Then plug the supported USB wireless LAN adapter
into the appropriate USB port on the hub.
Supported Wireless LAN Configuration
If wireless networking is preferred, ensure that the wireless
LAN configuration of your PXC/PXO matches the access point.
The following is the wireless LAN configuration that the
PXC/PXO supports.
Network type: 802.11 A/B/G/N
Protocol: WPA2 (RSN)
Key management: WPA-PSK, or WPA-EAP with PEAP
and MSCHAPv2 authentication
Encryption: CCMP (AES)
Tip: Supported 802.11 network protocols vary according to
the wireless LAN adapter being used with the PXC/PXO.
See
USB Wireless LAN Adapters
(on page 5).
Note: You must configure PXC/PXO to enable its wireless
LAN interface. See the topic titled Configuring Network
Settings in the User Guide.
QS Rule
Appendix C: More Information
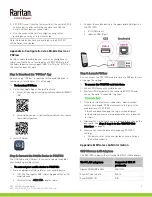
Disconnecting Devices from 'Locking' Outlets
Not every PXC/PXO is implemented with locking outlets.
Locking outlets, if available on your PXC/PXO, help secure the
connection of power cords from your IT equipment to
PXC/PXO.
To remove an IT device from a locking outlet:
1.
Press and hold down the tiny button adjacent to the
PXC/PXO outlet.
2.
Unplug the power cord now.
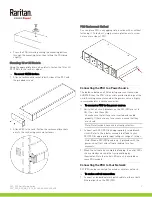
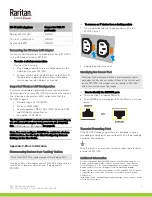
Identifying the Sensor Port
Warning: If you purchase Raritan's environmental sensor
packages, make sure you connect them to the correct port
on the PXC/PXO, or damages may be caused to PXC/PXO
and/or connected sensor packages.
How to identify the SENSOR port:
The correct port is labeled SENSOR.
The SENSOR port is marked with YELLOW color, as shown
below.
Threaded Grounding Point
If the PXC/PXO model you purchased is designed to have a
threaded grounding point, you can identify it via the grounding
symbol as shown below:
Wire this point to an electrical system in order to protectively
ground the PXC/PXO.
Additional Information
For more information about PXC/PXO and the entire Raritan product line, see
Raritan's website (www.raritan.com). For technical issues, contact Raritan
Technical Support. See the Contact Support page in the Support section on
Raritan's website for technical support contact information worldwide.
Raritan's products use code licensed under the GPL and LGPL. You can request
a copy of the open source code. For details, see the Open Source Software
Statement at
(http://www.raritan.com/about/legal-statements/open-source-software-statem
ent/) on Raritan's website.