


Dominion LX II Quick Setup Guide
5
QSG-DLX2-v3.0.0-0A-E
255-62-0024-00
•
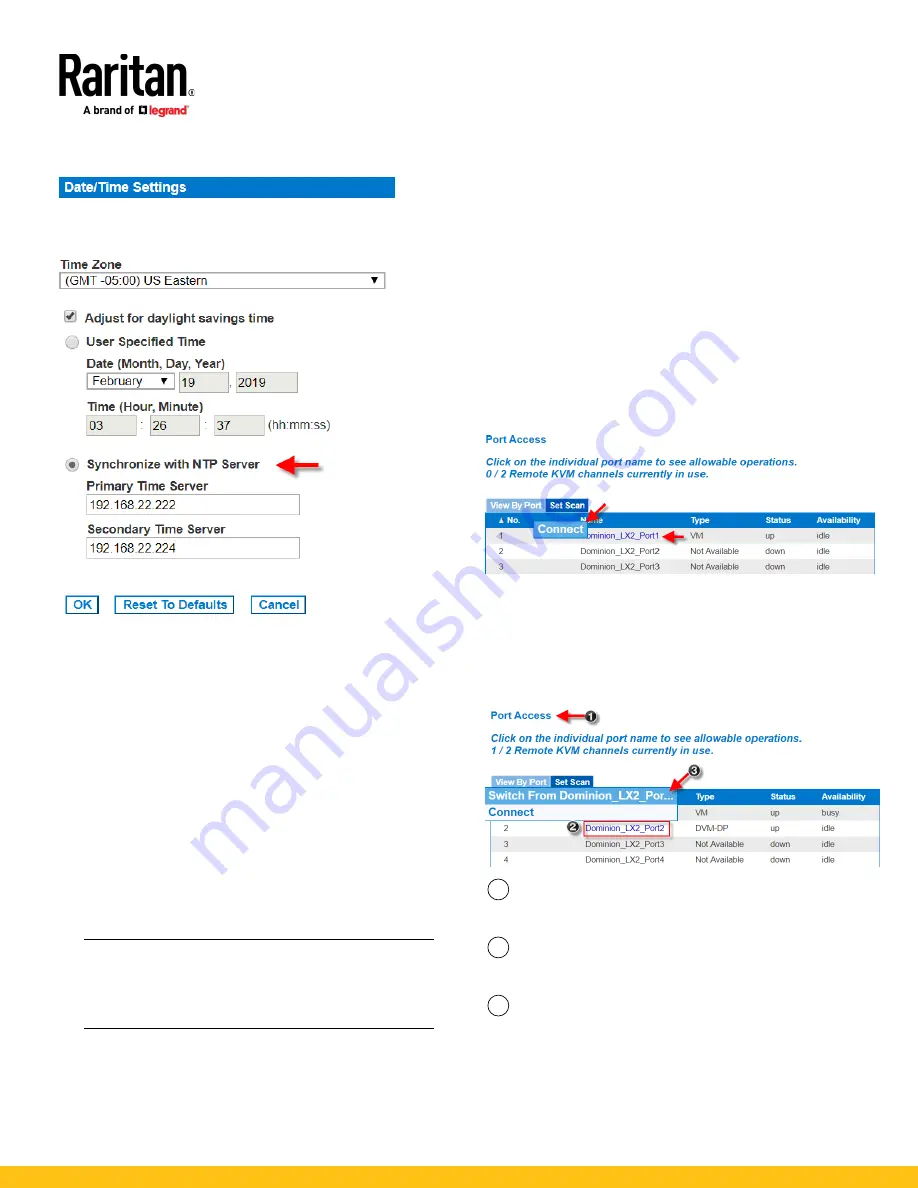
Synchronize the date and time with a Network Time Protocol
(NTP) server.
1.
Choose Device Settings > Date/Time to open the Date/Time
Settings page.
2.
Choose your time zone from the Time Zone drop-down list.
3.
Adjust for daylight savings time by checking the "Adjust for
daylight savings time" checkbox.
4.
Choose the method to use to set the date and time:
User Specified Time - use this option to input the date and
time manually. For the User Specified Time option, enter
the date and time. For the time, use the hh:mm format
(using a 24-hour clock).
Synchronize with NTP Server - use this option to
synchronize the date and time with the Network Time
Protocol (NTP) Server.
For the Synchronize with NTP Server option:
Enter the IP address of the Primary Time server.
Enter the IP address of the Secondary Time server.
Optional
Note: If DHCP is selected for the Network Settings on the
Network page, the NTP server IP address is automatically
retrieved from the DHCP server by default. Manually enter the
NTP server IP address by selecting the Override DHCP
checkbox.
5.
Click OK.
QS Rule
Step 5: Launching the Remote Console
1.
Launch a supported web browser, and enter the IP address
assigned to the LX II. A default client is launched based on your
pc and browser settings. See the online help for details about
clients.
2.
Enter your username and password, then click Login.
3.
Accept the user agreement (if applicable).
4.
If security warnings appear, click to accept.
Access and Control Target Servers Remotely
The LX II Port Access page provides a list of all LX II ports.
The page also lists all of the target servers connected to the LX II
along with their status and availability.
Access a Target Server from the LX II
1.
On the Port Access page, click the Port Name of the target you
want to access. The Port Action Menu is displayed.
2.
Choose Connect from the Port Action menu.
A KVM window opens with a connection to the target.
Switch between Target Servers
1
While already using a target server, access the LX II
Port Access page.
2
Click the port name of the target you want to access.
The Port Action menu appears.
3
Choose Switch From. The new target server you
selected is displayed.


