TILD1X05US / TILD1X1US / TILD1X2US / TILVAB2
Installation Instructions
12
Installing Housings and LED Screens
IMPORTANT ! :
Reference the LED screen installation
manual for specific instructions regarding care, handling,
cabling and installation of the LED housings and screens.
NOTE:
Begin the installation of the housings in the lower left
corner of the video wall.
NOTE:
One complete column of housings should be installed
before proceeding to the next column.
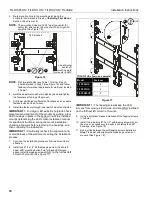
Figure 19
1.
Install the first LED housing in the lowest left-hand corner of
the video wall by aligning mounting buttons on the housing
with the mounting holes on the wall mount. (See Figure 19)
2.
Move LED housing forward until all four mounting buttons are
through mounting holes in wall mount.
3.
Continue with the next housing (directly above installed
housing).
NOTE:
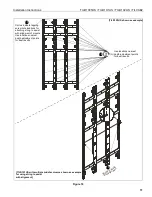
Be sure to check the level and plumb of the housings
often during the housing installation.
4.
AFTER
the
entire
first column of housings are installed, slide
the column to the left side so that the mounting buttons are
against the tapping screws, and to allow clearance for
installation of the second column.
5.
After the second column of housings is installed, push to the
left until the first and second columns of housings are
touching.
6.
Repeat until all housings are installed.
7.
Using levels, check the level and plumb of the housings
installed on the mounts and adjust as necessary following
information in the
Adjustments
section.
8.
Connect housings following instructions included with LED
screens.
9.
Install LED screens following instructions included with
screens.
Adjustments
Depth Adjust (Macroadjust)
1.
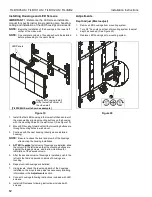
Remove LED housings from mounting system.
2.
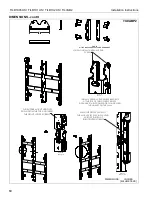
Turn 3/4" hex nuts near feet of mounting system to adjust
depth as needed. (See Figure 20)
3.
Replace LED housings onto mounting system.
Figure 20
2
LED Panels
[TILD1X05US wall shown as example]
Begin LED housing install
in the lowest left corner of
the video wall
1
2


