Simple Stopwatch
Note:
Remove the display
sticker and pull-tab from the
battery compartment before
operating.
To Operate:
Press the green “GO” button to start timing.
Press the red “STOP” button to stop timing.
Press the yellow “CLEAR” button to reset the time to zero
(00:00:00).
Pressing “GO” after “STOP” without pressing “CLEAR” will result
in time continuing from the last stopping point.
Installing or Replacing Batteries
Requires:
1.5V (LR44) button-cell battery and a Phillips
Screwdriver
Batteries should be installed or replaced by an adult.
• Simple Stopwatch requires (1) one 1.5V (LR44) button-cell
battery.
• The battery compartment is located on the back of the watch.
• To install the battery, first undo the screw with a Phillips
screwdriver and remove the battery compartment door. Install
battery as indicated inside the compartment.
• Replace compartment door and secure with screw.
Battery Care and Maintenance Tips
• Use (1) one 1.5V (LR44) button-cell battery.
• Be sure to insert battery correctly (with adult supervision) and
always follow the toy and battery manufacturer’s instructions.
• Do not mix alkaline, standard (carbon-zinc), or rechargeable
(nickel-cadmium) batteries.
• Do not mix new and used batteries.
• Insert batteries with the correct polarity. Positive (+) and
negative (-) ends must be inserted in the correct directions as
indicated inside the battery compartment.
• Do not recharge non-rechargeable batteries.
• Only charge rechargeable batteries under adult supervision.
• Remove rechargeable batteries from the toy before charging.
• Only use batteries of the same or equivalent type.
• Do not short-circuit the supply terminals.
• Always remove weak or dead batteries from the product.
• Remove batteries if product will be stored for an extended
period of time.
• Store at room temperature.
• To clean, wipe the surface of the unit with a dry cloth.
• Please retain these instructions for future reference.
Simple Stopwatch
Nota:
Retire la lengüeta
del compartimento de pilas
antes de su puesta en
funcionamiento.
Puesta en funcionamiento:
Pulse el botón verde “GO” (ir) antes de iniciar el contador.
Pulse el botón rojo “STOP” (parar) antes de parar el contador.
Pulse el botón amarillo “CLEAR” (borrar) para restablecer el
tiempo a cero (00:00:00).
Si se pulsa “GO” después de “STOP” sin pulsar antes el botón
“CLEAR”, el contador continuará desde el punto de parada
anterior.
Instalación o sustitución de las pilas
Necesita:
Pilas de botón (LR44) de 1,5V y un destornillador Phillips
• Debería ser un adulto el que instale o cambie las pilas.
• Simple Stopwatch funciona con (1) una pila de botón (LR44)
de 1,5V.
• Para instalar la pila, primero quite el tornillo con un
destornillador Phillips y quite la puerta del compartimente en
la parte trasera del reloj.
• Instale la pila como se indica dentro del compartimento.
• Vuelva a colocar la tapa del compartimento y apriétela con el
tornillo.
Consejos de mantenimiento y cuidado de las pilas
• Utilice (1) una pila de botón (LR44) de 1,5V.
• Asegúrese de colocar las pilas correctamente (con la
supervisión de un adulto) y siga siempre las instrucciones del
fabricante de las pilas y del juguete.
• Coloque la pila respetando su polaridad. Los polos positivo (+)
y negativo (-) deben colocarse en la dirección correcta, como se
indica dentro del compartimento de las pilas.
• No recargue pilas no recargables.
• Cargue sólo pilas recargables bajo la supervisión de un adulto.
• Retire las pilas recargables del juguete antes de cargarlas.
• No provoque cortocircuitos a las terminales de alimentación.
• Retire siempre las pilas gastadas o sin carga del producto.
Simple Stopwatch
Remarque :
ôtez la languette
transparente à l'intérieur du
compartiment de la pile avant
d'utiliser la montre.
Fonctionnement :
Appuyez sur le bouton vert "GO" pour démarrer le chronomètre.
Appuyez sur le bouton rouge "STOP" pour arrêter le chronomètre.
Appuyez sur le bouton jaune "EFFACER" pour réinitialiser le
décompte (00:00:00).
Si vous appuyez sur le bouton "GO" après avoir appuyé sur le
bouton "STOP" sans appuyer sur le bouton "EFFACER", le
chronométrage continue à partir de l'intervalle précédent.
Installation ou remplacement de la pile
Nécessite :
1 pile bouton 1,5 V (LR44) et un tournevis Phillips.
• L'installation et le remplacement des piles doivent être
effectués par un adulte.
LER 0808
Ages Grades
5+
K+
+
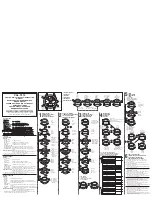
00:00:
00
minutes (min)
Time Display
seconds (s)
1/100 (s)
¦
¦
¦
E
ES
S
00:00:
00
minutos (min)
Visualización de tiempo
segundos (s)
1/100 (s)
¦
¦
¦
F
FR
R
00:00:
00
minutes (min)
Affichage de l'heure
secondes (s) 1/100 (s)
¦
¦
¦
Art.Nr. 2625603