background image


30 

It is therefore possible that non apparent residual risks may persist although all protective 
measures have been taken. 
26. Electrical connection – Safety 
- The supply line must be in accordance with IEC60245 (H07 RN-F) fitted with conductors 
having a cross section of at least 2.5 mm² and a maximum length of 10m. 
- Never use power lines or extension cords over 10m long. Longer supply lines cause a 
voltage drop. The motor does not reach its maximum performance resulting in operation of 
the machine being restricted. 
- When installing the supply line, ensure that it is neither trapped nor compressed, or bent and 
that the connector is not subject to moisture or falls in any liquid. 
- Do not use the cable for purposes for which it is not intended. Protect the cable against heat, 
oil and sharp edges. Do not pull the cable to remove the plug from the socket. 
- Check extension cable regularly and replace it as soon as you notice any damage. 
- Never use a defective supply cable / extension cord. 
- Use only extension cords approved for outdoors use, if necessary. 
- Never use provisional electrical connections. 
- Do not short-circuit safety equipment and never switch them off. 
All electrical connections or repairs on electrical parts of the machine must be carried out by a 
certified electrician or an authorised service centre. Local regulations, particularly with regard to 
protective measures must be observed. 
Repairs to other parts of the machine must be performed by the manufacturer or a its authorised 
service centre. 
Only use original spare parts or accessories. The use of other parts and other accessories may 
cause risk of injury to the user and releases the manufacturer’s liability for any damage incurred. 

5.GETTING STARTED 

5.1Unpacking 

Š


LE581504H  

We recommend that at least 2 persons unpack the log splitter package.   
Remove product from its packaging. 
Check that product and accessories are not damaged. 

Š


LE583008V 

We recommend that at least 2 persons unpack the log splitter package.   
Content of the packaging (fig.3) : 
A. Log Splitter Frame   1 set 
B. Control Lever and Guard Assembly  2sets 
C. Removable Support Table   

1 pc 

D. Owner's Manual    1pc 
Take the following steps 1 to 5 (see figs.4) : 

- Put the Log Splitter on the ground by tipping every side of the carton by 45   

Summary of Contents for LE581504H

Page 1: ...FENDEUR DE BUCHES LOG SPLITTER SPACCALEGNA LE581504H LE583008V Mode d emploi Original instructions Istruzioni originali...

Page 2: ...Fig 1 Fig 2 Fig 3 Fig 4a Fig 4b Fig 4c Fig 4d Fig 4e...

Page 3: ...Fig 5 Fig 6 Fig 7 Fig 8 Fig 9...

Page 4: ...Fig 10 Fig 11 Fig 12 Fig 13...

Page 5: ...Fig 14 Fig 15 Fig 16 Fig 17 Fig 18 Fig 19...

Page 6: ...Fig 20 Fig 21 Fig 22 Fig 23 Fig 24 Fig 25A Fig 25B...

Page 7: ...12 19 Fig 26 Fig 27 Fig 28A Fig 28B Fig 29 Fig 30...

Page 8: ...e consulter ult rieurement WARNING Carefully read this instruction manual before operating this product Incorrect operation may cause injury and or damages Please keep this manual for future reference...

Page 9: ...movible 15 Bras de commande 16 Protection du bras de commande 17 Molette r glage griffes 18 Griffes de serrage 19 Coin de fendage 2 CARACT RISTIQUES Description LE581504H LE583008V Mod le Type LS4T 52...

Page 10: ...teur de rester vigilant Afin de pr venir tout accident ex chute ne jamais laisser d outils b ches ou autres accessoires dans la zone de travail Ne pas utiliser dans des lieux o des manations de peintu...

Page 11: ...aide d une autre personne pour lib rer une b che coinc e Les personnes de moins de 16 ans ne sont pas autoris es utiliser le fendeur Les personnes de moins de 18 ans doivent avoir suivi une formation...

Page 12: ...glage changement d accessoires ou intervention sur le produit avant d ouvrir le capot moteur avant d placer le produit ou lorsque vous n utilisez pas le produit ou si vous quittez l aire de travail m...

Page 13: ...rs toucher l outil ou son c ble d alimentation ou la rallonge Il est recommand de maintenir tous les spectateurs sp cialement les enfants loign s de l outil et de l aire de travail L appareil ne doit...

Page 14: ...isque de blessures lors de l utilisation ou le maniement du produit 10 Ne pas pr sumer de ses forces Toujours garder une position stable et un bon quilibre Prenez correctement appui sur vos jambes et...

Page 15: ...sation de rallonge Lorsque l outil est utilis avec une rallonge n utiliser que des rallonges con ues et pr vues pour supporter le courant alimentant l outil Si le produit est utilis en ext rieur n uti...

Page 16: ...risques r siduels g n r s par la construction et l emploi de la machine notamment Les risques r siduels sont minimis s en respectant les consignes de s curit et un emploi conforme l usage pr vu comme...

Page 17: ...ervice apr s vente Les r glements locaux particuli rement en ce qui concerne les mesures de protection sont respecter Toutes r parations des diff rentes pi ces de la machine sont effectuer par le fabr...

Page 18: ...toute utilisation veuillez v rifier que les lignes de raccordement ne pr sentent pas de d fectuosit s fissures coupures ou autres Que l appareil ne pr sente pas d ventuels endommagements que toutes le...

Page 19: ...a Le fendeur dispose de 3 positions de travail 580 770 1060mm Position sup rieure de la table amovible pour des troncs d une longueur de 580 mm maximum Position interm diaire de la table amovible pour...

Page 20: ...nt d huile 5 5 D placer le fendeur Avant de d placer ou transporter le fendeur d branchez le de sa source d alimentation lectrique Assurez vous que le bouchon du r servoir d huile soit fermement serr...

Page 21: ...stock ou transport sous des temp ratures ambiantes comprises entre 25 C et 55 C LE581504H La fendeuse de b ches doit tre utilis e horizontalement et jamais verticalement Fig 16 Fig 17 LE583008V La fe...

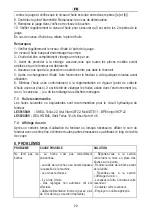
Page 22: ...telle sorte qu il ne provoque pas d accidents ex chute ou que le c ble ne soit pas endommag pendant la session de travail Prot gez le c ble d alimentation contre les chocs la traction ou des mat riaux...

Page 23: ...e ne fonctionne pas correctement Faire r parer ou remplacer imm diatement un interrupteur de commande endommag par du personnel qualifi afin d viter tout danger 6 6 Exploitation deux mains LE581504H F...

Page 24: ...z ensuite la fiche secteur Resserrez fond la vis de purge d air Observer les instructions d entretien et de maintenance LE583008V A l issue de votre travail Amenez le fendeur en position inf rieure ta...

Page 25: ...ste propre et ordonn e 7 ENTRETIEN ET ENTREPOSAGE Avant toute intervention sur le produit veillez ce que le produit soit d branch de sa source d alimentation Porter des gants de protection afin d vite...

Page 26: ...ez le fendeur de mani re ce que l orifice de remplissage pointe vers le haut Faire appel une seconde personne pour positionner et tenir fendeur 3 D vissez la jauge d huile 12 Fig 26 Ne perdez pas le j...

Page 27: ...oyez la jauge d huile et le joint d tanch it 4 Enfoncez la jauge jusqu la but e dans l orifice 5 Retirez nouveau la jauge de l orifice Lorsque le niveau d huile est compris entre les deux rep res Fig...

Page 28: ...anger les huiles us es dans l environnement ex le sol le caniveau ou de les m langer aux d chets m nagers 7 3 Huile recommand e Les huiles suivantes ou quivalentes sont recommand es pour le circuit hy...

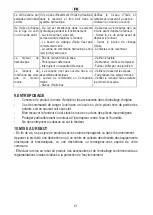
Page 29: ...deur ne fonctionne pas alors que le moteur tourne La soupape n est pas ouverte due un assemblage d fectueux Leviers de commande ou Connexions tordus Niveau d huile bas V rifier et resserrer les pi ces...

Page 30: ...08 EC Electro Magnetic Compatibility 2006 42 EC Machinery 2011 65 EC ROHS 2002 96 EC WEEE Et les normes suivantes EN 60204 1 2006 A1 2009 EN 609 1 1999 A1 2003 A2 2009 EN 60335 1 2002 A11 A1 04 A12 A2...

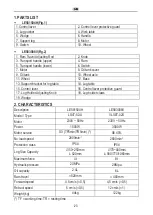
Page 31: ...ever 16 Control lever protective guard 17 Log Holder Adjusting Knob 18 Log holder claws 19 Wedge 2 CHARACTERISTICS Description LE581504H LE583008V Model Type LS4T 52 A VLS8T 02S Motor 230V 50Hz 230V 5...

Page 32: ...d help the operator stay alert To avoid tripping do not leave tools logs or other components laying around the work area Do not use it in areas where fumes from paint solvents or flammable liquids pos...

Page 33: ...splitting area when operating the log splitter Never pile logs to be split in a manner that will cause you to reach across the log splitter Only use your hands to operate the control levers Never use...

Page 34: ...ct your local authority or local recycle centre for further information for its safe disposal 4 GENERAL SAFETY INFORMATION 1 Keep work area clean Cluttered areas invite accidents and injuries 2 Consid...

Page 35: ...not use the product for purposes other than those for which it is intended The product will do a better and safer job if it is used only for the purposes it was designed for Do not under any circumsta...

Page 36: ...perly 16 Check damaged parts Before further use or reuse of the product it should be carefully checked to determine that it will operate properly and perform its intended function Check for alignment...

Page 37: ...tailer for a replacement 24 Important The information contained in this instructions manual describes components available at the time of publication We reserve the right to make changes without prior...

Page 38: ...ors use if necessary Never use provisional electrical connections Do not short circuit safety equipment and never switch them off All electrical connections or repairs on electrical parts of the machi...

Page 39: ...assemble them before using the machine Failure to do so may result in serious injury Before using the machine make sure each time that there are no faulty connections tears cuts etc there are no dama...

Page 40: ...tening the knob again Table height adjustment Fig 10 a The log splitter table can be hanged up at three different levels 580 770 1060mm Upper position for logs with max length of 580mm Middle position...

Page 41: ...moving or transporting the log splitter close the bleed screw to avoid any spillage 5 5 Moving the Log Splitter The log splitter is equipped with 2 wheels for minor moving Make sure the oil tank cove...

Page 42: ...y and never horizontally Fig 18 Fig 19 6 3 Before operating the log splitter Check the oil level and refill as required before use 1 Familiarize yourself with the controls and features of the log spli...

Page 43: ...to preheat the hydraulic oil 10 Reminder The log splitter is strictly designed for one man operation Never allow more than one person approach and work on the machine at the same time 6 4 Placing the...

Page 44: ...rd to its starting position 1 Press the On Off switch 9 Wait a few seconds until the engine reaches its operating speed and the pressure is generated in the hydraulic pump 2 Lower the control lever 1...

Page 45: ...ely hard log rotate it by 90 to see whether it can be split in a different direction In any case if you are not able to split the log this means that its hardness exceeds the capacity of the machine a...

Page 46: ...above procedure with sharper slope wedge woods until the log is completely freed Do not try to knock the jammed log off Knocking about will damaged the machine or may launch the log and cause accident...

Page 47: ...ts have stopped and that the log splitter is unplugged 2 Place a 4 liters container under the log splitter 3 Unscrew the cap of the oil tank Do not forget the seal during removal 4 Then tilt the machi...

Page 48: ...k the gasket Replace if damaged 9 Tighten thoroughly the dipstick Attention To prevent damage to the seal and the thread of the cylinder head the screw must not be over tightened 10 Regularly check th...

Page 49: ...ing the log splitter Bleed Screw is not tightened before moving the log splitter Tighten the Bleed Screw up before moving the log splitter Oil Drain Bolt with Dipstick is not tight Tighten the Oil Dra...

Page 50: ...ispose of the product in a collection centre for waste of electrical and electronic equipment or a waste drop off centre or seek advice from your local municipality Disposal of the product accessories...

Page 51: ...CE Compatibilit Elettromagnetica 2006 42 CE Macchine 2011 65 CE ROHS And to the followingstandards EN 60204 1 2006 A1 2009 EN 609 1 1999 A1 2003 A2 2009 EN 60335 1 2002 A11 A1 04 A12 A2 06 A13 08 EN 6...

Page 52: ...a amovile 15 Leva di comando 16 Protezione della leva di comando 17 Pomello di regolazione delle braccia di sostegno 18 Braccia di sostegno del ceppo regolabile 19 Cuneo 2 CARATTERISTICHE TECNICHE Des...

Page 53: ...zza dell operatore Per evitare di perdere l equilibrio non lasciare attrezzi ceppi oggetti o frammenti di materiale nella zona di lavoro Non utilizzare il prodotto nelle zone in cui sono presenti vapo...

Page 54: ...spaccalegna o durante il cambio dell olio Non avviare mai lo spaccalegna in prossimit di fiamme o scintille L olio infiammabile e pu esplodere Lo spaccalegna progettato per essere utilizzato da un sol...

Page 55: ...ono chiudersi improvvisamente e schiacciare o amputare le mani Non rimuovere i ceppi incastrati con le proprie mani Non lasciare la macchina incustodita durante il funzionamento Non lasciare la macchi...

Page 56: ...le vostre dita non tocchino il metallo della spina quando connettete o disconnettete il prodotto Staccare il cavo elettrico se il prodotto o il cavo si danneggiano durante l uso Scollegare il prodotto...

Page 57: ...roppo oltre l area in cui si opera Accertarsi di avere una posizione eretta sicura e mantenersi sempre bene in equilibrio Il pavimento non deve essere bagnato Non distendersi mai sul ceppo o sullo spa...

Page 58: ...ientemente isolati I cavi devono essere fatti con materiale protettivo adatto all uso esterno Verificare periodicamente le prolunghe del cavo d alimentazione e sostituirle se sono danneggiate 19 Se l...

Page 59: ...isure di sicurezza ignorata o omessa possono causare lesioni o danni Lo spaccalegna in movimento puo causare lesioni alle mani o alle dita se l utente disattento se non rispetta le avvertenze di sicur...

Page 60: ...LE581504H Si raccomanda che almeno 2 persone disimballino lo spaccalegna Rimuovere il prodotto dal suo imballaggio Controllare che il prodotto e gli accessori non siano danneggiati LE583008V Si racco...

Page 61: ...ta ed alta 60 75cm Bloccare le ruote per evitare qualsiasi movimento durante il funzionamento Montaggio delle gambe di supporto Mettere lo spaccalegna in verticale vedi Fig 5 Collegare le gambe di sup...

Page 62: ...orrente come pure un dispositivo di corrente residua RCD con una corrente residua stimata a 0 03A I cavi di gomma del collegamento elettrico devono essere conformi al EN60245 che sono segnati sempre c...

Page 63: ...ella pressione di una piastra contro un cuneo di taglio fisso Lo spaccalegna solo adatto per spaccare legno intagliato Lo spaccalegna destinato esclusivamente per uso privato nel settore del fai da te...

Page 64: ...omodare i ceppi ad un massimo di 106cm di lunghezza Le 3 posizioni della tavola di lavoro permettono che lo spaccalegna lavori con ceppi di 58cm di 77cm o di 106cm di lunghezza Inserire la tavola di l...

Page 65: ...rruttore 9 Il motore ruota mentre il tasto premuto Arresto Rilasciare l interruttore 9 LE583008V Avvio Premere il tasto verde I Arresto Premere il tasto rosso 0 Non utilizzare mai un prodotto con l in...

Page 66: ...posizione iniziale Osservazioni Non rilasciare le levi fino a quando il cilindro non ha completato il suo corso e la legna non rotto Lo spaccalegna si interrompe quando si rilascia una leva di comando...

Page 67: ...e attenzione a non danneggiare il cavo di alimentazione Il legno ed i trucioli accumulati possono generare un area di lavoro pericolosa Non lavorare mai in una zona di lavoro stipata in quanto l opera...

Page 68: ...ato con una sega Non chiedere una seconda persona per aiutare 7 2 Controllo e Cambio dell olio idraulico LE581504H a Controllo del livello dell olio 1 Il cilindro deve trovarsi nella sua posizione ori...

Page 69: ...l asta di livello e controllare che il livello dell olio si trova tra le due punti a e b 8 Controllare la guarnizione Sostituire se danneggiato 9 Stringere bene l asta di livello Attenzione Per evitar...

Page 70: ...ll olio basso riempire con olio Note 1 Controllare periodicamente il livello d olio con l asta di livello Un livello dell olio tropo basso puo danneggiare la pompa dell olio 2 L olio dovrebbe essere c...

Page 71: ...errare la vite di sfiato prima di spostare lo spaccalegna Il bullone di cambio dell olio non stato serrato correttamente Serrare il bullone di cambio dell olio La valvola di comando idraulico e o la e...

Page 72: ...ente Portare il prodotto ad un centro per il trattamento dei rifiuti o ad un centro di raccolta degli scarti delle attrezzature elettriche ed elettroniche o informatevi al vostro comune Effettuare lo...

Page 73: ...108 CE Compatibilit Elettromagnetica 2006 42 CE Macchine 2011 65 CE ROHS E alle seguenti norme EN 60204 1 2006 A1 2009 EN 609 1 1999 A1 2003 A2 2009 EN 60335 1 2002 A11 A1 04 A12 A2 06 A13 08 EN 62233...

Page 74: ...9 www dunsch com...

Reviews: