


Instruction manual 524 0033
Page 2/3
2
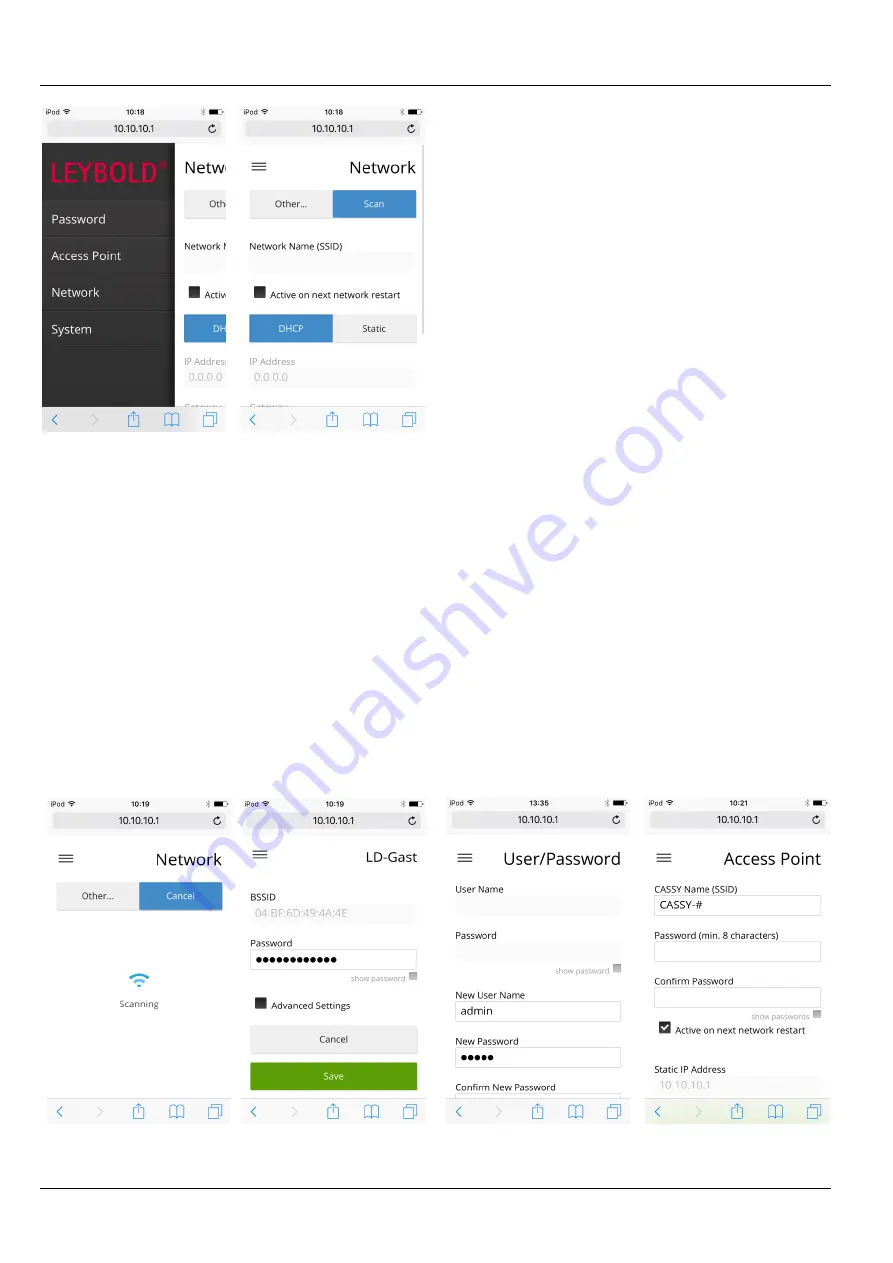
Fig. 1:
The data for accessing the network (Network menu option)
need to be input first while the WiFi adapter is directly connected to a
device. A smart phone is sufficient for this purpose.
4.2 Configuration as a client
If the WiFi adapter is to be included in an existing network, it
needs to be configured as a client
The adapter itself has a built-in web server running on it along
with the configuration app which makes it possible to enter the
access data for the existing network via a direct access point
connection.
Connect your device (computer, tablet, smart phone) to the
WiFi adapter (access point, blue LED lit), e
.g. “CASSY-
XXX”.
Enter the web address 10.10.10.1 into the browser on your
device.
Wait for the configuration page to load (see Fig. 1).
Select
Scan
and wait for the server to scan the network.
Fig. 2:
Scanning existing networks and entry of network password.
Select the network from the list and enter the password. If
the network fails to appear in the list, enter its name and
password using the
Other
option.
Select
Save
(see Fig. 2).
Switch the WiFi adapter into client mode using the blue but-
ton.
The red LED will start to flash until the connection has been
successfully established.
If the red LED starts flashing quickly, then connection to the
network has failed. Then switch the adapter back to access
point mode with the blue button and start again from the
beginning.
The apps (see Section 8) and CASSY Lab 2 will locate the
WiFi adapter automatically if they are part of the same net-
work.
The WiFi adapter recalls its most recent operating mode (access
point or client), meaning that the blue button will not usually be
needed again.
5 Other configuration options
The menu on the left-hand side offers the following options:
Secure access to the configuration with a user name and
password (see Fig. 3)
Secure access to access point mode with a password (see
Fig. 3)
Option to rename the WiFi adapter. This means that you
can chose a more simple name, e.g. for when only one WiFi
adapter is in use. The default # characters represent place-
holders for the last three characters of the WiFi adapter’s
MAC address.
Fig. 3:
Access to the configuration app and access point mode can be
secured by means of a password. The name of the access is the same
as that used for the WiFi adapter in the network.


