12
BATTERY PACK AND CHARGER
BATTERY LED PANEL
■ The panel consists of 2 LEDs on the battery. Press and
release the button, the LEDs will show you the charge levels.
■ The battery’s charge level can be checked either when
the battery is attached on the machine or removed from
the machine.
CHARGER LEDS
■ If the battery is not inserted into the charger, a continuous red LED light indicates that the outlet
plug is plugged into an outlet socket and the battery charger is ready for operation.
■ Charging: a flashing green LED on the charger indicates that the battery is charging normally.
■ Charged: continuous green LED on the charger indicates that the battery is ready for use.
■ Technical Issue: a flashing red LED light on the charger indicates that battery pack has a
charging problem or might be defective.
- One possible condition is the battery temperature is not within the charging temperature range
of 45°F - 104°F or the charging current is too high. As soon as the permitted temperature and the
charging current ranges are reached, the battery charger will automatically switch to charging.
- If the temperature range and charging current are correct and flashing red LED light continues,
then remove and reinstall the battery pack. If the LED status repeats a second time, try to
charge another identical battery. If the battery charges normally, dispose of the defective battery
pack (see Environmental Safe Battery Disposal section).
- If the flashing red light continues after installing the second battery, the charger may be defective.
Replace with a new one.
■ After continuous or repeated charging cycles without interruption, the charger may warm up.
This is normal and does not indicate a technical defect of the battery charger.
The indicator lights on the charger show the charger status:
SYMBOL
Green, continuous
Fully charged
Connected to power supply
Charging problem:
See Technical Issue
Red, blinking
Red, continuous
Green, blinking
Charging
Button
INDICATOR LIGHTS
STATUS
Power Indicator
Summary of Contents for CLBL6015A
Page 6: ...6 SYMBOLS Blower Tubes...
Page 7: ...SYMBOLS 7...
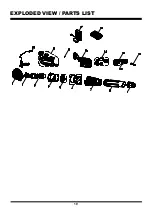
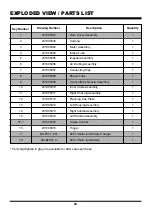
Page 19: ...19 EXPLODED VIEW PARTS LIST...
Page 21: ...21 NOTES...
Page 40: ...40 VUE CLAT E LISTE DES PI CES...
Page 42: ...42 REMARQUES...


