background image

LAUNCH

                                                                X-431  Torque  HD  User  Manual


63 


6.  Select  the  desired  Wi-Fi  printer  from  the  list.  If  the  chosen  Wi-Fi  printer 

hotspot  is  open,  the  tablet  can  connect  it  directly.  If  it  is  encrypted,  a 
password may be required. Refer to the Wi-Fi printer user manual to get the 
default password. 

7.  Now the printer is ready for printing. 

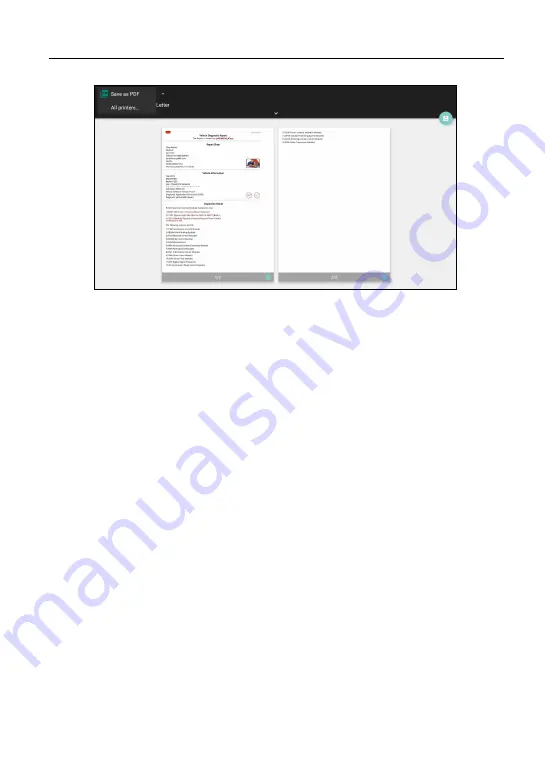
8.  Alternatively,  you  can  also  choose 

Save  as  PDF

  to  save  the  current 

diagnostic report as a PDF file for later printing. 

10.8.4 Clear Cache 

This option allows you to clear the App cache. Clearing the cache will restart the 

App. 

10.8.5 Login/Logout 

To logout the current user ID, tap 

Logout

.   

To login the system again, tap 

Login

10.9 Diagnostic Software Clear 

This item allows you to hide/clear the diagnostic software that is not frequently 
used.   

Tap 

Diagnostic Software Clear

 to enter. 

Under  the 

Hide  Software

  tab,  select  the  desired  diagnostic  software  and  tap 

Hide

, it will become invisible. Tap 

Unhide

 to undo the hide operation. 

Summary of Contents for X-431 Torque HD

Page 1: ...ate 12 03 2021 Statement All information specifications and illustrations in this manual are based on the latest information available at the time of release LAUNCH reserves the rights to make changes...

Page 2: ...or the software used by this product For any reverse engineering or cracking actions against the software LAUNCH will block the use of this product and reserve the right to pursue their legal liabilit...

Page 3: ...uation which if not avoided could result in minor or moderate injury to the operator or to bystanders Example Warning Retrieving and using DTCs for troubleshooting vehicle operation is only one part o...

Page 4: ...s personal injury Please use the included battery and power adaptor Risk of explosion if the battery is replaced with an incorrect type DO NOT attempt to operate the tool while driving the vehicle Hav...

Page 5: ...ol or power adapter to rain or wet conditions Water entering the tool or power adaptor increases the risk of electric shock This tool is a sealed unit There are no end user serviceable parts inside Al...

Page 6: ...ion against harmful interference in a residential installation This equipment generates uses and can radiate radio frequency energy and if not installed and used in accordance with the instructions ma...

Page 7: ...nitial Use 7 3 1 Charging Turning On 7 3 2 Screen Layout 7 3 3 Basic Gestures 7 3 4 Change System Language 8 3 5 Adjust Brightness 8 3 6 Set Standby Time 8 3 7 Network Setup 9 4 Getting Started 10 4 1...

Page 8: ...36 5 3 3 Start Instant Messaging 38 5 3 4 Launch Remote Diagnosis Device To Device 39 5 3 5 Launch Remote Diagnosis Device To PC 43 5 4 Diagnostic History 45 6 Diagnostic Feedback 47 7 I M Readiness 4...

Page 9: ...l 60 10 8 2 Shop Information 61 10 8 3 Printer Set 61 10 8 4 Clear Cache 63 10 8 5 Login Logout 63 10 9 Diagnostic Software Clear 63 11 Add on Modules 65 11 1 TPMS 65 11 2 ADAS Calibration 65 11 3 Vid...

Page 10: ...ious emissions related systems on the vehicle are operating properly and are ready for Inspection and Maintenance testing Tech 2 Tech This option aims to help repair shops or technicians launch instan...

Page 11: ...1 5 Type A to Type B data cable Connects the VCI module to the tablet to perform vehicle diagnosis 1 6 Type A to Type C data cable Connects the tablet to a PC to exchange data 1 7 Password envelope A...

Page 12: ...ccessing vehicle data See Chapter 2 2 2 1 Display Tablet The tablet acts as the central processing system which is used to receive and analyze the live vehicle data from the VCI and then output the te...

Page 13: ...Press it once to activate the LCD if the LCD is off Press it once to turn off the LCD if the LCD lights up Press and hold it for 3 seconds to turn it off Press and hold it for 8 seconds to perform for...

Page 14: ...ss BT communication or data cable connection 1 Touch screen 2 LAN WAN port Connect the SmartLink C device to the Internet via the crossover cable It only applies to the SmartLink Super Remote Diagnost...

Page 15: ...rtLink C device to the tablet to perform vehicle diagnosis 2 3 Technical Specifications 1 Display tablet Operating system Android Memory 4GB Storage 64GB Screen 10 1 inch capacitive touch screen with...

Page 16: ...e use the included power adaptor to charge your tool No responsibility can be assumed for any damage or loss caused as a result of using power adaptors other than the one supplied Press POWER for 3 se...

Page 17: ...inch them together 3 4 Change System Language The tool supports multiple system languages To change the language of the tool please do the following 1 On the home screen tap Settings System Language i...

Page 18: ...nd email launch the remote diagnosis and check for software updates etc 1 On the home screen tap Settings Network Internet WLAN 2 Slide the Wi Fi switch to ON the tablet starts searching for available...

Page 19: ...it a dialog box similar to the following will pop up on the screen A If you are a new user and want to register your tool directly tap New Customer to start your sign up a Create App Account Fill in t...

Page 20: ...it later tap Skip In this case please activate the VCI by tapping Profile VCI Management Activate VCI For details please refer to Chapter 10 1 Tap Activate to finish the registration process c Finish...

Page 21: ...ly In case you forgot password refer to b to reset a new password a If you have registered to be a member input your name and password and then tap the Login button to enter the main menu screen direc...

Page 22: ...m is operating within acceptable limits Report Views Health report ADAS reports Remote report ROXIE Reports and Recorded Data Software Upgrade Updates vehicle diagnostic software and APK Tech 2 Tech T...

Page 23: ...istance System calibration operations It needs to work with the specific ADAS calibration tool sold separately Videoscope This module allows you to check those unseen parts of engine fuel tank braking...

Page 24: ...ally located in the driver s cab If the DLC cannot be found refer to the vehicle s service manual for the location 4 3 2 Vehicle connection The method used to connect the VCI device to a vehicle s DLC...

Page 25: ...tivated and powered on the VCI device will pair with the tablet automatically Users have no need to make any setting any more Once the communication failure occurs the diagnostic app will pop up some...

Page 26: ...Tab Displays all the vehicle makes in the vehicle menu 3 Vehicle region buttons Tap different buttons to switch to corresponding vehicles 4 HD Displays all the vehicle makes that are subscribed in th...

Page 27: ...Through simple Bluetooth communication between the display tablet and VCI you can easily get the VIN Vehicle Identification Number information of the currently identified vehicle Once the VIN is succe...

Page 28: ...he vehicle VIN A If the VIN can be found from the remote server database the following screen will appear Tap Diagnostic to start a new diagnostic session Tap Scan History to view its historical repai...

Page 29: ...0 To perform other functions tap Quick Access to directly go to the function selection screen Choose the desired one to start a new diagnostic session B If the tablet failed to access the VIN informat...

Page 30: ...finder rectangle to scan it The most recognizable location for this number is in the top left corner on the vehicle s dashboard Other locations include the driver s door or post and the firewall under...

Page 31: ...display the result If the VIN scanned is incorrect tap the result field to modify it and then tap OK To scan it again tap REPEAT If the VIN exists on the remote server the system will enter the diagn...

Page 32: ...me precautions on using the current diagnostic software Search Bluetooth Tap to search for the available VCI After the VCI is successfully activated it will be bound to the user account and paired wit...

Page 33: ...CH X 431 Torque HD User Manual 24 3 Select test system Select the desired system Take ECM Engine Control Module Cummins for example 5 Select test function Select the desired diagnostic function to pro...

Page 34: ...des or Fault Codes can be used to identify which engine systems or components that are malfunctioning Retrieving and using DTCs for troubleshooting vehicle operation is only one part of an overall dia...

Page 35: ...tion is referred to as freeze frame data Freeze frame data includes a snapshot of critical parameter values at the time the DTC is set Help Tap to view the help information Code Search Tap to search f...

Page 36: ...agnostic Scan For workshop information tap the input box to enter it Alternatively you can also set it in Profile Settings Shop Information Once you configured the information it will be automatically...

Page 37: ...roubleshoot the code using a factory diagnosis guide then clear the code and recheck 5 2 4 Read Data Stream This option lets you view and capture record real time Live Data This data including current...

Page 38: ...stream item just check the box before the item name Unselect Tap to deselect all data stream items OK Tap to confirm and jump to the next step After selecting the desired items tap OK to enter the da...

Page 39: ...lowing you to view various types of parameters in the most suitable way Value This is the default mode which displays the parameters in texts and shows in list format Graph Displays the parameters in...

Page 40: ...yed on the same screen simultaneously If the graph is more than one page swipe the screen from the left to jump to the next page Value Switches the current graph display mode to the Value display mode...

Page 41: ...column for your comparison Note Before executing this function you have to sample the values of data stream items and save it as a sample Data Stream file Report Tap to save the current data in text f...

Page 42: ...replayed from Report Recorded Data Save Sample This item enables you to customize the standard range of live data stream items and save it as DS sample file Each time you run the data stream items you...

Page 43: ...cific subsystem and component tests Available test vary by vehicle manufacturer year and model During the actuation test the display tablet outputs commands to the ECU in order to drive the actuators...

Page 44: ...ion to amazing powerful diagnostic function the tool also features various reset functions which varies from vehicle to vehicle 5 3 Tech 2 Tech This option aims to help repair shops or technicians lau...

Page 45: ...a By default it appears blank 4 Messages tab Once an incoming message reaches a red dot will appear on the upper right corner of the tab 5 Contacts tab Tap to enter the friend list 6 Remote switch Tap...

Page 46: ...the users who have registered their Launch s diagnostic tools They may be the following roles Workshop Technician golo users Once the result matches the keyword a screen similar to the following will...

Page 47: ...listed in the Contact tab If a technician sent you a friend request tap Agree to confirm and his her name will appear in the friend list Contact Or tap Ignore to ignore this request 5 3 3 Start Instan...

Page 48: ...ic reports or local files to send Picture Choose screenshots or pictures to send Tech to Tech To start a remote diagnostic session For details refer to Chapter 5 3 4 Camera Open camera to take picture...

Page 49: ...essful communication is required On the function option selection screen tap Tech to Tech a pull down menu including the following options appears These options are defined as follows Actions Results...

Page 50: ...osis Generate diagnostic report Invite remote diagnostic assistant Use this option to invite a technician to perform a remote control on your tool Notes In process of remote diagnosis tap the button t...

Page 51: ...LAUNCH X 431 Torque HD User Manual 42 Cancel To cancel this operation...

Page 52: ...agnosis Device To PC Except that the remote diagnosis can be done between different Launch s diagnostic tools that come loaded with the module user also can ask for remote control from PC client techn...

Page 53: ...while using the PC 2 Notify the partner of the PC client website http remote x431 com When the partner accesses the link the PC displays as below Note Before processing remote diagnosis please make su...

Page 54: ...tic reports or records on your tool The operations in remote diagnosis are same as those in local diagnosis Once the session is complete a remote diagnostic report will be automatically generated 5 4...

Page 55: ...he details of the last diagnostic report To delete certain diagnostic history select it and then tap Delete To delete all historical records tap Select All and then tap Delete Tap Quick access to dire...

Page 56: ...e following 3 options will be displayed on the left column of the screen A Feedback Tap certain tested vehicle model to enter the feedback screen 1 Tap Choose File to open the target folder and choose...

Page 57: ...ifferent process states are marked with different colors C Offline list Tap it to display all diagnostic feedback logs which have not been submitted successfully due to network failure Once the handse...

Page 58: ...gy Continuous Monitors Some of the vehicle components or systems are continuously tested by the vehicle s OBD II system while others are tested only under specific vehicle operating conditions The con...

Page 59: ...s Monitor Status is to indicate which of the vehicle s Monitors have run and completed their diagnosis and testing and which ones have not yet run and completed testing and diagnosis of their designat...

Page 60: ...LAUNCH X 431 Torque HD User Manual 51 Note means not available on this vehicle means incomplete or not ready means Completed or Monitor Ok...

Page 61: ...select certain report check the box before the report To select all reports tap Select All To deselect all tap Unselect To change the filename of report tap Rename To share the report with others sele...

Page 62: ...certain diagnostic record to enter Select the desired data stream items and tap OK to navigate to the playback page On screen Buttons Graph Displays the parameters in waveform graphs Combine This opt...

Page 63: ...oftware refers to the diagnostic software that is frequently used including the vehicle diagnostic software and Reset software It is generally displayed following the Common software list Other vehicl...

Page 64: ...downloading Once download is finished the software packages will be installed automatically 9 2 Update Frequently Used software If the user only intends to update the frequently used software go to S...

Page 65: ...bottom of the screen to enter the payment screen There are two ways available for you to make payment Subscription Renewal Card need to buy it from the local dealer where you purchased the tool and C...

Page 66: ...3 Go to update center to update the diagnostic software 2 Using Credit Card 1 Select Credit Card and then follow the on screen instructions to finish the transaction 2 After payment go to update cent...

Page 67: ...continue If you use another VCI to test a vehicle select the desired checkbox and tap Pair to pair it with the tablet If the current VCI comes across communication failure tap Firmware Fix to update a...

Page 68: ...e performing the operation 10 2 ROXIE Management This option is used to activate and bind the ROXIE W device to the tool Once bound the reports generated by the ROXIE W device will be automatically pu...

Page 69: ...and configure personal information 10 7 Change Password This item allows you to modify your login password 10 8 Settings 10 8 1 General 1 Units It is designed to set the measurement unit Metric System...

Page 70: ...print information it will be entered automatically in the More Information box every time you save the diagnostic report 10 8 3 Printer Set This option is designed to establish a wireless connection b...

Page 71: ...Follow the steps below to proceed 1 Set the default printer as System 2 Go to Settings Network Internet WLAN set the WLAN switch to Off 3 On the report details page tap 4 Touch next to Select a print...

Page 72: ...save the current diagnostic report as a PDF file for later printing 10 8 4 Clear Cache This option allows you to clear the App cache Clearing the cache will restart the App 10 8 5 Login Logout To logo...

Page 73: ...agnostic software and tap Delete it will disappear from the screen Note Removing software may completely delete the software from the tablet If some software is not used and the tablet runs out of spa...

Page 74: ...or for the ACC Adaptive Cruise Control or the camera for adaptive headlights It needs to work with the specific ADAS calibration tool sold separately For more details please refer to the User Manual i...

Page 75: ...ox ECU It needs to work with the specific immobilizer programmer sold separately For more details please refer to the User Manual included with the module 11 6 Mall This module allows you to subscribe...

Page 76: ...t 1 Connect one end of the included charging data cable to the charging data I O port of the tablet and the other end to the USB port of the PC 2 Swipe the tablet screen from the top a pull down optio...

Page 77: ...using Feedback feature 3 Failed to enter into vehicle ECU system Please confirm 1 Whether the vehicle is equipped with this system 2 Whether the VCI is correctly connected 3 Whether ignition switch is...

Page 78: ...software of the corresponding language If the downloaded diagnostic software is still displayed in English it indicates that the software of the current language is under development 6 How to retrieve...

Page 79: ...repair or replacement and LAUNCH shall not be liable for any consequential or incidental damages Final determination of defects shall be made by LAUNCH in accordance with procedures established by LAU...

Page 80: ...nday Friday 8 am 5 pm PST If your unit requires repair service return it to the manufacturer with a copy of the sales receipt and a note describing the problem If the unit is determined to be in warra...

Reviews: