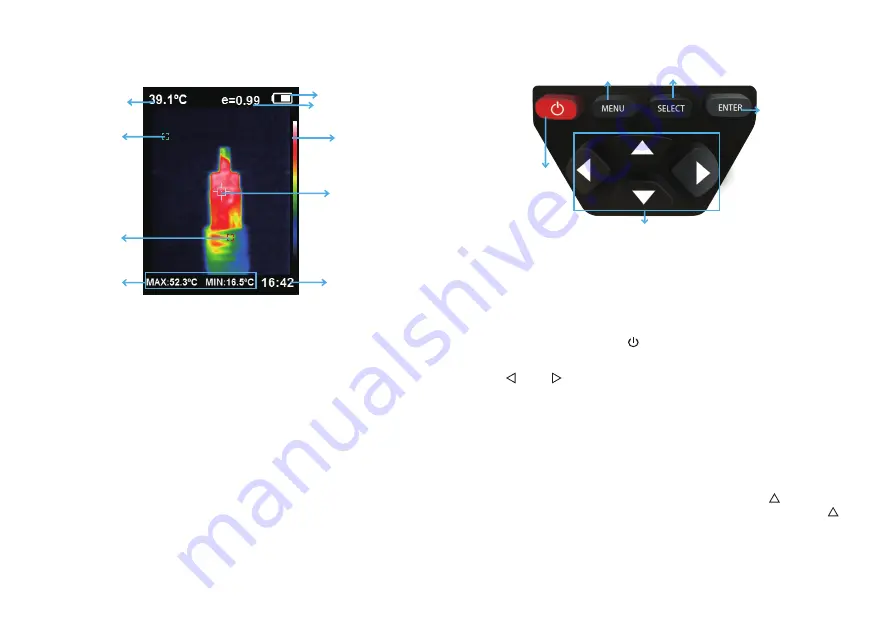
4.2. Key Description
Maximum value/
minimum value of
field temperature
5. Initial Operation
4.3. Key Description
On/off key
Menu key
Entry key
Selection key
Navigation key: Up, down, left and right
4
5
Color code
Current emissivity
Battery power
The highest
temperature cursor
Temperature
cursor at
central point
Time
Central point
temperature
The lowest
temperature cursor
Color code: used to mark the color corresponding to the relative temperature
from low to high in the field of version.
The central point temperature cursor: used to indicate the central position in
the screen area. The cursor color displays white. The temperature value is
displayed top left corner of the screen.
The highest temperature cursor: used to indicate the highest temperature
position in the screen area. It will move with the movement of the highest
temperature. The cursor displays red. The temperature value is displayed at
bottom left corner of the screen.
The lowest temperature cursor: used to indicate the lowest temperature
position in the screen area. It will move with the movement of the lowest
temperature. The cursor displays red. The temperature value is displayed at
the central position of the screen.
5.1 Charging: the product is provided with built-in 18650 lithium battery.
When the battery power is not sufficient, please charge it through Micro
USB interface in time.
5.2 On/off key: hold down “ ” key to power on /off.
5.3 Switching between infrared thermal image and visible image: press
“ ” or “ ” key to switch the degree of fusion between inferred thermal
images and visible images (the degree of fusion is 0%, 25%, 50%, 75% and
100%).
5.4 Image capture: press the image capture key. When the capture is
successful, the screen will display “store photo?” prompt. If “yes” is selected,
please press “MENU” key to determine to save the image. If “no” is
selected, press “SELECT” key to determine not to save the image.
5.5 The function to hide highest/lowest temperature column at the screen
bottom: under the operation after normal start up, press “ ” key and the
screen bottom will display highest/lowest temperature column. Press “ ”
can also hide it.
5.6 Image output: The saved images through capture may be checked and
output by connecting with a computer through Micro USB.