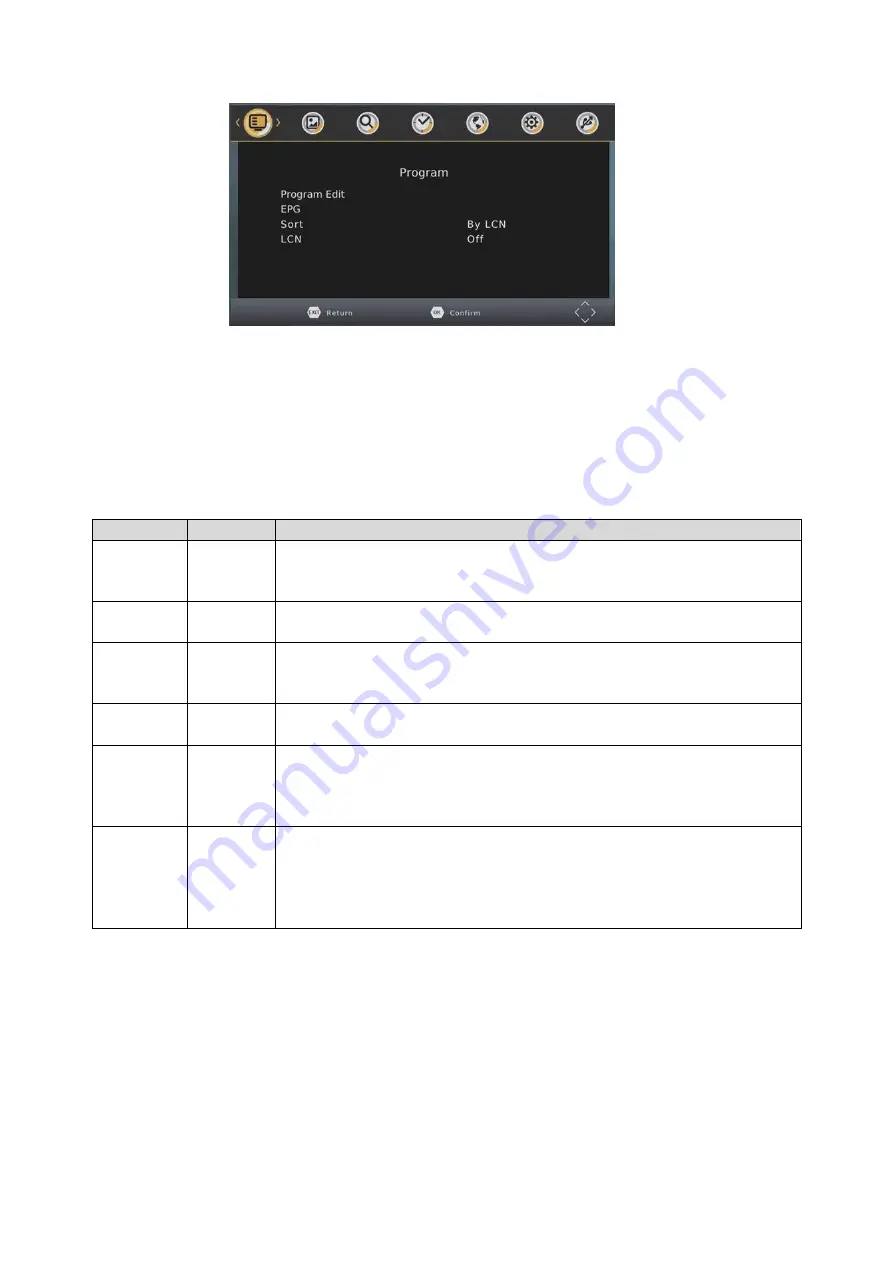
Laser STB-7000 User Manual Download Page 11


Program 


Program Edit 
 

To edit your program preferences (lock, skip, favourite, move or delete), you will need to enter the Program Edit 
Menu. This Menu requires a password for access 

and it is “000000” (6 zeros)


Press the LEFT/RIGH button to Change to the radio channel List. 


Action


Button


Description


MOVE


RED


Select the channel to move and press the RED button. Use the UP and 
Down Button to move the channel and then press the OK button to 
confirm. 

SKIP


GREEN


Press the GREEN button to select the channel to be skipped. Press GREEN 
again to stop the SKIP 

LOCK


YELLOW


Use the UP and DOWN buttons to select the channel to LOCK and then 
press the YELLOW button. Press again to unlock LOCKED channels will 
require the password to be viewed. 

DELETE


BLUE


Use the UP and DOWN buttons to select the channel to DELETE and then 
press the BLUE button. Press OK to confirm or EXIT to cancel. 

FAVOURITE 

FAV 

Use the UP and DOWN buttons to select the channel to add as a 
FAVOURITE and then press the FAV button. Use the UP and Down button to 
select the category to save the channel as and press the OK button to 
confirm. Multiple categories are possible. 

RENAME 

MENU 

Use the UP and DOWN buttons to select the channel to rename and then 
press the MENU button. Use the UP/DOWN/LEFT/RIGHT button to select 
each letter and press the OK button to confirm the letter. Select and 
confirm the OK button on the screen to save the changes. 


Note: Please see ”System Setting” section later in this manual for more information on


password protection. 


Summary of Contents for STB-7000

Page 1: ...Set Top Box HD Media Player STB 7000 User Manual Please read carefully before use...

Page 2: ...onnection 6 Connection Method 1 Composite 6 Connection Method 2 HDMI 6 Audio Connection 6 FIRST TIME INSTALLATION 6 OSD Language 6 Country 6 Channel Search 6 BASIC OPERATION 7 Channel Selection 7 Volu...

Page 3: ...ion 14 Recall List 14 USB 14 Multimedia 14 Photo Configure 14 Movie Configuration 15 PVR Configuration 15 Record Device 15 Format 15 MULITMEDIA PLAYBACK 16 Music 16 Photo 16 PVR 16 GENERAL INFORMATION...

Page 4: ...lling them from the plug and not the cord Using this device near other electronic devices may cause interference When recording images or video using this product please be respectful or the Copyright...

Page 5: ...2 SET TOP BOX Front Panel Rear Panel Item Description Item Description 1 Antenna In 4 Video Output 2 Antenna Loop Through 5 Audio Left Right output 3 HDMI Output 6 Audio Left Right output...

Page 6: ...AVOURITES 3 SUBTITLES 4 NUMERIC KEYS 5 MENU 6 OK BUTTON 7 EPG 8 PAGE UP DOWN 9 VOLUME UP DOWN 10 REWIND FAST FOREWARD 11 PREVIOUS NEXT 12 PLAY 13 PAUSE 14 RECORD 15 TIMESHIFT 16 ZOOM 17 ASPECT 18 POWE...

Page 7: ...e Viewing mode Press to Zoom in on Image ASPECT In DTV mode press to change to different Aspect Ratios POWER ON OFF Places the STB into Standby mode or wakes it up TELETEXT Streaming information on yo...

Page 8: ...off at the main power outlet 2 Connect the Antenna cable to the ANT In socket 3 Choose the best connection method for your Equipment There are 2 possible connection methods and the type that you choos...

Page 9: ...ed to the power and to the TV and after all audio connections have been made properly switch on TV Press Power button to switch the Set Top Box STB unit on If you are using the unit for the first time...

Page 10: ......

Page 11: ...ess again to unlock LOCKED channels will require the password to be viewed DELETE BLUE Use the UP and DOWN buttons to select the channel to DELETE and then press the BLUE button Press OK to confirm or...

Page 12: ...gram that you have selected SELECTION OPTION DESCRIPTION CHANNEL TYPE TV RADIO Choose between TV and Radio CHANNEL NO Available Channels Change the channel to book CHANNEL NAME Default As per Broadcas...

Page 13: ...NNEL NAME Sort the channels in ascending order ONID Sort the channels according to ONID SERVICE ID Sort the channels according to the station LCN Set LCN to ON or OFF Picture The Picture menu allows y...

Page 14: ......

Page 15: ...time that the STB will automatically turn off from the last input from the remote control Options are 1 to 12 hours set in 1 hour increments OFF disables the Sleep feature Option OSD Language Sets th...

Page 16: ...red consumers System The menu provides options to adjust the system settings Parental Guidance Select the parental level you desire for disc with lock out function or multiple rating levels Note This...

Page 17: ...edia When a USB device is attached you can select from the Music Photo or Movie options in this menu using the RIGHT LEFT keys and OK to select If a USB device is not connected the warning message Not...

Page 18: ...to enter the PVR Configuration Sub menu Record Device This screen Display information about the connected USB device including Device File System Total space on device Free Space on Device This featu...

Page 19: ...t contains the picture files to view Select the file and press the OK button to view an individual image or press the PLAY button to begin a Slide Show of all images in the current folder Movie In the...

Page 20: ...eature Use the REV and FWD buttons to fast forward or Rewind the vision Press the YELLOW button to enter a specific time to jump to Press the STOP to end the time shifting and then press the OK button...

Page 21: ...ectly Check power source if fitted or reconnect Movie Payback out of sync Faulty file Check file to ensure not encoding issue File is too large for STB Re encode file at lower resolution and or data r...

Page 22: ...the fault and refund or replace the product as per their store refund or warranty policy Step 2b If your place of purchase cannot be contacted then you can contact Laser Customer Service with details...

Reviews: