background image

SYSTEM SETUP 

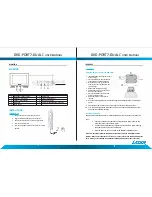
Play 

use 

and SD/MMC  Card 

1.  Plug in the USB device noting correct orientation. Press [DVD/SD/USB], then choose 

USB to select the content. 

2.  Insert a memory card to the SD/MMC  slot. Press [DVD/SD/USB] and select SD to 

play memory card. 

SYSTEM SETUP 

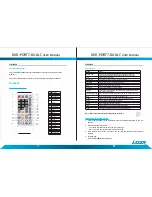
1.  Press "SETUP" on the remote to bring up the SYSTEM SETUP MENU. 

2.  Press the  ◄ or  ► buttons to go to or return to the required settings page. 

3.  When the required page is shown press the "OK" button to enter the page. 

4.  Use the..& or T buttons to navigate to the feature to be changed and then press the 

► 

button to enter the submenu. 

5.  Use the 

.&.. 

or T buttons to select the submenu item and then press the "OK" 

button to confirm. 

6.  Press the  ◄  button to return to the previous menu or press the "SETUP " button to 

close the Setup Screen. 

Note: Not all discs contain these features. Some features are disc dependent. 

General Setup Page 

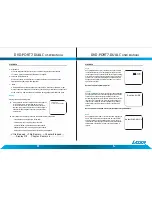
TV Display 

•  4:3: 

When the player outputs signal to a normal monitor. Wide-screen images are 

shown on the screen. But with some parts cropped automatically. 

•  Normal / LB: Normal/LB: When the player outputs signal to a normal monitor, a 

normal picture is shown on the screen with a black strip at both the top and bottom 
of the screen. 

•  16:9: 

Wide: When the player outputs signal to a wide screen monitor, a wide picture 

is shown on the full screen. 

Angle Mark 

•  ON: The screen will show the angle mark icon. (If an angle option is available). 
•  OFF: The screen will not display the Angle Mark. 

SYSTEM SETUP 

OSD Language 

You can choose one out of several different languages as the OSD setup language 

Captions 

•  ON: Captions are displayed. (If an captions available). 
•  OFF: The screen will not display captions. 

Screen Saver 

•  ON: Enables screen saver. 
•  OFF: Disables screen saver (off). 

Note: The DVD player will enter the Screen Saver mode after approximately five minutes if 
the same image remains on the screen. 

Last Memory 

•  ON: The unit will return to the last position on the disc. 
•  OFF: The unit will not return to the last position on the disc. 

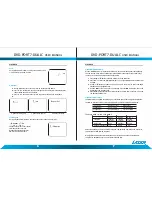
Speaker Setup 

Downmix  • LT/RT 

RIGHT/LEFT Channel: Mixes a 5.1 Ch audio signal to 2 audio channels and 

then outputs to the left and right speakers. 

• Stereo 

Outputs a stereo signal to the left and right speakers. 

Dual Mono 

•  Stereo: Left/Right channel audio will be played back by the Left/Right speakers. 
•  L-Mono: Playback of Left channel audio only. 

DVD-PORT7-DUAL

C


USER MANUAL

DVD-PORT7-DUAL

C


USER MANUAL

Summary of Contents for DVD-PORT7-DUALC

Page 1: ...Laser Dual 7 Screen Portable DVD Player Please read carefully before use DVD PORT7 DUALC USER MANUAL...

Page 2: ...8 Fitting the Headrest mounts and DVD player 8 Mounting the Monitor 8 Connecting Headphones 9 PLAYBACK 9 The Remote Control 9 Key Functions 10 Loading and Playing a Disc 10 Display 11 Angle 12 Subtitl...

Page 3: ...ge this product any liquid such as water or moisture extreme heat cold humidity dusty or sandy environments Only place this device on stable surfaces and ensure that any attached cables are secure and...

Page 4: ...oft damp cloth and wipe from the inside to the outside of the disc Always return the disc to its enclosure when finished with DVD PORT7 DUALC USER MANUAL WHATS IN THE BOX WHAT S IN THE BOX 1 X Main DV...

Page 5: ...he Tab at the top of the mount to open the flap 6 Place the DVD player the mount and secure the tab at the top 7 Adjust the tension on the straps if required 8 With the vehicle ignition off connect th...

Page 6: ...to the next chapter or track Play Pause Press to start playback or to pause playback Stop Press to stop playback Program This button is used to program the favourite songs or chapters when using VCD...

Page 7: ...splayed e Elapsed Title Remain Chapter Elapsed 7 Display Off Chapter Remain PLAYBACK Angle During playback of a disc press the ANGLE button to display the available angles for discs containing multi a...

Page 8: ...he A button to select the current folder and press OK to confirm Then you can back to the folder list Playback of DIVX content The DIVX format is capable of holding high quality video and sound in a h...

Page 9: ...tor a normal picture is shown on the screen with a black strip at both the top and bottom of the screen 16 9 Wide When the player outputs signal to a wide screen monitor a wide picture is shown on the...

Page 10: ...e that is not supplied with this product PAL Video output is PAL only Multi Video output is as per source material NTSC Video output is NTSC only Audio Sets the default Audio language of DVDs played o...

Page 11: ...it skipping through it IR sensor inoperative 1 Ensure that the batteries in the remote are fresh 2 Ensure that the remote sensor eye is not obstructed 3 Ensure that the infrared transmitter is affixed...

Page 12: ...erified your place of purchase or Laser will make an assessment based on the date of manufacture the condition of the Laser Product and the type of defect Step 2a Contact your place of purchase They w...

Reviews: