4
ASSEMBLY INSTRUCTIONS
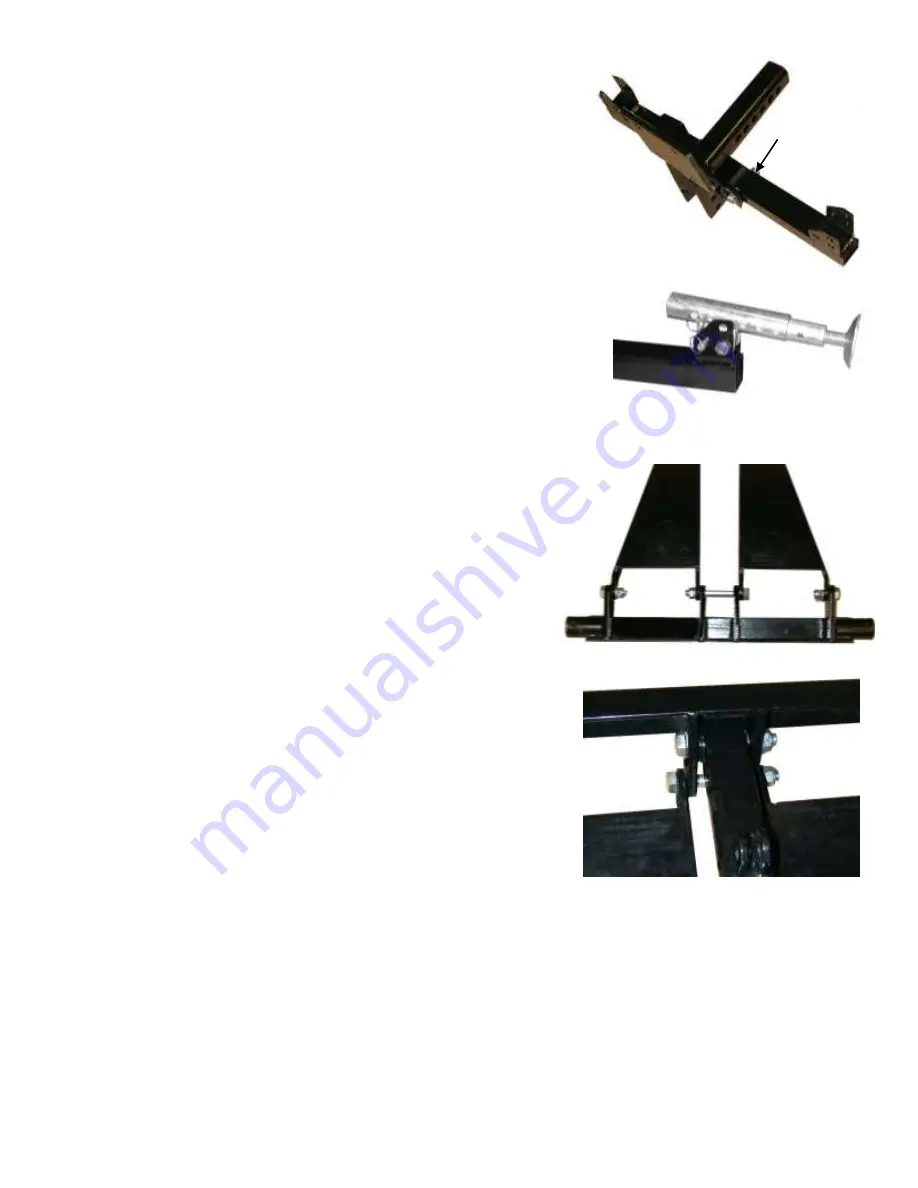
1 Attach the Outrigger Arm
Attach outrigger support (F) to the hitch adapter (A) using two M12 x 75 bolts (#14) A F
with M12 flat washers (#5) and M12 nylon lock nuts (#4).
2 Attach the Outriggers
Attach the two outrigger assemblies to the far outside lower holes in the outrigger
tube (F) as shown. Use a M12 x 75 bolt (#14) with a M12 washer (#5) and M12
nylon lock-nut (#4) on each bolt. Position the outrigger tubes as shown, then install a
quick release pin through the outrigger tube and outrigger assembly as shown.
After installing the pin, replace the securing clip in the pins.
F
The assembly should now look like this…….
3 Attach the Guide Arms to the Pivot Tube
Attach the Guide Arms to the Pivot Tube. Start at the center holes (A) and
Use an M12 x 105 (#11) bolt with an M12 washer (#5) and an M12 nylon B A B
lock-nut (#4). Then Use M12 x 35 bolts (#6) with M12 washers (#5) and
M12 nylon lock-nuts (#4) on each of the Outside holes (B).
D
4 Attach the Lifting Arm to the Pivot Tube
Attach the Lifting Arm (B) to the Pivot Tube (D) using an M12 x 85 bolt (#7) and
An M12 washer (#5) and an M12 nylon lock-nut(#4). Notice that the tabs with the holes
In them face up and are closest to the Pivot Tube.
B
5 Attach the Lifting Arm and Guide Arms to the Hitch Adapter Plate
Attach the Lifting Arm (B) to the Hitch Adapter Plate (A) using an M12 x 85 bolt (#7)
A
and an M12 washer (#5) and an M12 h all the parts. Secure it with an M12
washer (#5) and an M12 nut (#4). nylon lock-nut (#4). Now attach the two ends of the
Guide Arms (C) using an M12 x 105 bolt (#11) throug


