


3: Installation of the PremierWave XN Device
PremierWave® XN Intelligent Gateway User Guide
28
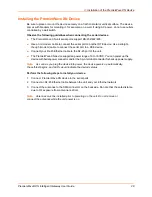
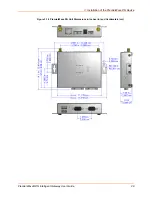
Installing the PremierWave XN Device
Be sure to place or mount the device securely on a flat horizontal or vertical surface. The device
comes with brackets for mounting it, for example, on a wall. If using AC power, do not use outlets
controlled by a wall switch.
Observe the following guidelines when connecting the serial devices:
The PremierWave XN unit serial ports support RS-232/422/485.
Use a null modem cable to connect the serial port to another DTE device. Use a straight-
though (modem) cable to connect the serial port to a DCE device.
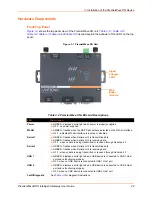
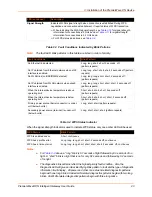
Connect your RJ-45 Ethernet cable to the RJ-45 port of the unit.
The PremierWave XN device supports a power range of 9 to 30 VDC. You can power up the
device with barrel-power connector and/or the 3-pin terminal connector for backup power supply.
Note:
As soon as you plug the device into power, the device powers up automatically,
the self-test begins, and LEDs would indicate the device's status
Perform the following steps to install your device:
1. Connect PremierWave XN device to the serial ports.
2. Connect an RJ-45 Ethernet cable between the unit and your Ethernet network.
3. Connect the antennas to the SMA connector on the backside. Do note that the safe distance
due to RF exposure from antenna is 23 cm.
Note:
Antennas must be installed prior to powering on the unit. Do not remove or
connect the antennas while the unit power is on.


