


46
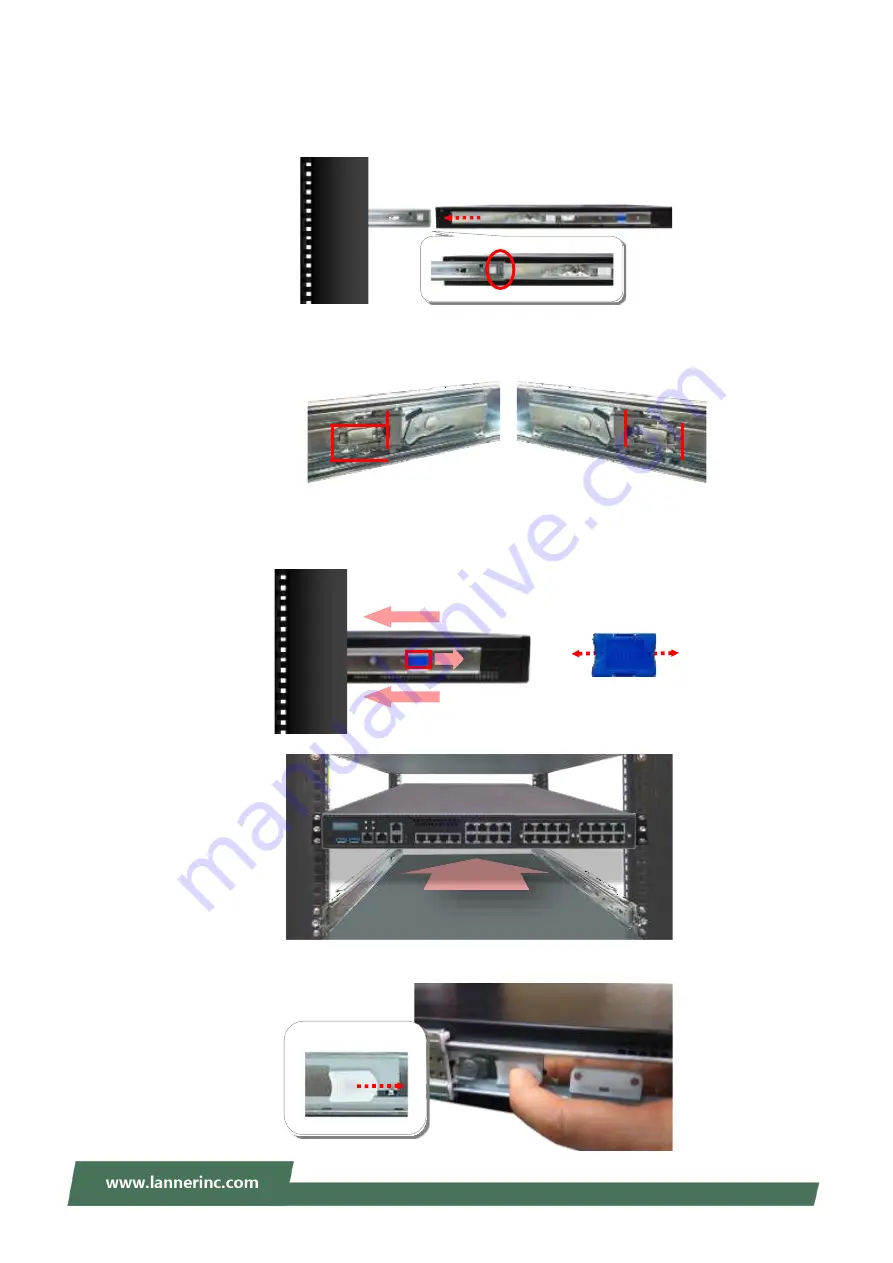
2. Hold the chassis with its front facing you, lift and gently insert it by aligning with the slide-rail assemblies
as shown in the image, and then push the unit into the cabinet.
3. Keep sliding the rails in until they stop about halfway. Press down the metal clips on bother inner channels
and push them further into the cabinet.
4. To have the chassis completely inserted into the rack, pull and hold the Rail Lock tab on both brackets
while pushing in the chassis.
To detach the chassis from the rack, pull the Release Tabs on both sides of the brackets towards you while
gently sliding the chassis out.
Press down the metal
clips while pushing in.
Rail Lock
Release Tab
Summary of Contents for NCA-5210
Page 1: ...NCA 5210 User Manual Version 1 7 Date of Release 2021 09 16 Network Appliance Platform...
Page 31: ...31 3 Slide and pull the top cover backwards a little bit 4 Lift the top compartment...
Page 53: ...53 HW Monitor This option allows you to view hardware health status...
Page 65: ...65 SATA1 enable or disable the SATA1 port SATA2 enable or disable the SATA2 port...
Page 66: ...66 SATA3 enable or disable the SATA3 port SATA4 enable or disable the SATA4 port...
Page 68: ...68 You may select Enabled Disabled or Auto...
Page 71: ...71 Memory Configuration Memory Configuration provides memory configuration parameters...
Page 81: ...81 Discard Changes and Exit exit system setup without saving the configuration changes...
Page 82: ...82 Restore Defaults restore load factory default setting for all setup parameters...
Page 83: ...83 Boot Override You may select a device under Boot Override for this function...
Page 84: ...84...
Page 93: ...93...


