NCA-4030 User Manual
25
T
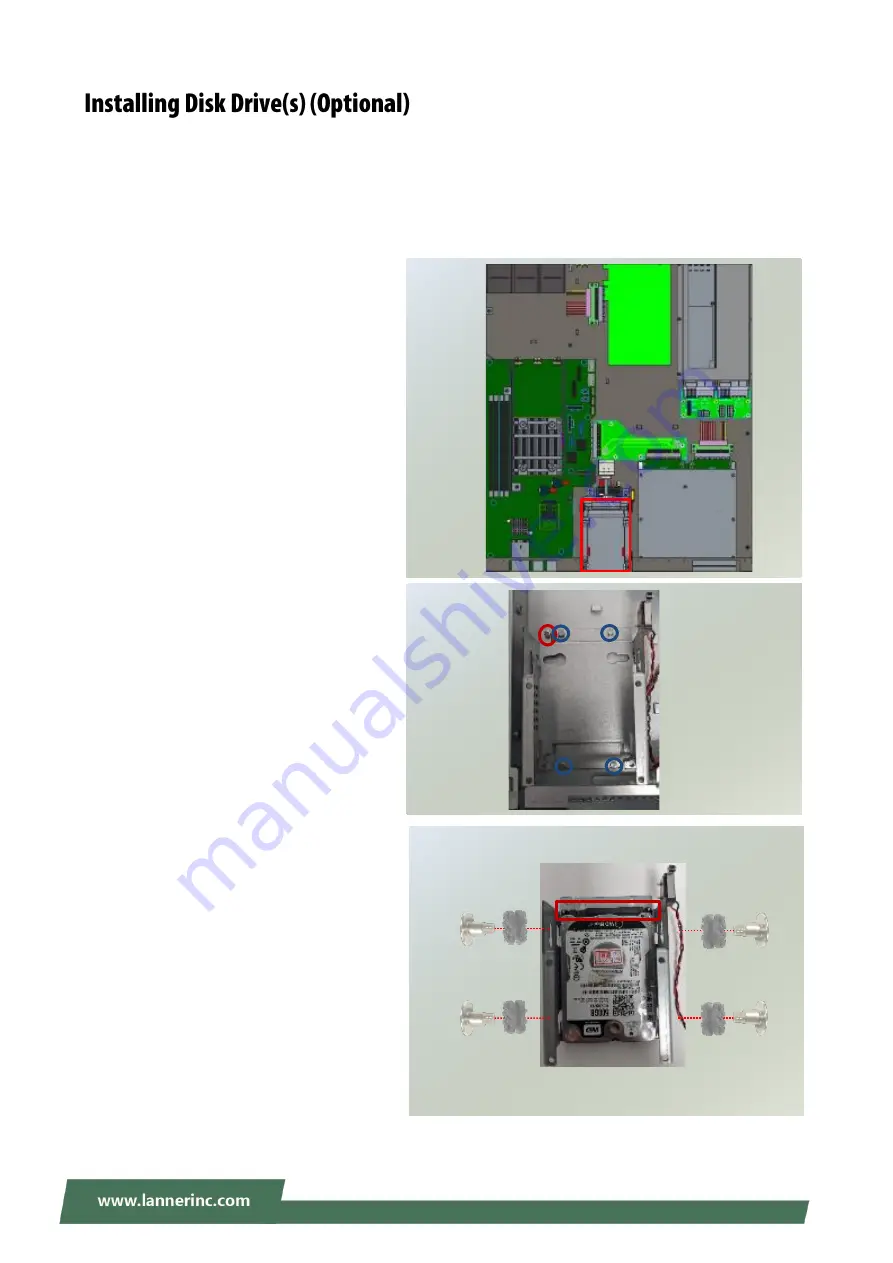
he HDD/SSD bay supports two 2.5” SATA HDDs or SSD for additional data storage. Follow the steps below
for installation.
After you have installed the drives on the disk bay, make sure the SATA data cables and SATA power cables
are connected to the designated connectors on the motherboard.
1. Power off the system and open the cover.
2
. Locate the 2.5” disk trays inside the system.
3. Loosen the one (1) screw that secures the
tray. Remove the screw, take the tray out
and prepare to install the disk drives.
Note: Make sure to watch out for the notches
(circled in blue) on the sides of the tray,
especially when placing the tray back in the
system.
4. Mount the disk drives in the tray, make
sure the SATA Contacts (SATA data cables
and power cable connectors) are facing
outwards. Apply two (2) disk screws with
rubber washers on each side of the disk
drive.
NOTE: If you are going to install two disk
drives, always start by installing the disk in
the lower (bottom) slot.
SATA Contacts
Summary of Contents for NCA-4030
Page 1: ...1 NCA 4030 User Manual Version 1 0 Date of Release 2022 10 21 Network Appliance Platforms...
Page 14: ...NCA 4030 User Manual 14...
Page 44: ...NCA 4030 User Manual 44...
Page 55: ...NCA 4030 User Manual 55...
Page 57: ...NCA 4030 User Manual 57 Feature Options Description TruOpt Optimize DPDK Optimize setting...
Page 62: ...NCA 4030 User Manual 62...
Page 64: ...NCA 4030 User Manual 64...
Page 78: ...NCA 4030 User Manual 78...


