CAUTION
DRIVE AT REASONABLE SPEEDS TO
INSURE YOUR SAFETY. SLOW DOWN
BEFORE MAKING SHARP TURNS OR
USING THE BRAKES. DRIVE SLOWLY
OVER ROUGH GROUND, SIDE HILLS,
AND AROUND CURVES TO AVOID TIP-
PING.
4-5.2
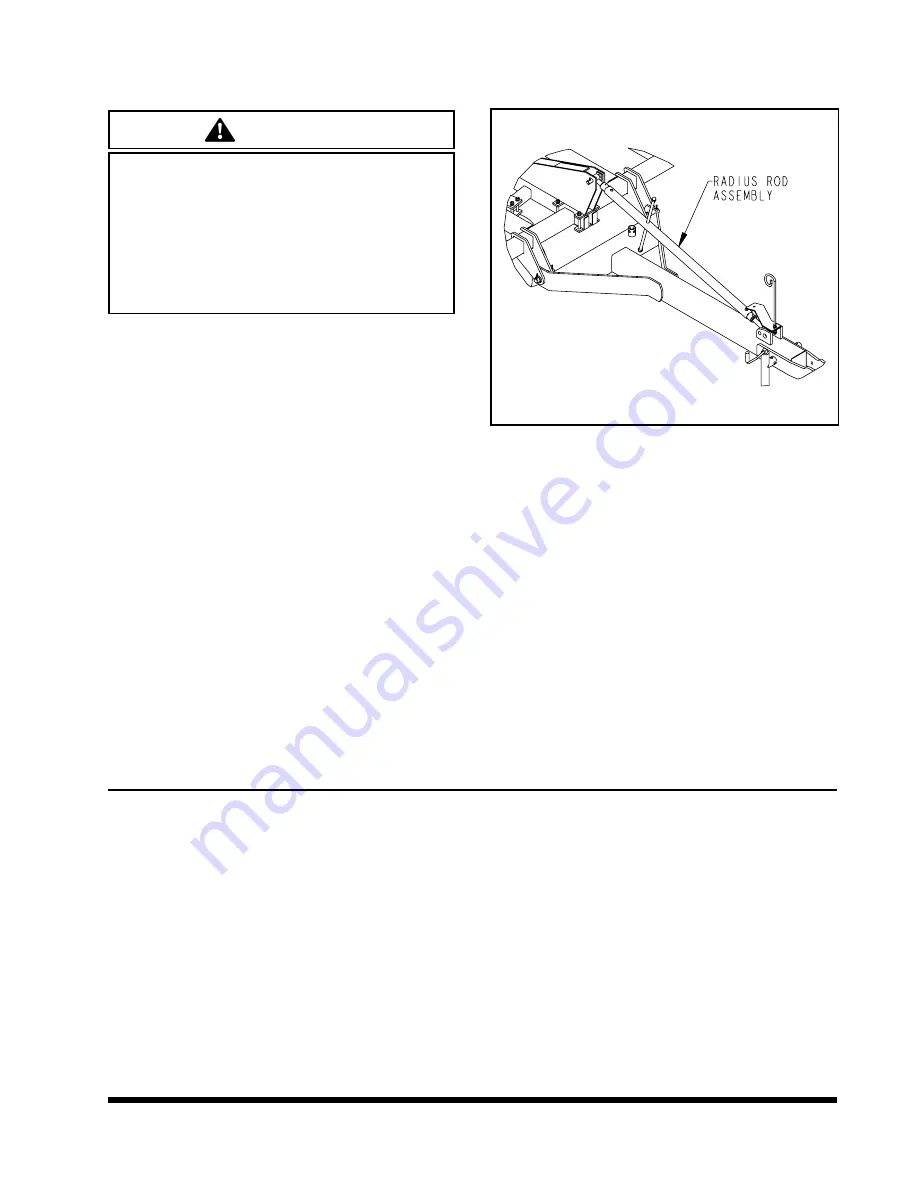
Check the front to rear leveling of the
frame. Adjust radius rod until frame is level
at working depth and all sections of the ma-
chine are cutting at the same depth
(See
Figure 4-4).
4-5.3
Set the unit working depth (1 - 5 inches)
by adjusting the stroke control on the master
cylinder. For stability, it is important that the
gauge wheels always apply slight pressure
against the soil.
4-5.4
Select proper speed (from 5 - 8 miles
per hour) for best results.
4-5.5
Always lift the Tilloll completely out of
the ground before turning or backing. This
prevents shank, disc, or harrow damage or
damage to their respective mounting brack-
ets.
4-5.6
It is important to keep all bolts tight at
all times, especially during the first few hours
of operation. Be sure to check the shank U-
bolts and pivot bolts. Tighten wheel lug bolts
to 90 ft-lbs of torque. After break-in period,
check them periodically. Loose bolts can re-
sult in lost, broken, or prematurely worn
parts and unnecessary down time. Refer to
torque specifications in
when retightening loose bolts.
4-5.7
Reduce speed at field ends, and lift the
Tilloll completely out of the ground before
turning.
4-5.8
When operating in the field, run the im-
plement with a minimum overlap of one foot
to insure an even mixing and leveling of the
soil.
4-6 DISC GANG SCRAPER ADJUSTMENT
4-6.1
To adjust the pressure of the disc gang
scrapers, loosen the U-bolts that hold the
scraper assembly in place. Slide the scraper
assembly toward the disc blades until there
is enough pressure on the scrapers to clean
the discs.
IMPORTANT
THE SCRAPER BLADES ARE REVERSIBLE TO
ALLOW EXTENDED USE BEFORE REPLACE-
MENT IS REQUIRED.
IMPORTANT
THE STRAIGHT COULTER AT THE END OF
EACH DISC GANG IS TO CONTROL THE FLOW
OF SOIL OUT OF THE SIDE OF THE MACHINE.
4-5
Figure 4-4 Adjusting Unit Working Depth
Summary of Contents for 875-18
Page 3: ...MODEL 875 SERIES TILLOLL OPERATOR S MANUAL PURCHASED FROM DATE ADDRESS PHONE NO SERIAL NO i ...
Page 4: ...ii ...
Page 8: ......
Page 12: ...2 4 Figure 2 1 875 10 Shank Placement Assembly ...
Page 13: ...2 5 Figure 2 2 875 13 Shank Placement Assembly ...
Page 14: ...2 6 Figure 2 3 875 15 Shank Placement Assembly ...
Page 15: ...2 7 Figure 2 4 875 15F Shank Placement Assembly ...
Page 16: ...2 8 Figure 2 5 875 18 Shank Placement Assembly ...
Page 17: ...2 9 Figure 2 6 875 21 Shank Placement Assembly ...
Page 18: ...2 10 Figure 2 7 875 25 Shank Placement Assembly ...
Page 19: ...NOTES 2 11 ...
Page 20: ......
Page 24: ...3 4 Figure 3 3 Frame Assembly Fold Models ...
Page 25: ...3 5 Figure 3 4 Frame Assembly Fold Models ...
Page 26: ...3 6 Figure 3 5 Shank Clamp and Sweep Assembly ...
Page 30: ...3 10 Figure 3 8 Hydraulic Lift Assembly Fold Models ...
Page 32: ...3 12 Figure 3 9 Hydraulic Fold Assembly 15 F Model ...
Page 34: ...3 14 Figure 3 10 Hydraulic Fold Assembly 18 21 25 6 Models ...
Page 36: ...3 16 Figure 3 11 Disc Gang and Spray Shield Installation 18 21 25 6 Models ...
Page 38: ...3 18 Figure 3 12 Reel Assembly Installation ...
Page 40: ...3 20 Figure 3 13 Harrow Assembly Installation ...
Page 42: ...3 22 Figure 3 14 Pull Hitch Installation 15 F Model ...
Page 44: ...3 24 Figure 3 15 Pull Hitch Installation All Other Models ...
Page 46: ...3 26 Figure 3 17 Decal Installation 1 of 2 ...
Page 47: ...3 27 Figure 3 18 Decal Installation 2 of 2 ...
Page 49: ...NOTES 3 29 ...
Page 50: ......
Page 60: ...NOTES 4 10 ...
Page 64: ...NOTES 5 4 ...


