
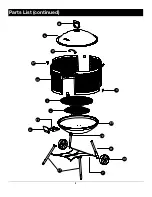


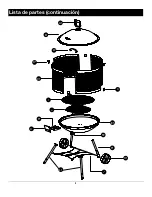


E1
E1
L1
T1
BB
DD
AA
AA
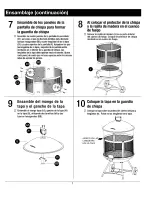
KEEP ROUND
EDGE TOWARDS
THE CENTER OF
FIREBOWL
BB
DD
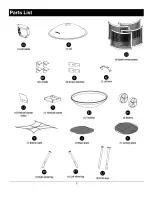
(30) M6 x 12mm Bolts
(30) M6 Hexnuts
(2) M6 Capnuts
(2) M8 Locknuts
(10) Washers
AA
BB
CC
DD
EE
Phillips
screwdriver
Adjustable
wrench
HARDWARE INCLUDED
NOTE:
Hardware not shown to actual size.
TOOLS REQUIRED
5
Hardware
Assembly
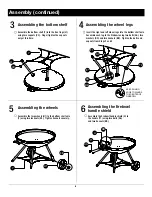
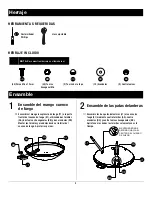
1
Assembling the firebowl
handle
Assemble the firebowl handle (T1) to the
front of the firebowl (E1) using two bolts (AA), two
hexnuts (BB) and two washers (DD).
Assemble the bolts and washers from inside
the firebowl. Tighten bolts securely.
2
Assembling the front legs
Assemble the two front legs (L1) to the firebowl (E1) using
four bolts (AA), four washers (DD) and four hexnuts (BB).
Finger tighten the bolts only at this time.
Summary of Contents for Heatwave 28051
Page 1: ......
Page 2: ......
Page 3: ......
Page 4: ...B C1 J I T1 L1 F2 W D1 X U E1 F1 H1 Y A1 4 Parts List continued...
Page 7: ......
Page 9: ......
Page 11: ......
Page 12: ......
Page 13: ......
Page 14: ...B C1 J I T1 L1 F2 W D1 X U E1 F1 H1 Y A1 4 Lista de partes continuaci n...
Page 17: ......
Page 19: ......


