


26
washing cycle you have chosen will be extended up to
having reached the exact temperature (thermocontrol).
G – Extracting the basket, incline and shake
it
carefully. So the rest of the water drops will be
eliminated.
Leave the dishes in the baske t until they will be dry by
evaporation. Take the dis hes aw ay from the basket
and pay attention not to touc h the dishes on its border
and put them on clean shelves.
To continue the wash, carry a new basket, introduce it
in the machine, close the door and press button
“C”.
-
Endless cycle (maximum 15 minutes)
: the door
being closed and the cy cle put on (any cycle), keep the
button
“B”
pressed for 3 seconds: lamps 1 and 2 will
flash at the same time (thermocontrol excluded); the
cycle can be interrupted at any
time pressing again
button
“C”
that w ill let final sequences of pause-rinse
start.
Self-cleaning cycle
:
- T o switch the machine off press and hold button “A”
for 2 seconds
(
Cycle pushbutton is red
);
- Remove the overflowpipe from the tank and wait until
it is completely empty
(for machines equipped w ith drain pump, see the
relative section for instructions),
- Close the hood of the dishwasher
- T o sw itch the machine on press and hold
main
switch “A” for 2 seconds
The “C” indicator flashes
yellow
-To begin the self-cleaning process, press and hold
cycle pushbutton “
C
” for 3 seconds until a solid
purple
light
turns on,.
After 10 minutes the machine will automatically stop
The “C” indicator light is solid red ;
N.B.: T he indicator w ill sw itch off after nearly
15
seconds
-
Stand by
: The machine w ill automatically stop after
an hour of inactivity (red button
“C” will stay lit
) .
To resume normal function press the button
“A”.
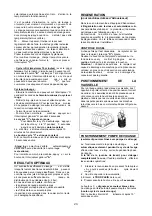
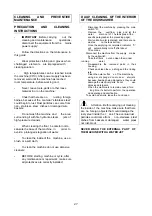
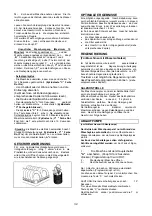
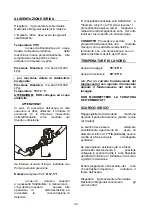
DISHES POSITIONING
It is suitable to place dishes, inside the plastic basket
with the concave side facing upw ards. Place mixed
cutlery in a vertical positi on into the suitable container
minding not to cram them and with handgrips towards
the bottom (see drawing).
ACHIEVEMENTS
Any deficiency in the w ashing process is apparent
when dirty residuals are visible. An insufficient rinsing
might cause any halos: in this case, check that the
rinsing jets are clean and there is a sufficient pressure
in the water distribution net work (ideal is betw een 2-4
bar).
In the case that residuals are present, check that:
• the washing jets are clean
• there is detergent
• filters are clean
• the position of the dishes in the rack is correct (look
at the specific paragraph).
REGENERATING
(for machines with Water softener)
If the glass-w asher is equipped w ith a W ater softener
the
regeneration of resins
is automatic
according to
parameters fixed by the producer (this operation is
signalled by lighting up of led “D”).
According to the water hardness, it is possibile to
modify the programming of the regeneration. See the
corresponding table in the installer section.
SALT CONTROL
When it is necessary to add sa lt in the container, the
lamp “
D"
flashes.
Unscrew the plug of the salt container at the bottom of
the tank and put 1 kg coarse salt tablets in it. Clean the
gasket and screw the plug.
Attention!
The lack of salt in the c ontainer damages the machine
because of limestone, besides a defective w ashing of
glasses and dishes.
These damages are not covered by the warranty.
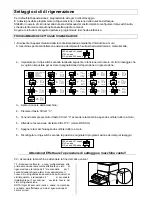
DRAIN PUMP INSTRUCTION
(only for machines with drain pump)
The drain pump starts up automatically just during
the washing cycle
to drain the exceeding w
ater
coming from the rinsing cycle.
At the end of the working day, in order to
completely drain the tank,
it is necessary to perform
the following operations:
1.Switch the machine off by keeping pressed the main
switch “A” for 2
seconds (cycle pushbutton
becomes red);
2.Open the hood of the dishwasher;
3 .Remove the overflow from the tank;
4.Afterwards push button
“C” for 3 seconds.
Pushbutton “C”
flashes with sky-blue colour
.
The drain w ill stop automatic ally after 5 minutes (
cycle
pushbutton is red).
N.B : the button turns off completely after about 15”
seconds.
To stop manually the drain cy cle, press the
cycle
button “C” again.
Reinstall the overflow and close the hood.


