22
PXl16 Sheartec:II Planer \ Setup Assembling
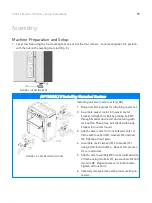
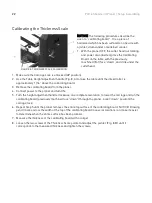
Calibrating the Thickness Scale
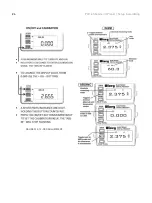
FIGURE 8: THICKNESS SCALE CALIBRATION
NOTICE!
The following procedures describe the
use of a “calibrating board”. It is a piece of
hardwood which has been surfaced on one side with
a jointer, drum sander or wide belt sander.
1. With the planer OFF, the cutter head not rotating
and power disconnected, place the Calibrating
Board on the table, with the previously
machined (flat) face “down”, and slide under the
cutterhead.
1. Make sure the Carriage Lock is unlocked (UP position).
2. Use the Table Height Adjustment handle (Fig. 8, A) to raise the table until the infeed roller is
approximately 1/16” above the calibrating board.
3. Remove the calibrating board from the planer.
4. Connect power to the planer and turn ON.
5. Turn the height adjustment handle clockwise, one complete revolution, to lower the carriage and run the
calibrating board (previously machined face “down”) through the planer. Lock (“down” position) the
carriage lock.
6. Repeat Step 5 until the planer removes the entire top surface of the calibrating board. NOTICE! Drawing
pencil marks across the width of the top of the calibrating board in several locations can make it easier
to determine when the entire surface has been planned.
7. Measure the thickness of the calibrating board with a caliper.
8. Loosen the two screws of the Thickness Scale pointer and adjust the pointer (Fig. 8, B) until it
corresponds to the measured thickness and tighten the screws.
Summary of Contents for Sheartec:II PXl16
Page 1: ...PXl16 Sheartec II Planer Owner s Manual MPLANPX16 0130 3 10 2021...
Page 24: ...24 PXl16 Sheartec II Planer Setup Assembling FIGURES 10 12 DRO ADJUSTMENT...
Page 38: ...38 PXl16 Sheartec II Planer Replacement Parts Diagram Table Lift...
Page 39: ...39 PXl16 Sheartec II Planer Replacement Parts Diagram Stand Motor...

