-12-
www.igmtools.com
7. Adjustments
Your Laguna Tools machine comes fully
adjusted from the factory, but it is good practice
to double check these adjustments and make
sure the tool is in safe operating condition.
7.1 Fence Adjustments
Fitting the fence:
You will need to fit the fence to the right side of
the blade to use the table saw. You will need to
fit the fence to the right side of the blade to use
the table saw.
1. Unplug the table saw!
2. Hold fence with both hands, with cam lock up.
3. Place fence in fence guide
4. Check cam lock action, adjust if necessary.
2. Place fence in fence guide
While holding the fence and the cam lock, raise
the cam lock to engage the open position.
Insert the fence frame into the front rail.
3. Check Cam lock action
The fence can slide freely in any position to the
right of the blade. If the fence does not lock,
adjust both blade paralleling set screws.
Adjusting the Scale (rule):
The scale will need to be “zeroed” every
time the fence guide is taken off the table
or adjusted. The fence must be zeroed for
accurate cuts when using the scale.
1. Unplug the table saw!
2. Position the fence up to blade.
3. Loosen the transparent viewport.
4. Adjust the view as needed.
5. Tighten the view screws.
Place fence in fence guide
WARNING: MAKE SURE SAW IS
UNPLUGGED. With the blade in a high
position, bring the fence close to — but not
touching — the blade. Use a folded piece of
paper between the blade and the fence to
ensure good distance.
Adjust the Viewport
Use a #2 Philips head driver to loosen (but
do not remove) the transparent scale reader.
Adjust the viewport as needed, tighten the
screws. Note: If adjusting the viewport does not
allow enough to zero the scale, see step 8 of
general setup.
There are 2 magnifiers on the longitudinal
ruler, which are used to adjust the width of the
material according to whether you have set the
aluminum profile vertically or horizontally on the
longitudinal ruler.
Adjusting the Fence Glide Bushings:
You may need to adjust the height of the
bushings on either side or rear of the fence. The
fence should be between 1-3 mm off the table
to prevent scratches.
1. Unplug the table saw!
2. Unlock the fence.
3. Use a hex key to adjust the front bushing
height.
4. Use a wrench to adjust the rear bushing
height.
Front Bushings
To adjust the front bushings, use the included
hex key to raise or lower the nylon bushings
that make contact with the front fence rail.
Rear Bushings
Adjusting the Fence to be parallel with the
Blade: It is very important to only operated this
saw with the blade parallel to the fence. Note: If
this section does not help, please see the table
adjustments section: Adjusting the Table to be
Parallel with the Blade. The blade needs to be
parallel to the table (mitre slots) to effectively
make the fence parallel to the blade.
1. Unplug the table saw!
2. Position the fence to access the fence
adjustment screws.
3. Use a hex key to adjust each side
4. Make small increments and check
Use caution: It is not guaranteed that the fence
will be parallel to the saw blade when shipped
from factory. Make sure to make all required
adjustments to make the fence parallel to the
saw blade prior to operation.
Position fence to access adj. screws
WARNING: MAKE SURE SAW IS
UNPLUGGED. Take the fence out of position
and flip it on its back side to access the cat
screws that push the nylon supports in/out.
Use a hex key to adjust
Use the included hex key to adjust the depth of
each nylon support. Do small increments and
check.
7.2 Table Adjustments
Adjusting the Table to be Parallel with the
Blade: It is good practice to make sure that the
table is always parallel to the blade by checking
it often. You can do this with a combination
square or with a dial indicator on an appropriate
mount. Check the IGM website for these tools.
Good
Combination Square. Notice: This method may
leave scratched.
Summary of Contents for Fusion2 2022
Page 2: ...2 www igmtools com...
Page 3: ...3 www igmtools com...
Page 18: ...18 www igmtools com Wiring Diagram Fusion 2 230V...
Page 19: ...19 www igmtools com Fence assembly...
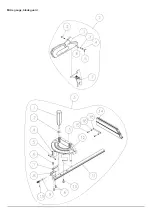
Page 20: ...20 www igmtools com Mitre gauge blade guard...
Page 21: ...21 www igmtools com Motor and trunnion...
Page 22: ...22 www igmtools com Cabinet...


