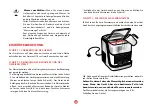
START-UP AND USE
1
ST USE
*
When you unpack the unit, make sure that you remove all of the
packaging materials.
*
Make sure that all of the parts and accessories are present and intact.
*
Before using your unit, thoroughly clean all of the parts (see
upkeep section).
When you turn the unit on, the On/Off indicator light blinks.
This means that the unit is awaiting instructions.
USE OF THE CONTROL PANEL
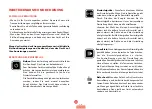
On/off:
The on/off button indicator light will blink
once the unit has been plugged in. The unit is then
in standby mode. To start the unit, press the on/off
button again, the indicator light will turn on. You can
then select the desired ice cube size. You can stop
the making of ice cubes at any time by pressing the
same button again to put the unit in standby.
The indicator light will start blinking.
Ice cubes format:
This button is used to select the
ice cube format. By default, the ice cube size will be
large. Select the desired ice cube size by pressing
successively. An indicator light will blink below the
corresponding illustration.
N.B.: By selecting the smallest ice cube size,
the exterior shape of the ice cubes does not change,
but the density is decreased and the production
cycle is faster. By selecting the largest ice cube size,
the exterior shape of the ice cubes does not change,
but the density is increased and the production
cycle is slower.
Pause/Start:
After choosing the desired ice cube
size, press this button to start making ice cubes.
The indicator light will go on below the illustration
of the ice cube size chosen. Press this button again
to pause the process. The indicator light will then
start blinking. Press this button again to resume
making ice cubes. The indicator light will then go
back on.
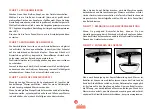
Bin full:
When the ice cube bin is full, the indicator
light goes on and the machine stops working.
Empty the ice cube bin and then put it back in place.
The indicator light will turn off as soon as there is
enough room on the bin. The unit will automatically
make new ice cubes.
51
ENG
Summary of Contents for Transparence 489
Page 1: ...INSTRUCTIONS FR NED DEU GB type 489 NOTICE Machine gla ons Transparence...
Page 5: ...05 FR...
Page 6: ...10 8 Visuel 1 Machine gla ons Transparence Type 489 7 2 6 4 5 9 3 1 06...
Page 15: ...15 FR...
Page 19: ...19 NED...
Page 20: ...10 8 Visuel 1 IJsbokjesmachine Transparence Type 489 7 2 6 4 5 9 3 1 20...
Page 29: ...29 NED...
Page 33: ...33 DEU...
Page 34: ...10 8 Visuel 1 Eisw rfelbereiter Transparence Typ 489 7 2 6 4 5 9 3 1 34...
Page 43: ...43 DEU...
Page 47: ...47 ENG...
Page 48: ...10 8 Visuel 1 Ice cube maker Transparence Type 489 7 2 6 4 5 9 3 1 48...
Page 57: ......
Page 58: ......
Page 59: ......

