


8
9
FEATURES
FEATURES
Other Applications
There are also other programs that are used in conjunction with
the simulation sessions, for example License Manager for handling
program licenses and Simulator Firmware & Network Fixer for
updating the firmware of the simulators or troubleshooting network
problems.
SimDesigner
The SimDesigner application allows you to configure your own
preprogrammed scenarios. It can also be used to analyze and print
out a graphical representation of a scenario.
SimDesigner must be installed to allow conversion of legacy
instructor application files to LLEAP compatible file formats.
For a full overview of all applications and their help files, start LLEAP
Home.
Web Downloads
Visit www.laerdal.com/downloads to download the latest User Guide
and Software.
Airway Features
The airway is anatomically modeled as far as the bronchia.
The airways can be manipulated by a learner:
−
Head tilt/Chin lift
−
Jaw thrust w/articulated jaw
−
Cricoid pressure and manipulation
−
Suctioning (oral & nasopharyngeal)
If the tongue fallback feature is enabled, head tilt is required to open
the airways for mask ventilations.
The Patient Simulator may be ventilated by normal and
emergency methods:
−
Bag-mask ventilation
−
Orotracheal intubation
−
Nasotracheal intubation
−
Transtracheal intubation
Prior to using airway adjuncts, apply a small amount of
Laerdal Airway
Lubricant
to the equipment. Do not spray lubricant directly into the
airway,
The following equipment or methods are suitable to secure
the Patient Simulator’s airway:
−
Laryngeal mask airways: The airways are designed for use with
size #4, but size #5 may also seal correctly.
−
Endotracheal tube intubation, Size ID 7.5 - 8.5 is suitable, but
using the smaller size reduces wear of the Patient Simulator’s
airways.
Use of a malleable stylet is recommended - make sure it does not
extend beyond the ET tube.
Recommended styles:
−
i-Gel
−
Fiberoptic intubation
−
Combitube (size small adult is suitable)
−
Retrograde intubation
−
Needle cricothyrotomy
−
Surgical cricothyrotomy
The following Patient Simulator features indicate incorrect
tube placement:
−
Right main stem intubation – unilateral chest rise
−
Stomach distention
−
Lack of chest sounds, CO
2
exhalation (see
Breathing Features
section)
Configurable Airway Features
Patient Simulator features may be configured to present various
airway Scenarios:
−
The airway may be closed automatically or manually. There are
four levels of resistance and compliance within the airway.
−
Tongue edema - multiple levels
−
Pharyngeal swelling
−
Laryngospasm
−
Decreased cervical range of motion
−
Trismus
−
Teeth - soft upper dentures may be replaced with a hard set of
teeth for enhanced realism while practicing intubations.
During simulation, the following conditions can be set:
−
Can’t intubate/can ventilate
−
Can’t intubate/can’t ventilate
The following information is automatically registered in the
SimMan3G simulation session:
−
Detection of proper head position.
−
Intubation device used (if fitted with RFID tag)
−
Jaw Thrust
−
Pneumothorax decompression
−
Ventilations
−
Stomach distension
Note: In LLEAP the airway and breathing status for the current
simulator is shown in a window. Settings for lung resistance,
compliance, and other parameters can be made. See LLEAP Help
for further information.
Breathing Features
The SimMan3G can simulate spontaneous breathing:
Warning: Do not ventilate the Patient Simulator with oxygen
enriched air or flammable gass.
Caution: Do not ventilate Patient Simulator lungs using humidified
air.
−
Bilateral and unilateral chest rise and fall
−
There are 4 compliance settings, from normal to extremely stiff
−
There are 4 settings for airway resistance, from normal to
extremely tight
−
Normal and abnormal breath sounds
−
5 anterior auscultation sites and 6 posterior auscultation sites
−
Unilateral, bilateral and lobar breath sounds
−
Oxygen saturation and phlethysmogram
−
Cyanosis - indicated by blue lights on the lips
−
CO
2
exhalation for use with third-party etCO
2
detectors
(Requires connection to an external CO
2
reservoir)
Patient Monitor Features - Breathing
−
SpO
2
−
Airway respiration rate (awRR)
−
End-tidal CO
2
(etCO
2
)
−
End-tidal O
2
(etO2)
−
inO
2
−
pH
Lung Specifications
−
Max tidal volume: 1.2 liters
−
Max tidal volume registered in the LLEAP is 900ml. All volumes
larger than 900ml will register as 900ml
−
Max airway pressure: 80 cm H
2
O
−
Simulated stomach inflation starts from approximately 40cmH
2
O
airway pressure.
Note: Lungs are not intended for use with PEEP-valves.
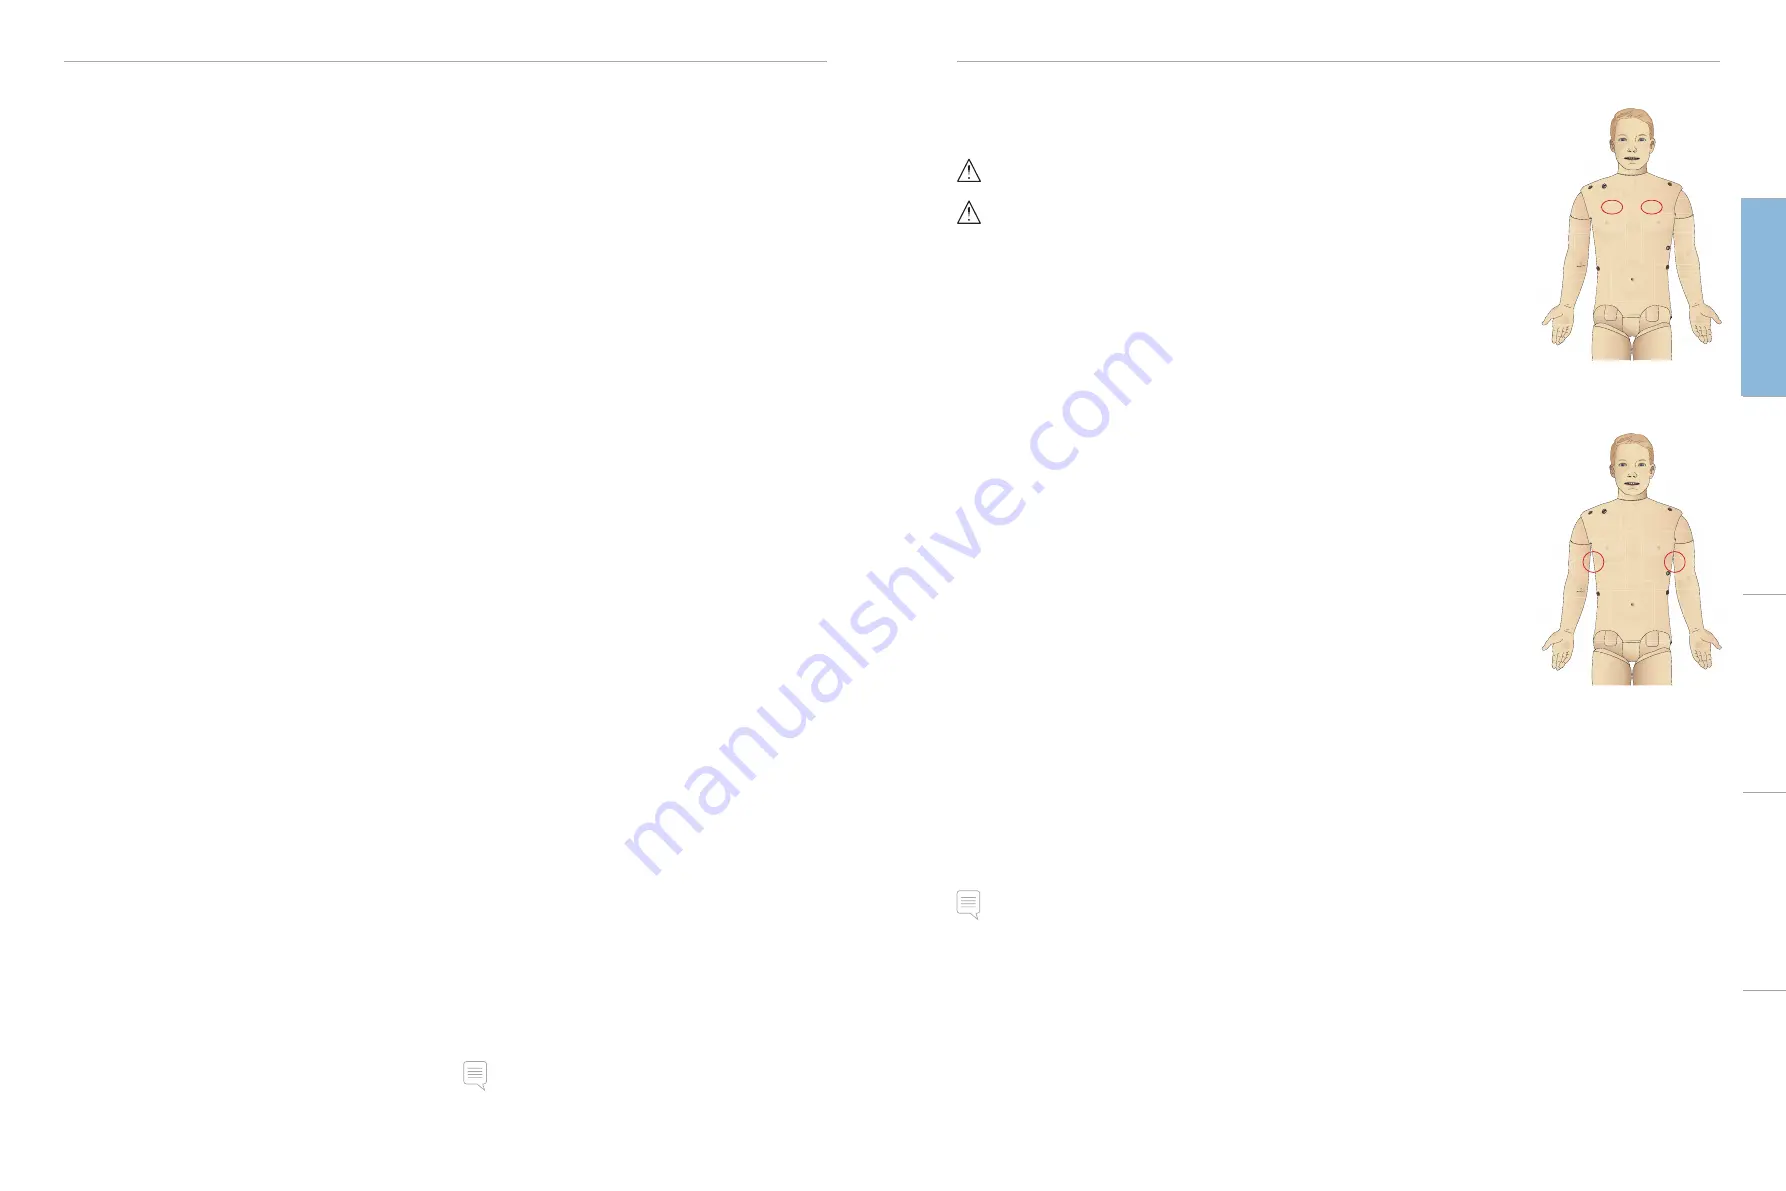
Pneumothorax
Tension pneumothorax with
needle decompression can be
performed at bilateral mid
clavicle line, 2nd intercostal
space. The pneumothorax
bladders may be p/-10
times, the pressure inside the
bladder will drop after repeated
puncturing.
A 22 (or smaller) gauge
needle is recommended for
decompression of the chest.
Using a smaller gauge needle
increases the longevity of the
chest skin and bladders.
However, a too small gauge prevents automatic detection of the
decompression event in the simulation model.
Chest Tube Insertion
Chest tube insertion can be
simulated, and exploration and
cut can be made at left or right
mid-axillary line in the 4th and
5th intercostal space.
Cautions
and
W
arnings
Featur
es
Setup
Maintenance
Spar
e Par
ts
Tr
oubleshooting


