background image

LaCie rikiki go 

Getting Connected

User Manual 

page 9

2.3.  Disconnecting Your Hard Drive

External  USB  devices  feature  “plug  &  play”  connectivity,  which 
means that your drive can be connected and disconnected while the 
computer is running.  To prevent failures, however, it is important to 
follow these steps when disconnecting your hard drive.

2.3.1.  Windows Users

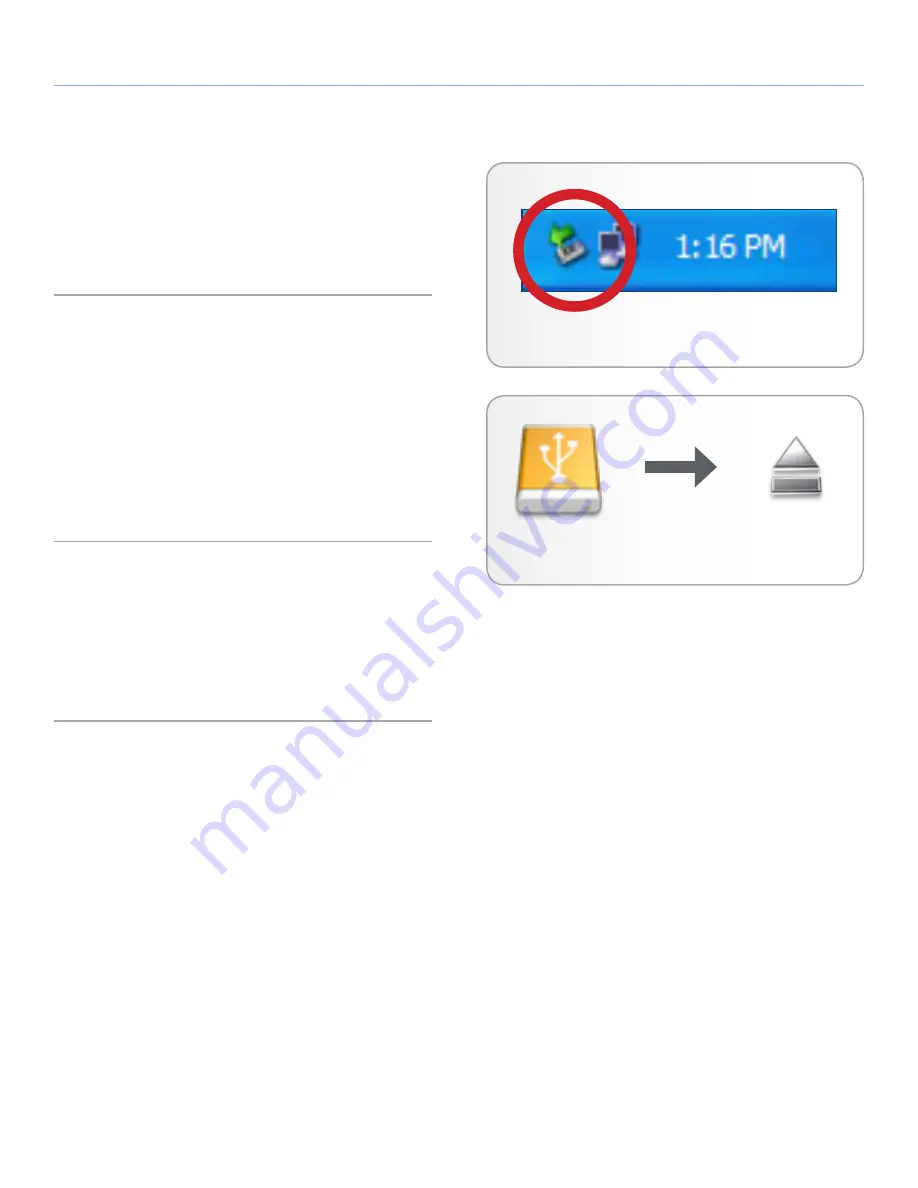
From the System Tray (located in the lower right-hand side of your 
screen), click the Eject icon (a small green arrow over a hardware 
image) (

Fig. 03

).

A  message  will  appear,  listing  the  devices  the  Eject  icon  controls 
(it  should  say,  “Safely  remove...”).  Click  on  the  drive  you  wish  to 
disconnect.

This message will appear: “Safe to Remove Hardware” (or similar). 
It is now safe to disconnect the device.


2.3.2.  Mac Users

Drag the hard drive icon to the trash (

Fig. 04

). (The icon pictured 

below is a generic USB device icon. Your drive may be represented 
by an icon that looks like the drive itself.)

When the icon disappears from the desktop, the drive can be dis-
connected.


Fig. 03 - Windows Users

Fig. 04 - Mac Users

Summary of Contents for 301939

Page 1: ...ur Hard Drive 9 2 3 1 Windows Users 9 2 3 2 Mac Users 9 3 Optional Formatting Partitioning 10 3 1 Windows Users 11 3 2 Mac Users 13 4 Interface and Data Transfer Information 14 4 1 Cables and Connecto...

Page 2: ...lled and used in accordance with the instructions may cause harmful interference to radio com munications However there is no guarantee that interference will not occur in a particu lar installation I...

Page 3: ...it will be unused for an extended period of time Otherwise there is an increased risk of electrical shock short circuiting or fire Do not use the LaCie rikiki go near other electrical appliances such...

Page 4: ...rfect for storage on the go the LaCie rikiki go is small in size but large in capacity Carry it with you when moving important data or use the rikiki go at home knowing it requires very little room on...

Page 5: ...1 LaCie rikiki go 2 Quick Install Guide NOTE Storage utilities and user manual come pre loaded on the drive IMPORTANT INFO Please save your packaging In the event that the drive should need to be rep...

Page 6: ...ts Your system must meet certain requirements in order for your LaCie product to function properly For a list of these requirements please refer to the product packaging or consult the datasheet at ww...

Page 7: ...Cie hard drive connected to your computer Step 1 2 1 Connecting the USB Cable Step 2 2 2 Launching the LaCie Setup Assistant 2 1 Connecting the USB Cable 1 Connect the USB 2 0 cable to your computer F...

Page 8: ...rs double click on the LaCie drive icon that appears on your desktop or Finder and then double click the LaCie icon The LaCie Setup Assistant will guide you through the process of op timizing your LaC...

Page 9: ...ur screen click the Eject icon a small green arrow over a hardware image Fig 03 A message will appear listing the devices the Eject icon controls it should say Safely remove Click on the drive you wis...

Page 10: ...scratched and creates internal address tables that it later uses to locate information What is Partitioning You can also divide the hard disk into sections called partitions A partition is a section o...

Page 11: ...ack up this information before performing these steps 1 Connect the drive to the computer via the interface port 2 Right click My Computer and select Manage 3 From the Computer Management window selec...

Page 12: ...11 Click Next 12 On the Format Partition window select Quick Format Click Next Fig 07 13 Click Finish to begin the formatting process 14 Windows Disk Management will format and partition the disk acc...

Page 13: ...ist of available hard disks on the left side of the window Fig 09 5 Select the Partition tab 6 From the Volume Scheme menu choose the number of parti tions you want to divide the drive into Mac OS X g...

Page 14: ...e latest implementation of this standard and it provides the necessary bandwidth and data transfer rates to support high speed devices such as hard drives CD DVD drives and digital cameras Included US...

Page 15: ...LaCie drive check that it is certified 2 Disconnect your computer s USB 2 0 cable Wait 30 seconds Reconnect 4 3 Installing New Firmware LaCie may periodically offer firmware updates for the hard disk...

Page 16: ...sit the downloads page where the most recent software updates will be available If you need further assistance please contact your LaCie reseller or LaCie Customer Support see section 6 Contacting Cus...

Page 17: ...ognized restart your computer and try again Is there a conflict with other device drivers or extensions Contact LaCie Technical Support for help Has the drive been formatted Make sure that the drive h...
Page 18: ...nd look for an icon and drive letter assigned to the LaCie drive If the drive does not appear follow the rest of the Troubleshooting tips to isolate the problem Does your computer s configura tion mee...

Page 19: ...te at Hi Speed USB 2 0 performance levels when it is connected directly to a Hi Speed USB 2 0 port or hub Otherwise the Hi Speed USB 2 0 device will operate at the slower USB 1 1 transfer rates Is the...

Page 20: ...ve the following information on hand 6 Contacting Customer Support Information Where to Find Information LaCie hard drive serial number Located on a sticker at the back of drive or on the original pac...

Page 21: ...ie contact LaCie Italy http www lacie com it contact Japan Elecom CO LTD http www lacie jp LaCie Korea http www lacie com kr contact LaCie Latin America http www lacie com la contact LaCie Netherland...

Page 22: ...or any loss of data during the use of this device or for any of the problems caused as a result LaCie will not under any circumstances be liable for direct special or consequential damages such as but...

Reviews: