background image

GH1246

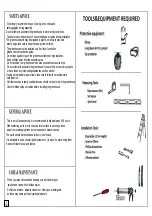
Please read these instructions carefully before beginning assembly. 
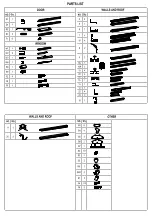
Check all parts against the part list, making sure you have everything you need before you begin.
Please ensure you carry out the installation as per the steps laid out in these instructions.
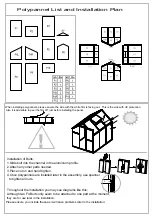
As you go through the installation, do not fully tighten the bolts until you reach the stage where the polypannels have been installed.
Keep these instructions in a safe place for future reference.

Summary of Contents for GH1246

Page 1: ...have everything you need before you begin Please ensure you carry out the installation as per the steps laid out in these instructions As you go through the installation do not fully tighten the bolts until you reach the stage where the polypannels have been installed Keep these instructions in a safe place for future reference ...

Page 2: ...windyconditions Takecaretoavoidhazardssuchasoverheadpowercablesduringinstallation Donotleanagainstorpushthegreenhouseframeduringinstallation Donotpositionyourgreenhouseinanareaexposedtoexcessivewind Hotitemssuchasrecentlyusedbarbecues shouldnotbestoredinthegreenhouse Checkforhiddenpipesorcablesbeforeinstallingthegreenhouse Westronglyrecommendtheuseofworkgloves shoesand safetygogglesduringassembly ...

Page 3: ......

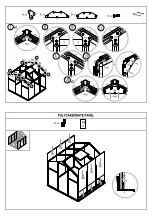
Page 4: ...ensure you include these as it will save problems later in the installation Throughout the installation you may see diagrams like this they are for use later in the installation 4 Once polypannels are installed later in the assembly use spanner to tighten all nuts When installing polypannels please ensure the side with the white film is facing out This is the side with UV protection Also it is adv...

Page 5: ......

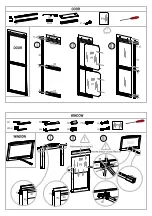
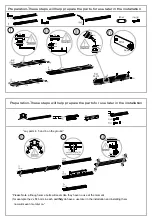
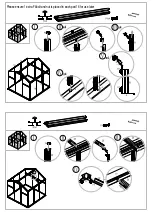
Page 6: ... in the installation Preparation These steps will help prepare the parts for use later in the installation Please Note although some bolts will seem like they have no use at the moment they do have a use later in the installation and installing them now will save time later on Lay parts 4 5 and 6 on the ground ...

Page 7: ......

Page 8: ......

Page 9: ......

Page 10: ...whilst you continue with the installation At this point it is helpful to use a ladder to support the frame ...

Page 11: ......

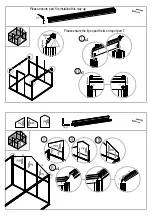
Page 12: ...Please ensure part 8 is installed this way up Please ensure the lip on part 8 sits on top of part 7 ...

Page 13: ......

Page 14: ...Please ensure 1 extra F4bolt and nut is placed in each part 18 for use later ...

Page 15: ......

Page 16: ......

Page 17: ......

Page 18: ...part 8 ...

Page 19: ......

Page 20: ... Silicone should be added to frame to help seal the panels in ...

Reviews: