background image

11

ASSEMBLY

8

1

2

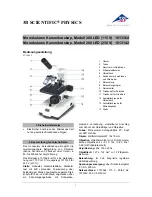
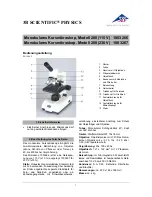
Installing or Replacing the LED

Battery Replacement

Each standard set can be assembled by simply charging the microscope.

Fig. 8

Caution: For LED Replacement During Use or Right After Use

The  LED  socket  and  areas  near  these  will  be  hot  during  and  right  after  use.  Set  the  knob  to"  O"  (OFF), 
disconnect the charging adapter from the wall outlet, and allow LED assembly to cool before replacing it with 
a new LED of the designated type.  Cooling time may vary with ambient temperature.

  Applicable LED replacement: LED P/N 9135000-950

Always use the designated parts. Using an LED other than those specified by LABOMED may lead to a fire 
hazard or improper light level. If contamination occurs, wipe bulb surface with a cloth slightly moistened with 
alcohol.

1

2

4

3

5

6

7

Before changing the LED, remove specimen from the microscope frame, 
and  move  to  the  empty  objective  position.  In  case  all  objectives  are 
mounted, move to the 4x objective.

1.  Raise the stage to the highest position by rotating the coarse focus 

knob (7) clock wise. See figure 8.

2.  Use allen key 3mm (2) to unlock the screw (1) from the stage to un-

secure LED assembly. 

3.  Detach the LED assembly from connectors (3 & 4) by gently pulling 

them apart. Secure the lower part of the connector (3) with the stage 
clip to avoid it from slipping inside.

Caution:  Do  not  pull  the  LED  assembly  excessively  as  it  may 

damage the wire harness inside the system.

4. Remove the condenser system (5) by rotating it anti clockwise.

Caution: Remove the LED by holding it with a soft tissue paper or 

a cloth to avoid finger prints.

5. Remove the LED assembly (6) and replace with new LED assembly.
6. Reverse the procedure from 4 to 2 to secure the system.

Rest the microscope safely aside and follow the following procedure:
1.

Peel the sticker showing electrical information.

2.

Open the screws (1) as shown in figure 9.

3.

Replace the battery.

4.

Reverse the operation from point 3 to 2, to complete the process.

5.

Replacement  battery  comes  with  a  sticker  which  is  to  be  replaced 
after charging battery to make the system tamper-proof.

1

Fig. 9

!

!

!

Summary of Contents for Sigma

Page 1: ...ure proper use of this instrument as well as to avoid injury while operating instrument understanding this manual completely before use is highly recommended LABOMED User Manual Educational Microscopy...

Page 2: ......

Page 3: ...IFICATIONS 6 10 DETAILED OBSERVATION PROCEDURE 13 14 9 SUMMARY OF BRIGHTFIELD OBSERVATION PROCEDURE 12 7 INITIAL SETUP 10 6 OPTIONAL ACCESSORIES 9 8 5 STANDARD COMPONENTS 7 4 SYSTEM DIAGRAM 6 3 UNPACK...

Page 4: ...e free operation The sturdy new stylish design provides comfort as well as stability The high powered objectives are spring loaded to prevent accidental damage to specimen slides The quadruple nosepie...

Page 5: ...charging adapter provided by LABOMED If the proper charging adapter is not used product safety performance cannot be warranted 5 When installing the microscope route the charging adapter away from th...

Page 6: ...safe operational life with the least amount of maintenance required In general routine maintenance is limited to keeping the microscope working parts lubricated and optics clean Always cover the micro...

Page 7: ...ecommend pure volatile petroleum ether or Optical Cleaning Solution as explained in point 3 above Wipe using a spiral movement Do not use a zig zag motion 2 Cleaning of painted surfaces Avoid the use...

Page 8: ...UNPACKING YOUR MICROSCOPE 3 5 Power Adapter Battery charger Microscope Mechanical stage optional Slides optional...

Page 9: ...6 SYSTEM DIAGRAM 4 Sigma Integrated eyepiece with eye guard Objectives Stage clips Coarse focusing knob Fine focusing knob...

Page 10: ...STANDARD COMPONENTS 5 7 After opening the package make sure that the correct units for the selected set are present LED Adapter Integrated eyepiece Objectives Stage clips...

Page 11: ...wards in direction of arrows as shown in figure 3 2 Align the indexing pins A and B to the index holes 1 and 2 provided on the stage plate Align A with 1 and B with 2 as shown in figure 4 3 Fix the st...

Page 12: ...er positioning your specimen slide return the bow shaped lever 4 gently by slowly releasing lever handle 3 3 Use X axis movement control knob 2 and Y axis movement control knob 1 for horizontal and ve...

Page 13: ...ovided at rear of the microscope See figure 6 Fig 6 Objectives are factory set Objectives are par centered and par focalised during assembly phase All objectives have been secured for a tight fit to p...

Page 14: ...4x objective 1 Raise the stage to the highest position by rotating the coarse focus knob 7 clock wise See figure 8 2 Use allen key 3mm 2 to unlock the screw 1 from the stage to un secure LED assembly...

Page 15: ...te the knob towards I ON Place the specimen on the stage Engage the 10X objective in the light path Bring the specimen in focus Engage the objective to be used in the light path and bring the specimen...

Page 16: ...e 11 1 Rotate the coarse adjustment knob 1 anticlockwise to fully lower the stage 2 Press the stage clips 2 one by one with finger to lift them from front Place the specimen by sliding the specimen gl...

Page 17: ...is obtained an image is detected rotate the fine adjustment knob 2 for fine focusing Working Distance WD The WD refers to the distance between each objective and the specimen when precise focus of the...

Page 18: ...4 Part of image is defocused or image The objective is not properly engaged Engage the objective into position looks like it s flowing in the light path until it clicks The specimen is not set properl...

Page 19: ...imen 6 Dimensions 267 0mm L x 179 6mm W x 368 0mm H 7 Electrical Battery 3 7V 500mAH Charging time up to 3 hours with totally consumed battery Back up time up to 8 hours 8 Operating environment Indoor...

Page 20: ...009 Labo America Inc 2124000 990A 12 2009 LABOMED and Sigma are registered trademarks of Labo America Inc With a policy of continuous development Labo America Inc reserves the right to change design a...

Reviews: