11
2.1.1 Checking the Installation
Before starting up the ESCR check and verify that all connections are correct. Check that all terminations and
contacts are tightened securely. Check that the input voltage, frequency, and DC output voltage match the front
nameplate of the charger.
2.1.2 Starting/Stopping
the
ESCR
Once proper connections are established energize the charger by applying AC power. This will charge the
capacitors inside the unit and eliminate heavy arcing when the batteries are connected.
2.1.3 Start-Up
Sequence
Upon powering up the ESCR the LCD will display the model number. During the start up sequence, the Low DC
voltage alarm will be temporarily activated.
2.2
The Front Panel Display
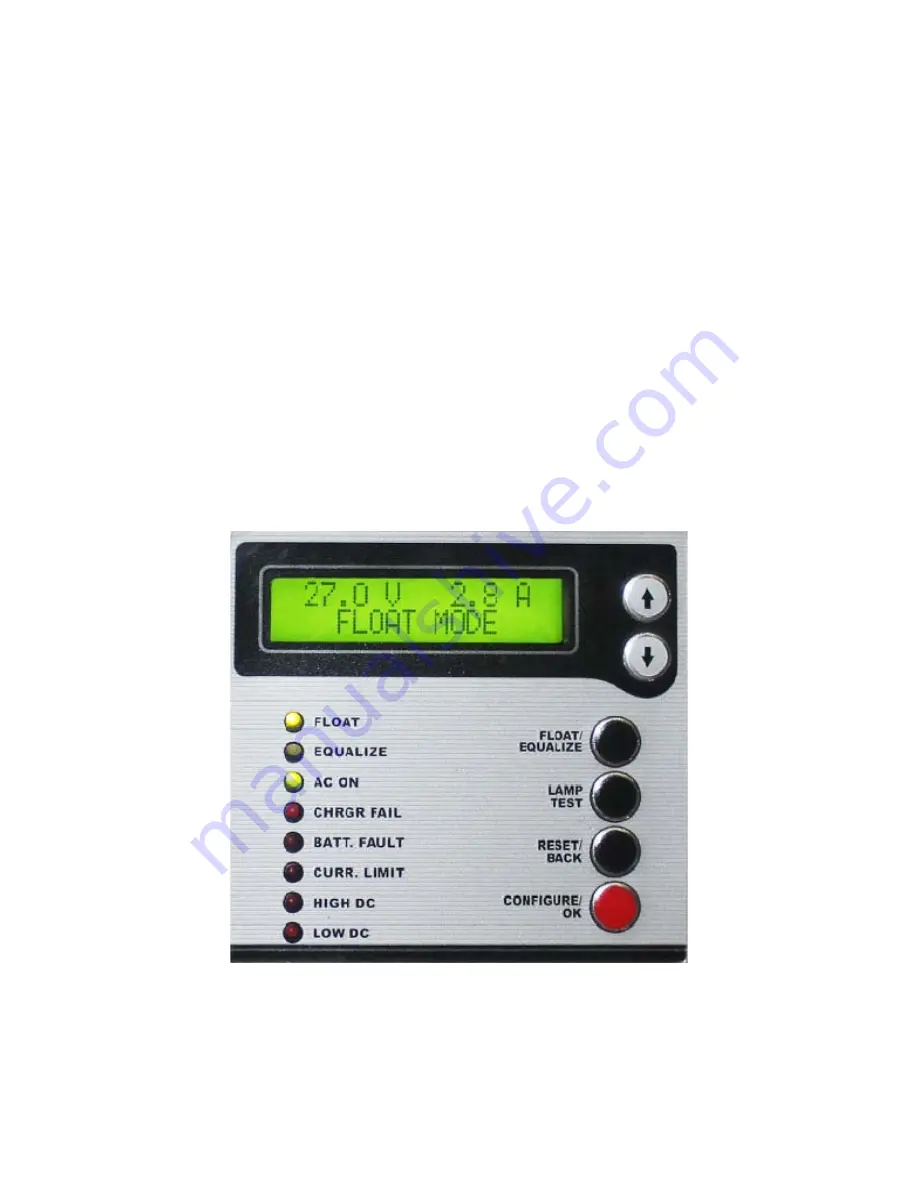
After the ESCR has completed start up, the “AC ON” indicator on the front panel and either the “Float” or
“Equalize” indicator on the front panel will be lit. The LCD will display the system DC output voltage and DC
output current on line one. Line two of the LCD displays the status of ESCR.
Figure 12 - Front Panel Display (Unit in Float Mode)


