BATTERY INSTALLATION:
1.
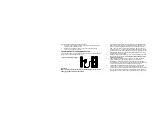
First, insert the batteries into the Weather Projection Station (see “T
o
install and replace batteries in the Weather Projection Station
”).
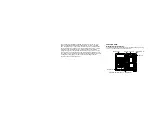
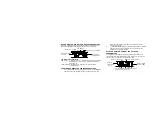
Once the batteries are in place, all segments of the LCD will light up
briefly and a short signal tone will sound. Then the ALM1 6:00, the indoor
temperature and humidity, the time as 12:00, the date as WE 1.1., the
moon icon, the weather icons (sun and clouds) will be displayed. If the
indoor temperature and indoor humidity are not displayed after 15
seconds, remove the batteries and wait for at least 3 minutes before
reinserting them. Once the indoor data is displayed proceed to step 2.
2.
Within 4 minutes of activating the Weather Projection Station, place the
batteries into the sensor (see “
To install and replace batteries in the
Thermo-hygro Sensor
“).
3.
After inserting the batteries into the sensor, the Weather Projection
Station will start receiving data from the sensor. The outdoor temperature
and humidity should then be displayed on the Weather Projection Station.
If this does not happen after 3 minutes, the batteries will need to be
removed from both units and reset from step 1.
4.
The Weather Projection Station can receive up to 3 remote Outdoor
Thermo-hygro sensors. If you have purchased additional sensors, repeat
from step 3 for all extra sensors. However, ensure that you leave 10
seconds in between the reception of the last sensor and the set-up of the
following sensor. The Weather Projection Station will number the sensors
in the order of set-up, i.e. the first sensor will have the
temperature/humidity displayed with the number 1 against it and so on.
5.
With less than 3 sensors received, the Weather Projection Station will try
to pick up the remaining one in approximately another 3 minutes. If 3
sensors are received, the Weather Projection Station will stop further
reception.
6.
Once the outdoor temperature and the humidity have been received and
displayed on the Weather Projection Station, the WWVB time code
reception is automatically started. This takes typically between 6-8
minutes in good conditions.
7.
If after 10 minutes, the WWVB time has not been received, use the SET
key to manually enter a time initially. The clock will automatically attempt
to receive the WWVB time from 12:00 to 6:00 a.m. for a successful
reception. When WWVB reception signal is successful, the received time
will override the manually set time. The date is also updated with the
received time. The next reception attempt will occur on the following day.
(Please refer to notes on
“About WWVB Radio controlled Time”
and
“Manual Time Setting”
).
Your Weather Projection Station is now operational!
Note:


