background image


25

WARRANTY INFORMATION 
 

La Crosse Technology provides a 1-year warranty 
on this indoor weather station.  Contact La Crosse 
Technology immediately upon discovery of any 
defects covered by this warranty. 
 
Before sending the indoor weather station in for 
repairs, contact La Crosse Technology.  The indoor 
weather station will be repaired or replaced with the 
same or similar model. 
 
This warranty does not cover any defects resulting 
from improper use, unauthorized repairs, faulty 
batteries, or the indoor weather stations inability to 
receive a signal due to any source of interference. 
LA CROSSE TECHNOLOGY WILL NOT 
ASSUME LIABILITY FOR INCIDENTAL, 
CONSEQUENTIAL, PUNITIVE, OR OTHER 
SIMILAR DAMAGES ASSOCIATED WITH THE 
OPERATION OR MALFUNCTION OF THIS 
INDOOR WEATHER STATION.  THIS 
PRODUCT IS NOT TO BE USED FOR 
MEDICAL PURPOSES OR FOR PUBLIC 
INFORMATION.  THIS PRODUCT IS NOT A 
TOY.  KEEP OUT OF CHILDREN’S REACH. 
This warranty gives you specific legal rights.  You 
may also have other rights specific to your State.  

Summary of Contents for WS-7208TWC

Page 1: ...WS 7208TWC Wireless 433 MHz Weather Station Instruction Manual...

Page 2: ...e Time 9 Features Minimum and Maximum Temperatures 10 Resetting Minimum and Maximum Temperatures 11 Adding additional remote temperature sensors optional 12 13 Weather Forecast 14 Weather Icons 15 16...

Page 3: ...remote temperature sensor 3 to 5 feet apart 2 Batteries should be out of both units for 10 minutes 3 Place the batteries into the remote temperature sensor first then into the indoor temperature stati...

Page 4: ...ry the set up as stated above After both indoor and outdoor temperatures are displayed for 10 minutes you can place your remote temperature sensor outdoors and set your time The remote temperature sen...

Page 5: ...raight line NOTE Fog and mist will not harm your remote temperature sensor but direct rain must be avoided To complete the set up of your indoor temperature station after the 10 minutes have passed pl...

Page 6: ...oor weather station Figure 1 2 The remote temperature sensor TX6U and mounting bracket Figure 2 3 3 each 1 2 Philips screws 4 One strip of double sided adhesive tape 5 Instruction Manual and Warranty...

Page 7: ...7 ADDITIONAL EQUIPMENT not included 1 1 Philips screwdriver 2 2 Fresh AA Alkaline batteries 3 2 Fresh AA Alkaline batteries...

Page 8: ...llation 1 Install 2 AA batteries in the remote temperature sensor Make sure they do not spring free or start up problems may occur 2 Install 2 AA batteries in the indoor weather station Do not press a...

Page 9: ...for 4 seconds 2 The hour will flash 3 Press and release the key to advance the hour 4 Press and release the SET key 5 The minute is flashing 6 Press and release the key to advance the minutes 7 Press...

Page 10: ...door and remote temperature is displayed 3 Press and release the MIN MAX button 4 MIN appears between the indoor and remote temperatures 5 The recorded minimum temperature is displayed 6 Press and rel...

Page 11: ...11 Resetting Min and Max Temperatures To reset both the minimum and maximum temperatures press and hold the MIN MAX button for 5 seconds...

Page 12: ...me dealer as this unit or by contacting La Crosse Technology directly A TX6U will monitor temperature only a TX3U will monitor temperature and display the temperature on its LCD and the TX3UP will mon...

Page 13: ...smission problems will arise if this is not done correctly To view the temperature of a different remote temperature sensor unit press and release the CH button A shift from one number to the next sho...

Page 14: ...averages past air pressure readings to provide an accurate forecast creating a necessity to disregard all weather forecasting for 12 24 hours after the unit has been set up reset or moved from one al...

Page 15: ...indicates that the weather is expected to improve not that the weather will be sunny Sun with Clouds indicates that the weather is expected to be fair not that the weather will be sunny with clouds Cl...

Page 16: ...icons change in order from sunny to partly sunny to cloudy or the reverse It will not change from sunny directly to rainy although it is possible for the change to occur quickly If the symbols do not...

Page 17: ...on the right side of the LCD These arrows reflect current changes in the air pressure An arrow pointing up indicates that the air pressure is increasing and the weather is expected to improve or remai...

Page 18: ...nge is 80ft obstacles such as walls concrete and large metal objects will reduce the range Place both units in their desired location before permanently mounting Remote Temperature Sensor Remove the m...

Page 19: ...that is required is to place the indoor weather station in an appropriate location To wall mount the indoor weather station first remove the table stand Next insert an appropriate screw in your desire...

Page 20: ...m No outdoor temperature is displayed Solution 1 Remove all batteries reinsert into remote temperature sensor first then into the indoor weather station 2 Place remote temperature sensor closer to the...

Page 21: ...is less responsive to ambient air currents because of the shielding effect of the display s case In addition the case can act as a heat sink to absorb and store heat from external sources i e handling...

Page 22: ...and units with a soft damp cloth Do not use solvents or scouring agents they may mark the displays and casings Do not submerge in water Do not subject the units to unnecessary heat or cold by placing...

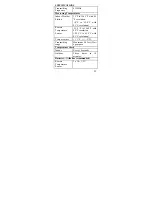
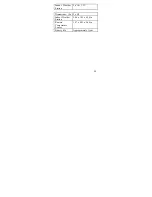
Page 23: ...with 0 1 C resolution Remote Temperature Sensor 21 8 F to 156 2 F with 0 2 F resolution 29 9 C to 69 0 C with 0 1 C resolution Temp accuracy 1 F 5 C Transmitting range Maximum 80 feet 25m open space...

Page 24: ...24 Indoor Weather Station 2 x AA 1 5V Dimensions L x W x H Indoor Weather Station 2 90 x 1 05 x 6 20 in Remote Temperature Sensor 1 57 x 0 85 x 5 00 in Battery life Approximately 1 year...

Page 25: ...over any defects resulting from improper use unauthorized repairs faulty batteries or the indoor weather stations inability to receive a signal due to any source of interference LA CROSSE TECHNOLOGY W...

Page 26: ...apply to you For warranty work technical support or information contact La Crosse Technology 1116 South Oak Street La Crescent MN 55947 Phone 507 895 7095 Fax 507 895 8000 e mail support lacrossetechn...

Page 27: ...ing two conditions 1 this device may not cause harmful interference and 2 this device must accept any interference received including interference that may cause undesired operation Freq 433 92 MHz La...

Page 28: ...gy All rights reserved This handbook must not be reproduced in any form even in excerpts or duplicated or processed using electronic mechanical or chemical procedures without written permission of the...

Reviews: