background image


5


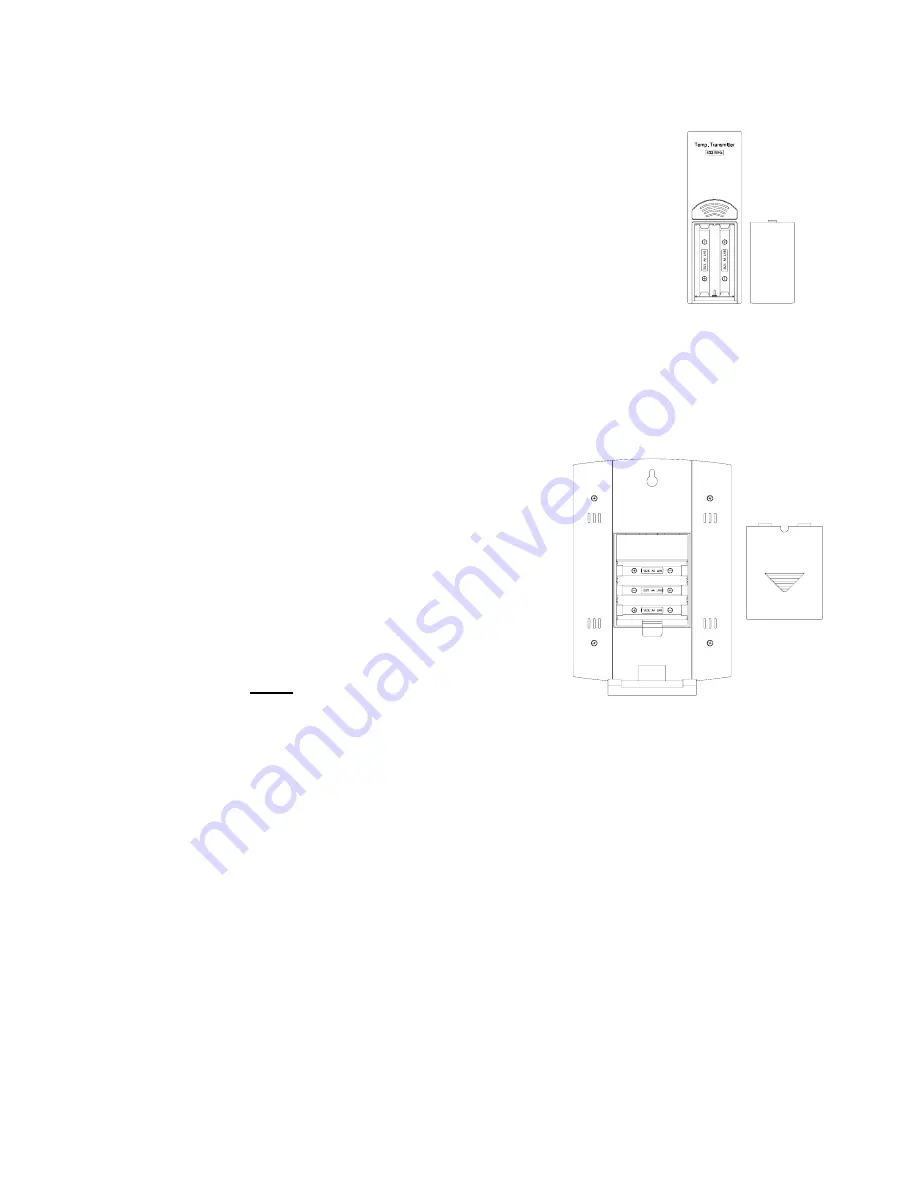
A.  REMOTE TEMPERATURE SENSOR 

1.  Remove the mounting bracket.  The 

bracket snaps on and off easily. 

2.  Remove the battery cover, by sliding the 

cover down. 

3.  Observing the correct polarity install 2 AA 

batteries.  The batteries will fit tightly (to 
avoid start-up problems make sure they do 
not spring free). 

4.  Replace the battery cover by sliding upwards. Be sure battery 

cover is on securely. 


B.  INDOOR WEATHER STATION 

1.  Remove the battery cover.  To do this, insert a solid object in 

the space provided at the 
lower-central position of the 
battery cover, then push up 
and pull out on the battery 
cover. 

2.  Observe the correct polarity, 

and install 

3 AA

 batteries. 

3.  Replace the battery cover. 


Note:  Immediately after the batteries 
have been installed, the LCD (Liquid 
Crystal Display) will flash, and a tone will sound.  Within a few seconds 
the indoor temperature, indoor relative humidity, and the weather icons 
(sun and clouds) will be displayed.  If not, remove batteries for 10 seconds 
and reinstall. If the outdoor temperature is not displayed within four 
minutes, remove batteries from both units, wait 10 seconds, and reinstall 
making sure to install batteries into the remote temperature sensor first. 
The time will show -:-- and start searching for the signal. If it successfully 
receives the time signal (usually at night), it will display the correct time 
(default time-zone is Eastern). You will need to adjust the time zone to 
match your local time. 

 
PROGRAM MODE 

Programming Note:

 If 30 seconds is allowed to pass, or the CH button is 

pressed during the programming mode, the unit will confirm/set the last 
information entered—the display will stop flashing and return to normal 

Battery 
Cover 

Battery 
Cover 

Summary of Contents for WS-7159U

Page 1: ...WS 7159U Wireless 433 MHz Radio controlled Weather Station Instruction Manual...

Page 2: ...2 24 hour Time Setting 9 Setting the Time 10 11 Setting the Year Day and Month 11 Setting the Snooze 12 Setting the Temperature Format 12 Setting the Forecast Sensitivity 13 Features Weather Forecast...

Page 3: ...The signal can be received up to 2 000 miles away through the internal antenna in the Weather Station However due to the nature of the Earth s Ionosphere reception is very limited during daylight hour...

Page 4: ...he remote temperature sensor has a range of 330 feet Any walls that the signal will have to pass through will reduce distance An outdoor wall or window can have up to 30 feet of resistance and an inte...

Page 5: ...LCD Liquid Crystal Display will flash and a tone will sound Within a few seconds the indoor temperature indoor relative humidity and the weather icons sun and clouds will be displayed If not remove b...

Page 6: ...trast 5 Time Zone 5 Eastern Daylight Saving Time 1 on Radio controlled time reception ON 12 24 hour time 12 Time 12 00 Year 2003 Day and Month 1 1 Snooze this function not used 10 Temperature Format F...

Page 7: ...he time LCD and the number setting will flash 3 Press and release the SET button again 4 The time zone will flash in the date LCD 5 Press and release the IN button to select your time zone Note When a...

Page 8: ...tes that the feature is on and the WWVB will change times automatically Note Some locations Arizona and parts of Indiana do not follow Daylight Saving Time and should select DST 0 6 Press and release...

Page 9: ...tically via WWVB reception or B Manually A WWVB Remote Control Time This method requires you to do nothing except wait for the signal to be received and to select a time zone Reception usually takes a...

Page 10: ...minutes 7 Press and release the SET button to confirm and advance to the year setting IX SETTING THE YEAR DAY AND MONTH Note Reception of the WWVB signal will also set the date and day The reception...

Page 11: ...format 6 Press and release the SET button to confirm and advance to the forecast sensitivity setting XII SETTING THE FORECAST SENSITIVITY Note The forecast sensitivity can be adjusted to allow for ar...

Page 12: ...for the next 12 to 24 hours The weather forecast is based solely upon the change of air pressure over time The WS 7159U averages past air pressure readings to provide an accurate forecast creating a n...

Page 13: ...n of the expected weather change for example a sunny icon indicates the weather is expected to improve The weather icons change when the unit detects a change in air pressure The icons change in order...

Page 14: ...R LCD When there is more than one remote temperature sensor unit in operation a boxed number will appear to the right of the temperature This indicates which remote temperature sensor unit 1 2 or 3 is...

Page 15: ...ure and the time and date of occurrence are displayed The minimum records will display for 30 seconds before returning to the normal display mode 2 Press the OUT button again once while MIN is still d...

Page 16: ...o insert batteries first into all the remote temperature sensor units and in numeric sequence Second install batteries into the indoor weather station Transmission problems will arise if this is not d...

Page 17: ...station and changes in elevation will result with inaccurate weather forecasting for the next 12 to 24 hours These changes will require a 12 to 24 hour wait before obtaining reliable data To achieve...

Page 18: ...3 Adhere the tape to the designated area on the back of the mounting bracket 4 Remove the protective strip from the other side of the tape 5 Position the remote temperature sensor in the desired locat...

Page 19: ...nute and date are correct Solution Be sure correct time zone and daylight saving time settings are selected Problem The LCD is faint Solution 1 Set the LCD contrast to a higher number 2 Replace batter...

Page 20: ...oth Do not use solvents or scouring agents they may mark the displays and casings Do not submerge in water Immediately remove all low powered batteries to avoid leakage and damage Opening the casings...

Page 21: ...s warranty If necessary repairs are not covered by this warranty or if a product is examined which is not in need or repair you will be charged for the repairs or examination The owner must pay any sh...

Page 22: ...kes and printing errors The information in this handbook is regularly checked and corrections made in the next issue We accept no liability for technical mistakes or printing errors or their consequen...

Reviews: